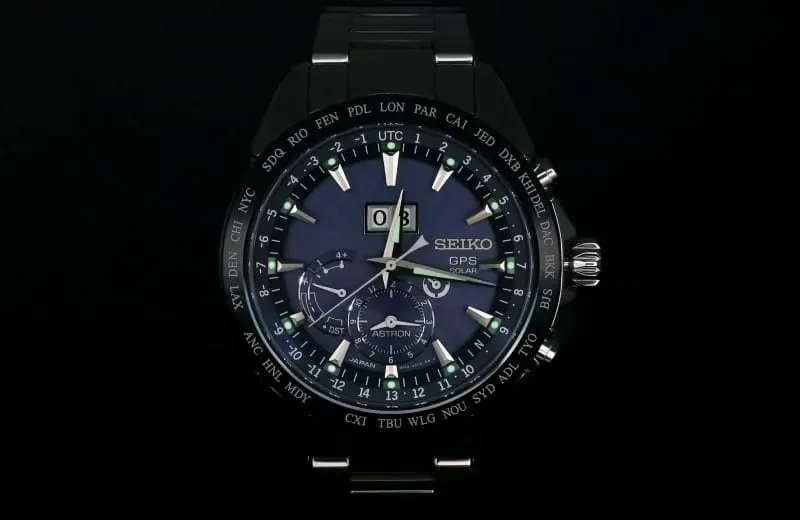
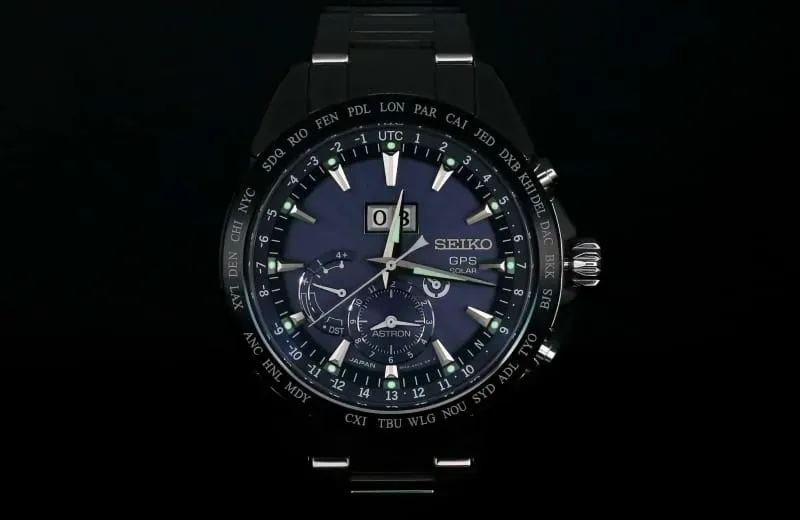
Black background product photography places your product against a matte black or deep charcoal backdrop to sharpen focus, deepen contrast, and reveal texture. It works especially well for jewelry, cosmetics, electronics, and premium goods where fine detail sells the item. This guide walks you through materials, lighting, camera settings, editing, and how to run it at production pace in 2026.
- Deep, even blacks come from three things working together: the right material, tightly controlled lighting, and manual camera settings.
- Without a rim light, most products blend into the background - and the wrong rim light gives you a muddy silhouette instead of a clean edge.
- Automated capture and AI-assisted editing handle the repeatable parts, so your team spends time on the frames that need judgment.
A black background creates immediate visual separation. Light bounces off the product, but the backdrop absorbs the spill - so the eye locks onto texture, edge, and finish. Compared to a white backdrop, black:
- Deepens perceived contrast and material richness
- Suppresses background reflections and stray light
- Reads as premium, editorial, or dramatic
- Isolates fine detail on small, intricate objects like watches, rings, and lipsticks
That control also gives you room to work. When the backdrop swallows unwanted light, you can push rim lights, spotlights, and side lighting harder without blowing out the frame. That is why jewelers, cosmetics brands, and audio equipment sellers reach for black backdrops when they need images that carry the product.
The material decides how much light your backdrop absorbs. Anything reflective bounces stray light back into the frame and turns your "black" into a washed-out charcoal. Match the material to the product size and how often you shoot.
| Material | Light absorption | Best for | Trade-off |
|---|
| Black velvet | Excellent | Jewelry, cosmetics, small premium goods | Fragile, collects dust and lint |
| Matte-painted MDF board | Very good | Furniture, mid-size products, repeat setups | Rigid, heavier to store and move |
| Black paper roll | Good | High-volume shoots that rotate backdrops | Creases and marks quickly |
| Matte foam board | Moderate | Test shoots, prototypes | Reflects more than velvet |
| Custom matte-black paint | Very good | Fixed studio setups | Not portable, hard to swap out |
Quick tip: whatever you pick, run your hand across the surface under a hard light. If you see a sheen, the camera will see it too.
Lighting is where most black background shoots succeed or fail. The goal is not to add light to the background, but to add just enough light to the product for the shape and material to read clearly.
Place one or two lights behind and slightly to the side of the product, aimed back toward the camera. A thin edge of light on the product's outline pulls it forward. Without a rim light, dark or reflective products often disappear into the black.
Flags, gobos, snoots, and honeycomb grids concentrate the light where you want it. Black cardboard or foam works well as a flag - place it between the light and the background to cast a shadow across the backdrop.
Fill lights and reflectors soften shadows without lifting the background. Watch the histogram: shadows should have detail, highlights should not clip. If either loses information, the post-production job gets harder.
Try one hard light with a honeycomb grid from above for editorial mood. Try side lighting with the far side left in shadow for texture and depth. Try multiple narrow beams from different angles to sculpt curves. Every product responds differently.
For high-volume setups, this is where a studio like Fashion Studio or Bike Studio helps. Both have integrated backdrop holders up to 272 cm wide and software-controlled light sections, including contra lamps built for rim lighting.
A black backdrop tricks most auto-exposure systems into overexposing the whole frame. Manual settings put you back in control.
Set aperture between f/8 and f/11 for most products. This range keeps the whole product sharp and holds the lens near its optical sweet spot. Very small products may need f/16 for extra depth of field, but watch for diffraction softness beyond that.
Use the shutter speed and ISO to control exposure once the aperture is locked. Keep ISO at the camera's base value (typically 100 or 200) to keep noise out of the shadows. Adjust shutter speed to match the light. With continuous lights on a tripod, a slower shutter is fine.
Turn off auto-focus. Most systems hunt against a dark background because there is little contrast to lock onto. Switch to manual focus, use live view zoomed to 100%, and set focus on a clear edge of the product.
A longer focal length (85 mm and up on full-frame) compresses the scene and reduces distortion. It also helps push the background further out of focus, which improves the sense of depth.
Post-production is where good black background photos become finished PDP stills. The dark backdrop makes editing choices more visible - every hint of gray in the background reads as noise.
Steps that matter most:
- Deepen the black. Pull the black point down until the background reads as true 0,0,0 in the darkest corner. Stop before you crush shadow detail on the product.
- Refine edges and depth. Selectively brighten the product and darken the frame edges. This adds perceived depth and pulls the eye to the center.
- Remove reflections and glare. Reflective products almost always pick up highlights that were not there in real life. This is where AI Retoucher helps - it removes reflections and cleans imperfections automatically, while keeping the product true to reality.
- Correct color with a gray card. Shoot one reference frame with a gray card in the same light. Use it to set white balance for the whole batch. This step is not optional for e-commerce.
- Reframe for each channel. PDP still, marketplace tile, and lifestyle crop each want different aspect ratios. Do the reframing after color and cleanup, not before.
- Sharpen with care. A little clarity brings out texture. Too much and small objects look brittle.
Even a well-planned setup will hit a few of these. Here is what to do.
Too much light is reaching the backdrop. Move the product further from the background, tighten your light modifiers, and add flags to block spill.
You need stronger rim lighting to define the edge. Add a second rim light on the opposite side, or use a small kicker to catch a highlight on the darkest part of the product.
Move the light further from the product, add a diffuser, and rotate the product a few degrees at a time until the reflection breaks up. Clean up what is left in post.
Switch to manual focus and use live view at 100%. If the product is very small or has no defined edges, place a temporary marker in the frame to focus on, then remove it before shooting.
Check for creases in fabric or paper, dust on velvet, and unwanted light hitting one side. In post, use the black point and levels to even out any residual gradient. A clean shoot beats heavy editing every time.
Add fill from a large soft source at low intensity, or use a white or silver reflector to bounce light back into the shadow side. In post, dodge and burn selectively rather than pushing global sliders.
Black background photography is one of the looks e-commerce catalogs need - not the only one. The real question is how you shoot it consistently across hundreds of products, and how you connect that to the rest of your workflow.
Orbitvu is built for product photography automation from capture to publish. Here is what that looks like for black background work.
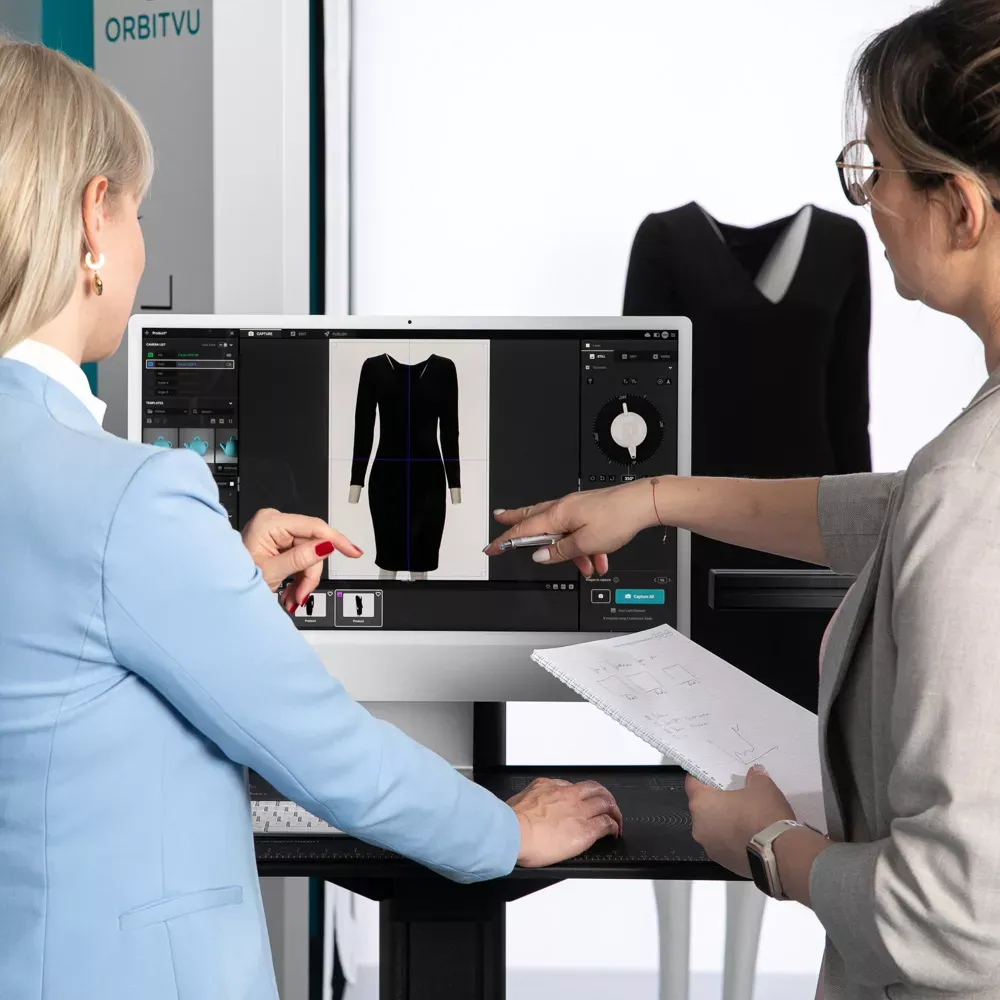
Orbitvu Station runs the whole shoot from one interface. Lights are software-controlled, so a proven black background setup can be saved as a preset and reused across products. Live view on a large monitor lets your team check exposure and framing before every capture. Batch editing applies consistent corrections to every frame.
AI Retoucher removes reflections and glare from finished frames automatically, while keeping the product real. Reflection cleanup is one of the most time-consuming steps in black background editing.
AI Masking removes the background in high resolution when you need to move a product from black to another color across a full catalog. One pass, no design skills needed.
The final choice is yours. AI assists you along the way.
If you produce dozens or hundreds of products a week and every frame needs the same deep black behind it, the technique above scales only so far without automation. Orbitvu gives you one system for capture, editing, and publishing, so the black background you nail on shot one looks the same on shot 700.
See the full workflow in how it works.
Yes. Jewelry benefits more than almost any other category. A pure black background suppresses stray reflections from stones and metal, and lets the light on the piece do the work.
Black velvet gives the deepest black for small products because it absorbs light rather than reflecting it. For larger setups, matte-painted MDF board or a custom-painted matte black wall gets close.
Add rim lighting behind and to the side of the product. A thin edge of light along the outline separates it from the backdrop. For dark or matte products, a second rim light from the opposite side helps.
No. You can start with a basic camera, one or two lights, and a piece of black velvet. But if you shoot hundreds of products a week, a controlled setup like Alphashot or Fashion Studio keeps every frame consistent and cuts the time per shot.
Yes. AI Retoucher in Orbitvu Station removes reflections and glare, corrects colors, and cleans up small imperfections in a batch, while keeping the product true to reality.
White is standard for marketplace listings and PDP tiles. Black is stronger for hero images, campaign shots, editorial layouts, and product categories where detail and mood matter. Most catalogs use both.
Talk to Orbitvu about your workflow
Use the form to tell us what you are planning and what kind of product content workflow you need.