July 10, 2026
How to create a fashion lookbook: a step-by-step guide
Learn how to create a fashion lookbook from planning to publishing, and see how to speed up production with in-house automation.
Product photography is, by far, one of the most critical aspects of selling online. We list some pro tips on product photography for Amazon. Read Now!
Table of contents
You have probably already been listed among Amazon’s 2.5 million sellers (2019) and, as an entrepreneur, you are faced with questions about how to make the global pool of customers take interest in your product and how to sell effectively online? Sure thing.
Part of the big sales puzzle is professional product photography – by far one of the most critical aspects of an Amazon listing. After all, potential customers can’t see or touch a product in person. They build purchase intent basing on vision. It’s essential to help them visualize the product. That’s why Amazon product photography is not only about the quality of image, it also needs to meet strict image requirements from the platform. It is definitely worth handling it well.
In this guide, I will take you through the basic rules for attractive Amazon-ready photography. You will learn the technical requirements and get ready to think about what kind of product photography process will suit your needs best. You will get to know how to optimize Amazon product photography and know the risks that come with the growth of your business. Let’s go, a quick look and you will get closer to Amazon-proficiency.
With net sales close to 280.5 billion U.S. dollars in 2019 and more than 197 million people around the world who are visiting it each month, Amazon is a tool that online sellers simply cannot afford to ignore.
But if you want to take a piece of Amazon pie, you should keep in mind that this platform is customers-centred and pays the highest attention to building trust and excellent customer experience.
“
Our vision is to be the earth’s most customer-centric company; to build a place where people can come to find and discover anything they might want to buy online.
This is Amazon’s mission statement. It is crucial for you as an Amazon seller. This approach impacts the way you should be showcasing your products and creating product photography for Amazon. Having good quality, unique images of your products will allow you to stand out from your competition.
You can learn more about the styles and techniques of product photography and their impact on customers from our “Complete guide to product photography”. For now, let’s focus on what Amazon obliges you to do.
Amazon has set up rules for all their product photography. They vary depending on the role an image is to play on the website. You will get different sizes and different spacing requirements for the main listing photo, the secondary photo, or the listings loader shot. Consult our cheatsheet for a quick overview of the Amazon listing photography requirements and to stay properly up to date visit the Amazon webpage.
For a start, be sure that both your main and secondary listing images follow the below technical requirements:
While cropping and resizing your photos for an Amazon listing you can use Photoshop or any of the free photo management software like XnView or IrfanView.
The choice is less important if you realize that Amazon will convert these formats to its own optimized standards – JPEG or WebP – and this is how they will be served to web browsers. JPEG is the format recommended by Amazon for upload, but any other format, except for GIF will do the work. Read more about Amazon file types in the section “Image file types for Amazon”.
The size of the file might be important if you are to send thousands of product photos over a slower connection. Amazon has set the file size limit to 10 MB. Their platform will optimize the size of the photo independently to shorten the load time at the user’s end. This way, the size of your file might not impact the user’s experience directly.
In image processing software, such as Photoshop, you will have an option to control the size of the output file by manipulating the image compression and quality. The size optimizer works as illustrated below. Always use the best quality option – let Amazon decide the compression ratio.
The platformdoes not support animated GIF files, so there will be no chance to present a simple spin of the product in this format.
Read more about Amazon file types in the section “Image file types for Amazon”.
You will have an option to set the color space in your camera at the beginning of your photo session and it is advised to keep it across all pictures.
The color space used for the web is sRGB and this should be your choice for Amazon product photography. By default, cameras register files in the web-optimized sRGB, but you also have a choice of Adobe RGB, which is not supported by Amazon.If you take your images in RAW and produce files inCMYK color space (e.g. for print) you can upload them to Amazon directly without a need to convert to sRGB. Amazon will do it for you.
Amazon has also prepared a series of content rules. They are different for the various roles the photo is to play – main listing image, alternate image, child image.
This image, known also asparent SKU image, is the first photo that a customer sees at the product page. It also appears in the search results and in the product listing.
This image has to give the customer an idea of what your product really looks like. It must be free of distractions and this should be a white background image (sRGB 255, 255, 255). There are more specific requirements for the main listing image, both general and depending on the category of the product. Let’s examine the list:
As useful as close-ups can be, they do not present the product in its entirety. A full view often remains key to the customer's first impression. Photography for Amazon products has this requirement: the parent image must present the whole product.
This requirement was introduced to prevent large margins where the product sits as a small item in the middle of a white void. The 85% refers to the longest dimension of the product, so if we consider a pencil on a 1000px photo, its length should be at least 850px.
Additional cropping and alignment may be needed – the product is best positioned in the centre of the frame. In the case of furniture and floor-based products, it will be useful to align them to the bottom of the frame so that they “do not hang on different levels” in every next photo.
The image must not contain confusing additional objects. Supporting objects which create a lifestyle impression about your product are not permitted in the main listing photo. You can add them in alternate images.
The main photo is reserved for a classical packshot. No additional texts, graphics or inset images pasted in post-production will be accepted by Amazon. What’s more, drawings or illustrations of the product are not allowed; it has to be photography.
The image must be in focus, professionally lit and photographed or scanned, with realistic color, and smooth edges. This can be achieved in a professional product photography process, which would include a well-equipped studio, professional post-production, and quality assurance.
You can learn more about what is necessary for a good quality packshot in our “ Complete guide to product photography”.
The images of books, music, and video/DVD should be the front cover art and fill 100% of the image frame. Jewel cases, promotional stickers, and cellophane are not allowed.
While photographing glossy paper fronts in a big close-up, you will need to be careful with lighting and reflexes. Our dedicated article about lighting in product photography might be of help to you.
To have a complete listing, you will need secondary images of two categories. A child SKU main image is used when your product comes in different color variations. If your goods come in black, white, and red, you will need images to illustrate all of these colours. The requirements for a child SKU main image are the same as for the parent SKU one.
An alternate product imagewill show different views of the product, its details, fabric, and whatever you want to convey that might help in sales. You can provide up to 8 alternate images for each parent or child SKU.
Alternate images need to meet the minimum technical specification as well, although the requirements offer a wider leeway here:
An alternate photo will have a support role for the main one. It should focus on the detailed aspects not shown in full in the main image. Thus, the picture must be of, or pertain to, the product being sold. Attaching even quality photos of similar products for comparison or loose photographic associations for mood is not allowed at Amazon.
All the visibility requirements for the main photo remain in force. Keeping the focus, professional lighting, realistic color, and smooth edges will constitute a good Amazon product photo.
Other products or objects are allowed to help demonstrate the use or scale of the product.
With these lifestyle images you can support yourself with side items that will underline the qualities of your product. Think about contrasting (or harmonizing) colors, size clues (a cup next to the kettle), or simple adornments (say it’s Christmas and a glass ball will be a reminder that you have just started a sale).
Our tip – supporting item arrangements
Arrange the plan so that the main product stays in the centre supported by different-sized props to the left and the right. This way you create a centre of attention. In photos with a higher shooting angle think of applying a triangular setting of the product and its supporting items – this way, one of the sides of the triangle will carry a stronger message with the main product while the others will support it.
The product and props should fill 85% or more of the image frame. This refers to its longer side in ratio to the frame. There is no escape from the rule of small margins in alternate listing images. Amazon wants the photography to be precise and uniformly scaled, so measuring frame coverage, as described in the main listing section, will be necessary.
It is worth noting that for an alternate image the product can take more than 85% of the frame, up to 100%.
Cropped or close-up images are allowed. For complex products, such as electronic equipment or spare parts, you will be interested in highlighting the most important details of the product. How this little twitch looks like, where the slot is placed, or what exactly the shape of the hole is?
A series of precise close-up photos can reduce the number of questions you receive from the shoppers and quickly assure the customer that they are viewing exactly the product they need. Don’t hesitate to zoom in on the most important features of your product in the studio or create crops from high-resolution photos in post-processing. This will pay off on Amazon.
How to choose your close-ups and crops for Amazon? – our tip
Mind that your close-ups need to carry additional value for the customer. When choosing elements to zoom in on, think of the questions your item may arise and photograph the answers. How is this hold linked to the body? How is this socket colored and will it fit my cable? These will be the potential questions that will help you with photo ideas.
Technical tip:
While shooting close-ups of glossy surfaces manipulate the lighting to avoid too strong reflections on the surface of the product. Show that this shoe or cigarette box is shiny but do not overplay the lighting effect. Studio experience or live-preview automation technology will help you decide what is correct during the shoot-out.
Backgrounds and environments are allowed. No need for white background images here, as different products may look better on different backgrounds. Imagine an expensive golden watch stylishly emerging from a black background thanks to good lighting in your Still Life photograph. Or maybe a sea-colored backdrop for your fishing products? Lifestyle photos sell!
Some products benefit from their surroundings. Furniture or home decoration gadgets will speak more to the customer when presented in a lifestyle photograph. This would mean a cozy room or a busy kitchen setting that engages well with the impression the product is meant to make.
How to arrange an environment for Amazon photography? – our tip
The surroundings of your lifestyle product will matter a lot. Keep in mind that the ambience you create with product photography will influence the emotions of customers. Warm lighting and plush for a listing of a pillow? Sharp edges and wild nature surroundings for an outdoor product? You will benefit a lot from consciously placing the product in its natural environment or showing its use in the real world. This way you can offer tips to your customer and enhance their buying drive.
Text and demonstrative graphics are allowed. You can welcome infographic images to your listing and employ graphic designers for better effect. The decision to guide your customer with additional text or drawings around your product photography will add a practical side to your listing. Tip-arrows, warranty-stamps, text-bubbles – they all offer a chance of conveying more information about the product and increasing interest.
Employing the power of visuals and text in a single product photo or an infographic image will require some graphic design experience and a clear understanding of what needs to be presented but will certainly be worth the effort and enrich your Amazon listing immensely.
What to put as additional text and graphics in a listing? – our tip
Some of the technical specifications of your product might find their way to an alternate image in an Amazon listing. Think of dimensions, weight or capacity, especially if they play a role in product choice and set you off against the competition. You can consider competent endorsing remarks with adjectives such as “useful, quick, resilient, or robust”. You can surely invent plenty of them for your listing – however, beware not to turn lengthy and boring.
For Amazon’s used and refurbished products section you will be able to use a differently sized photo. It can be added through “Sell yours here button”. It will help your customer choose directly from the list of products without navigating to the entire product page.
This photo will best be characteristic of the product and help it stand out in the long list. The preferred dimensions are 1:1, minimum of 200 pixels per side, but you can venture as far as 5:1 and 2,000 pixels.
Our recommendation: When capturing JPEG images use a maximum quality setting on your camera (e.g. JPEG Large Fine when using a Canon camera). After processing, save with a compression ratio of 96 (the quality difference between 100 and 96 is unnoticeable while the size is much lower). For best results, avoid resaving the image multiple times in JPEG format, as each time you save it, you lose a bit of quality (JPEG is a lossy compression format).
Our recommendation: Amazon recommendation is not to apply any file compression in TIFF files. Removal of layers, which might have originated during post-processing, is also suggested before submitting.
Quick tip: Amazon applies additional compression to all image formats that are uploaded to the platform. It will be most effective, if you choose files with no or minimal compression for your listing.
Example: A00987654321.jpg or 039223356.tif. Optionally you can use MAIN variant code after an additional period, e.g. A00987654321.MAIN.jpg. This will clearly indicate that the image in question is the main product image.
Example: A00987654322.jpg or 039223357.tif. Optionally you can use MAIN variant code after an additional period, e.g. A00987654322.MAIN.jpg. This will clearly indicate that the image in question is the main product image for the given child SKU.
Variant codes can specify additional views (PT01, PT02, PT03, PT04, PT05, PT06, PT07, PT08, PT09), angle shots (TOPP, BOTT, LEFT, RGHT, FRNT, BACK) and interior shots (IN01, IN02, IN03)Example: A00987654321.PT01.jpg.
A correct photo for Amazon needs to be aesthetically impeccable. This entails 5 key parameters:
Keeping a high depth of field in the photo will be beneficial, as it will allow the customer to examine the product in all its depth. No details will be blurry or hidden from attention.
Basically, the “indispensable” Amazon product photography can be approached in three ways with regard to time, difficulty, and quality:
Definitely the easiest way to start your Amazon product photography will be to take control in your own hands and with little investment produce basic-level photos. Various producers have introduced solutions for still-life photography taken with mobile phones: tents and lightboxes with independent lighting. Their advantages and disadvantages can be summed up as:
PROS
CONS
The use of a mobile phone without a lens will require moving the phone physically closer to a subject to achieve the zoom effect, thus introducing a change of perspective. At the same time, external lenses attached to mobile phones, which come as a possible remedy, may turn out to be very uncomfortable in use.You can read more about lenses for product photography in our separate article, a guide for your lens choice.
Product photography is undertaken most professionally in dedicated studios. Many photographers offer product photography services. A traditional studio will be set up either on the premises of the customer or will require transport of products to different studio locations. The photographer will offer experience in light and equipment manipulation and ensure a high quality of the output photos. The benefits and downsides of traditional studio photography will be as following:
PROS
CONS
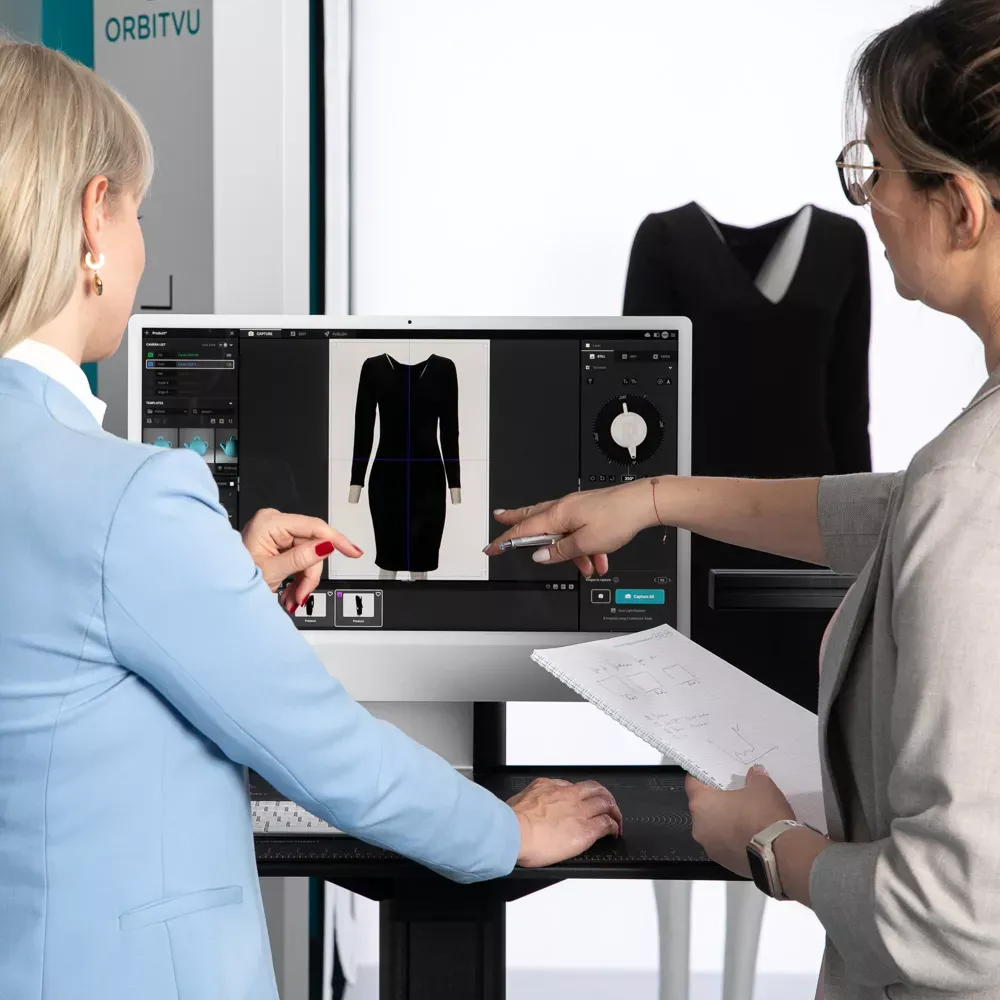
Automated solutions for product photography have the capability to change your view of the whole studio process and can build your competitive advantage in image cost, quality and consistency. They are pre-made and deployment-ready equipment that comes as a whole, integrating the photo session, post-production and publishing into a seamless process. When introduced, the benefits will circle around these points:
PROS
CONS
Orbitvu Alphashot series makes for a good example of automated product photography solutions. A short clip summarizes “how this all works”.
Orbitvu - How it works? - Automated Product Photography
Knowing image requirements and the three paths to creating Amazon product photography, you should be able to choose one that best fits the purpose you have chosen. The clue of your choice will consist in adjusting the time, quality, difficulty and price factors to the needs of your business.
Orchestrating the product photography on your own will certainly require a lot of your personal time or incline you to employ a mobile phone and lightbox solution. Much time and cost will have to be spent in post-production for ensuring you get white background images of RGB(255,255,255) and high image quality.
For a small business at the beginning of the journey these limitations might not seem as important while set against affordable prices and the relatively high speed of the process. As you grow, together with the number of products and required shots, you will certainly have to face the low scalability issues and most probably consider the traditional photo studio, or the in-house photo automation.
A traditional photo-studio, if the process is fully outsourced, will leave you with more time at the cost of third-person dependency. As you will not be able to operate a full traditional studio without months of careful practice and learning photography, choosing a good contractor will be absolutely key.
The outsourcing will also cause logistics costs, as many studios offer photo services only on their premises. For hundreds and thousands of product pictures to be shot and edited, count plenty of time and high costs. What’s more, you might find yourself limited by the supply of talented photographers in your area or surging prices due to low availability of their pipeline. Quality comes at a cost, you know it well.
Both medium-sized and large businesses can recur to traditional product photography fully consciously, aiming at the highest possible quality, good work relationships with the contractor, and coping with large time-spans for photo production. However, photo automation comes as a modern alternative, which can match quality and cost requirements.
At the cost of a single investment in an automated photo studio, you will receive a significantly faster time-to market time, lower operational costs and precise scalability/repeatability of the solution.
With the growth of your business in mind, you will not need to worry about scaling up your photo operations. The know-how on how to capture your own products stays in your company saved in template files for controlling image capture, post-production and publish. It’s easy to replicate the photo workstation to multiply photo production volumes.
To produce Amazon photography that will stand out from your competition, you need not only to meet technical requirements, but above all provide unique, quality and engaging images in a consistent way. Professional photos are key to build purchase intent, increase conversions and entice clients. Whether you choose outsourcing to Amazon product photography services, or an in-house traditional or automated photo studio, you still need a good process and a way to scale your operations.
I sincerely wish that one day you join the elite 200,000 sellers who achieved more than $100,000 in annual sales. And if you’re already there, that you will pave your way to best value with cost- and time-effectiveness that will serve you for years.
All the best on the Amazon highway!
Use the form to tell us what you are planning and what kind of product content workflow you need.
July 10, 2026
Learn how to create a fashion lookbook from planning to publishing, and see how to speed up production with in-house automation.
June 12, 2026
Learn how to shoot flat lay fashion photos in 2026: setup, lighting, camera settings, post-production, and marketplace-ready exports.
February 18, 2026
Learn how to photograph antiques professionally - from manual techniques and the right gear to automated product photography solutions that save time and deliver consistent results.