As a professional photographer or an e-commerce entrepreneur, you will face a series of questions regarding the Holy Grail of the product photography business: equipment. There is no escaping from the quality-price carousel, however with basic knowledge on what makes photography processes effective, you will be able to choose the best camera for YOUR product photography.
Before you start
We are here to help with a starter guide that lists all you need to know before spending any portion of your budget on a camera for product shots.
What product photography equipment do I need?
This seems to be the first question to ask, as a camera never plays a role on its own. Even the best camera and a hundred professional photographers will not arrive at satisfactory results without the support of a good lens, a well-equipped studio, and the final retouching capabilities.
Cameras also require accessories such as tripods, flash lights, or memory cards. The choice of all the equipment needed for product photography needs to be coordinated and planned ahead.
If you are worried about lens choice, head on to our dedicated article that lights up the question carefully and offers precise model recommendations. The general rule will be to aim at the higher tier of lenses, as the basic ones have poor sharpness specifications.
In case you also plan to build a photo studio (this will be the requirement for fully professional product shots), prepare for a busy session of choosing the best equipment for product photography. Our guide on how to manage a photography studio might be of some help.
What should my equipment for product photography be like?
From the first shot, image quality and shorter sessions will be the goals of your product photography. The first measure guarantees good looking photos for your website or portfolio, while the second saves time and money.
The choice of equipment adjusted for both purposes will point you toward factors like the ergonomy of the camera, its color rendering and resolution. Questions about the shape of the camera body and the accessibility of its buttons will appear. You might feel tempted to dive more into the longstanding discussion about the color faithfulness of each camera model or brand. And the answer to the resolution question will not necessarily be “never enough”…
Next come the camera settings and their flexibility. Product photography being more stationary, you will note the available shutter speed range to be less important, while apertures you will use stay in the mid-range.
If you intend to use lifeview, a very beneficial option in product photography automation options, the quality of the auto focus of the camera will play a role. Mirrorless cameras tend to have more af points and additional manual focus boosters, which makes focusing more precise. You will consider whether the additional af speed added by mirrorless cameras will convince you to buy one rather than a DSLR.
Finally, you will consider the different sizes of the sensor and useful options for studios like tethering and remote control. All in all, a camera alone means little without the surrounding equipment that it needs to communicate with.
Ergonomy – for a start and forever
The camera you choose for in-house product photography will be a piece of equipment that serves you 8 hours a day, 5 days a week. This is a significant amount of time that states serious requirements as to camera ergonomy.
If you plan to photograph hand-held, an ergonomic shape of the camera body will come first. A camera that fits the hand nicely and has comfortable weight will be a bonus for anyone who plans to shoot at all-day sessions.
Next comes the placement of buttons and dials on the body, so that all major functions are easily accessible. Think of the camera settings triangle first and look for easiness of setting the shutter speed, aperture, and ISO speed. An additional, quick-to-access button should be programmable at your will. From our experience, you could make it the switch for:
- RAW/JPG format
- resolution
- fps in video-filming
- touch screen activation/deactivation
- dynamic range change (in Sony cameras)
Every time the object category and purpose of the session changes you will be able to reprogramme the button (or more of them!) and take advantage of the easy access you need.
There is a difference in ergonomy between mirrorless cameras and DSLRs. The former ones have been importantly reduced in size due to a simpler construction. You can accept both as an advantage (in case of carrying) or a disadvantage when it comes to firm hold of the body and lens. Don’t forget you can always apply additional grips for smaller cameras to adjust them to your comfort.
The construction of modern mirrorless cameras allows comfortable work both with the electronic viewfinder and the LCD screen. The practical advantage of mirrorless cameras is the ability to see the photo with final lighting applied in lifeview. Very often, LCD screens are of better quality in mirrorless solutions.
In comparison to DSLR cameras, where the viewfinder is optical, an electronic screen influences the battery life both long term and in terms of the number of photos in one charge cycle. Solutions such as automatic unpowering of the viewfinder have been applied, yet the impact remains visible.
Battery life becomes secondary when you decide to apply an AC adapter that replaces the battery and provides power directly from the network. If you work continuously in long time spans, you will appreciate the reduction in charging operations an adapter provides.
Color rendering – keep your photos real
The choice of your product photography equipment might be influenced by the color rendering parameters. Cameras work on the basis of filters to emulate human eye perception of color. This being different among individuals, the question of color rendering has a subjective element.
Tests (Tony Northrup, YouTube) have made clear thatbrand loyalty and test complexity influence the judgements users make about the quality of color rendering. What remains more important than the highly inflated question of color science isthe correct application of white balance.
Make sure your best camera for product photography has flexibility in white balance settings and that it is easily accessible to change when your lighting changes.
Resolution – should I maximize expectations?
The decision whether you need high resolution in your camera will mainly depend on the purpose of the photos you create.
LED billboards, catalogues, and any printed materials will require a large number of megapixels to ensure good print quality and scalability. If you plan to produce a lot of lookbook photos and still life shots, then you might consider going for a best-available resolution camera.
Remember the bigger the surface you intend to present your photos on, the bigger resolution you require from the photo material.
On the other hand, when your focus is more about packshots, photos for e-commerce and websites, you might be satisfied with the standard resolutions available on the market. Amazon and similar platforms have their own requirements as to resolution and we wrote about it in an Amazon photography guide.
In both cases, the sharpness and faultlessness of the photo output will depend on the quality of the lens system and perhaps thelens correction system of the camera. You can imagine this dependency as similar to what an artist faces when painting on a canvas: the canvas (resolution) may be bigger, however it is the paint and brush quality that will define the precision of the painting.
Settings spectrum – is it important?
Product photography will lead you towards a rather limited spectrum of camera settings that you will prefer to use. In the settings triangle, you will aim at a low ISO speed (you will not have issues with low light in a studio) and mid-range apertures (for best sharpness), while the shutter speed will not be as important with a still camera on a tripod.
Different camera bodies will offer different ranges of shutter speeds. You can leave this setting for event photographers and pay more attention to ISO ranges. This is only because a camera body with a better ISO range will also have a better noise reduction system and a more powerful processor.
High ISO
Noise reduction setting
Although in packshot photography you will mainly use the full manual mode, some cameras offerintelligent support in auto mode. You might think of landscape mode as useful for highest depth of field and the Sony DRO solution for highest possible dynamic range.
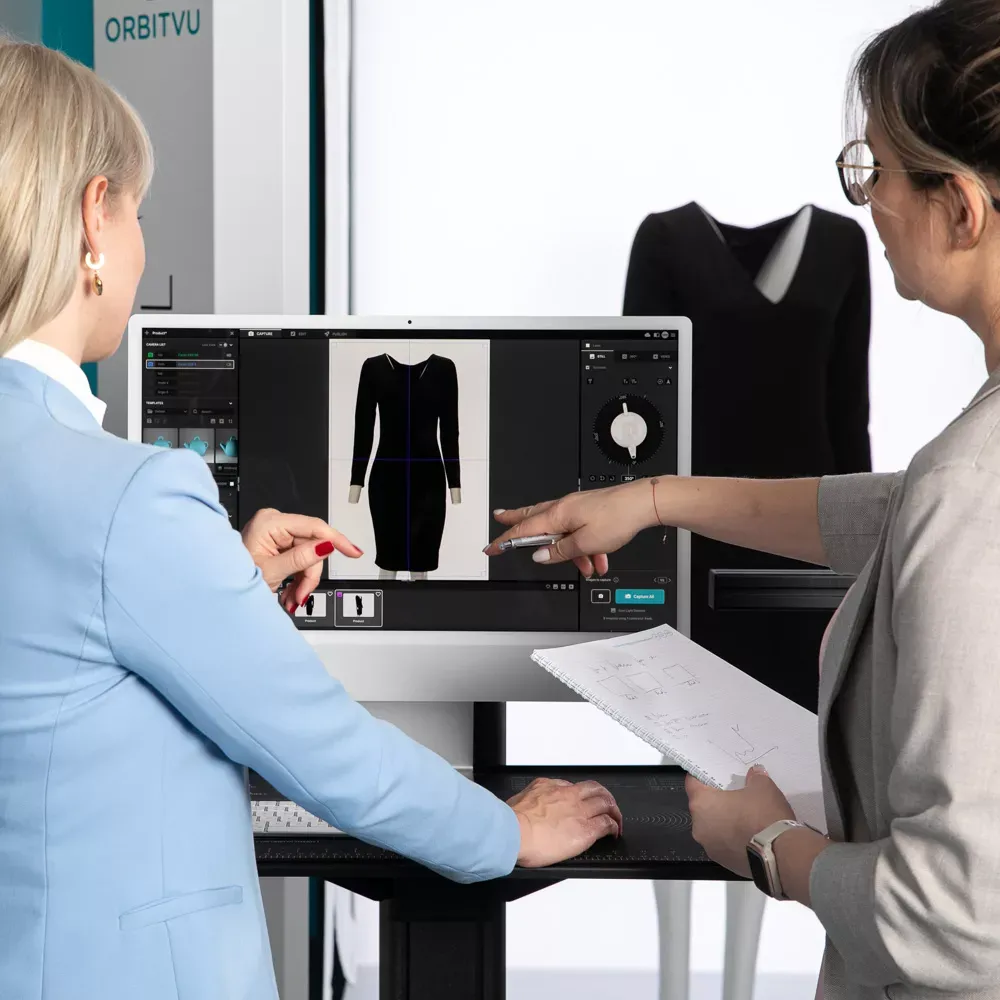
Tethering – remote control as a key benefit
Tethering, an option to make use of in a studio, means remote control of the camera via a computer. You connect the two devices using a cable, Bluetooth or Wi-fi connection. Additional software is needed to operate the camera and enable features such as photo grabbing (direct saving of the images in the computer) and editing on the fly.
Tethering is a solution common among professional photographers, as it offers technique and time benefits. With the ability to display freshly made photos on big screens, a photographer canbetter direct the session, avoid technical mistakes, and look to camera settings more precisely.
For what concerns grabbing and on the fly edition, they save time on migrating the photographs between the camera and the post-processing station. The effectiveness of this depends on thestability of the connection (cable is advised) and software compatibility.
Before buying a camera for product photography, consult the compatibility lists of your post-processing software and check any tethering options that go together with the camera. Adobe LightRoom and CaptureOne have a wide range of compatible cameras, while Canon offers an independent app for remote camera control.
All in all, the better you adjust the camera and tethering software to what is needed, the more time- and procedure-effective sessions you will have.
What size of the sensor should I choose?
In product photography, a Full Frame image sensor is not “the one and only” choice, as it might be in other branches of photography. When looking for an optimal camera, you may give APS-C (crop frame) a chance.
The depth of field offered by an APS-C sensor is higher, which means that with the same aperture a product will be sharper at all of its length. With products as your objects, you generally photograph at high closeups and depth of field is more difficult to achieve. With this in mind, APS-C systems get a bonus against Full Frame ones.
The depth of field issue is often taken care of by the focus stacking technique, done either automatically by software or manually in a photo editor. As might eliminate one criterion from your camera purchase decision, you can read more about it in our special jewelry photography article.
One important advantage of a Full Frame image sensor is its wider dynamic range. Dark regions in a photograph will be rendered with more detail in a Full Frame camera than in a crop frame one. Should you plan to photograph more dark items and require precision, you would give a point to Full Frame solutions.
Final thoughts on equipment needed for product photography
You examined all the important camera features and coordinated them with the accessories and you still stand puzzled in front of the choice? The variety on the market is huge and choosing your brand is not a one-shot task.
You have considered ergonomy, camera settings, resolution, sensor size, tethering capabilities… The list is almost endless. With the base provided by this guide, set off to the sea of options and find your own preference one feature by one.
If you intend to use automation technologies in your product photography, you will be able to use the guidelines provided by the solution producer. That already removes some of the burden of the difficult choice.
Gaining knowledge on camera bodies and camera lenses will come progressively, as you test more and more models on your way through photography. Sooner or later, you will find your perfect match and then it will be a pity to replace it with a new model as technology progresses.
We wish you experience this on your way.
Talk to Orbitvu about your workflow
Use the form to tell us what you are planning and what kind of product content workflow you need.