July 23, 2026
What is Orbitvu's AI OCR, and how does it work?
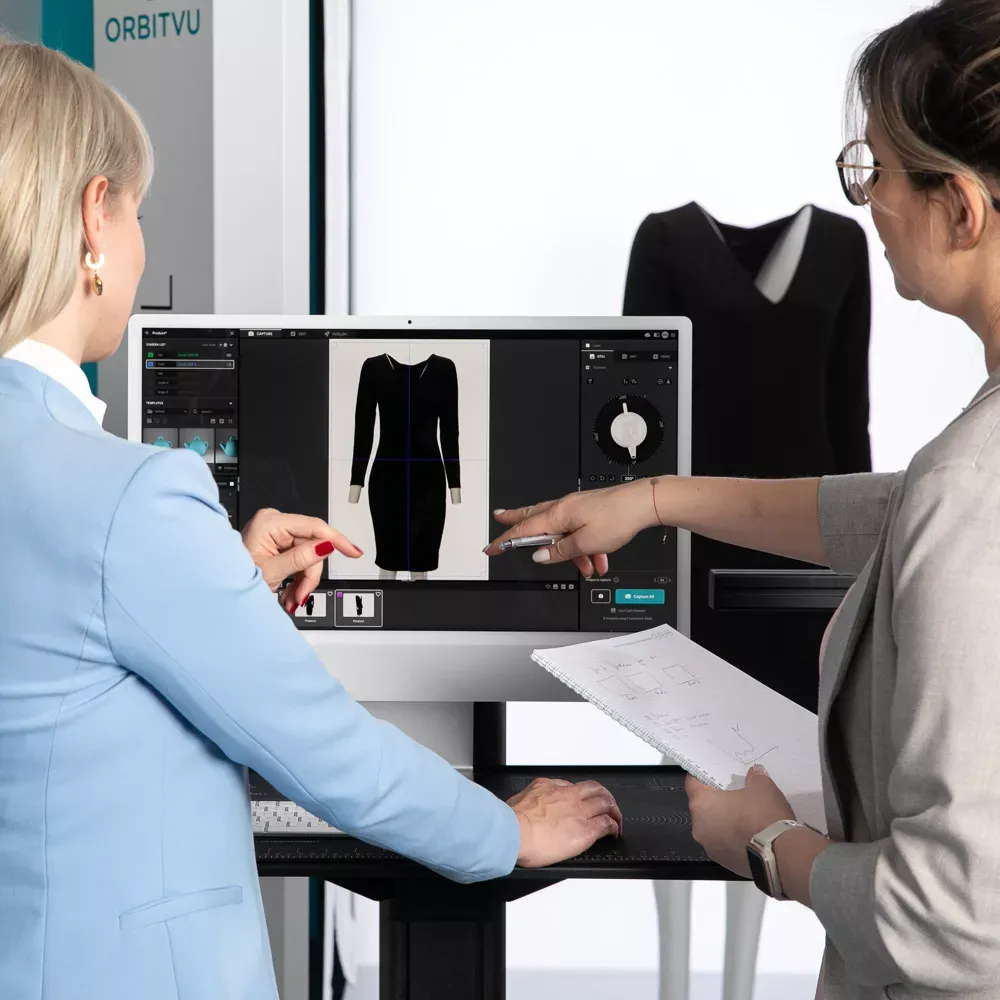
Meet Orbitvu's AI OCR: extract labels, part numbers, and product data straight from your images and turn it into structured metadata inside Orbitvu Station.
Preparing products is a crucial step in the journey of showcasing your items in the best possible light. It’s not just about capturing an image; it’s about presenting your product in a way that captures its essence, highlights its features, and attracts potential customers. The preparation phase sets the tone for the final image, influencing buyer perceptions and decisions.

Table of contents
Preparing products is a crucial step in the journey of showcasing your items in the best possible light. It’s not just about capturing an image; it’s about presenting your product in a way that captures its essence, highlights its features, and attracts potential customers. The preparation phase sets the tone for the final image, influencing buyer perceptions and decisions.

In this comprehensive guide, we’ll explore practical product photography tips and expert insights on every aspect of product photography preparation. From planning your shoot, organizing products, and detailing preparation steps to selecting the right equipment and understanding lighting environments. We’ll also learn how to enhance visual appeal with props. This guide is designed to equip you with the knowledge and skills to transform your products into photographic masterpieces.
Planning a product photography shoot is essential for capturing high-quality product photographs that effectively showcase your products. Whether for an e-commerce website or a marketing campaign, a carefully planned photoshoot can significantly impact the final outcome. Proper planning not only ensures efficiency and high-quality photos, but also allows emphasizing the product’s best features and aligning with brand aesthetics. In this chapter, we delve into the vital steps of planning your shoot, from understanding client needs to picking the perfect location, all aimed at achieving a successful photo session.
1. Understand the importance of planning Detailed planning leads to a smoother, more organized photoshoot, enabling better time and resource management and the ability to foresee and mitigate challenges.
2. Define the objectives Set clear goals like highlighting specific features or targeting a certain audience, guiding the choice of photography styles and techniques.
3. Understand the difference between client needs and in-house photography For client projects, align with their expectations on brand aesthetics and product focus. In-house, ensure your shoot aligns with marketing strategies and brand guidelines.
4. Create a timeline and schedule Develop a detailed timeline considering product readiness, team availability, and post-production, with realistic deadlines for smooth project execution.
5. Collaborate with team members Involve photographers, stylists, marketing specialists, and sales and product managers in the planning phase for a blend of expertise and creativity.
6. Get into location scouting and studio optimization Choose a location that enhances the product’s appeal and meets logistical needs. In the studio, optimize the space for the best product handling, photography lighting, and background options, considering ergonomics and workflow efficiency.
A well-organized pre-session checklist and product organization are key to a successful product photography session. Here's a more detailed approach to preparing your products:
1. Creating a pre-session checklist - List all necessary photography equipment: cameras, lenses, lamps, tripod, batteries, memory cards, chargers, cleaning tools, etc. - Include product photography lighting equipment: softboxes, reflectors, honeycombs, light stands, and diffusers. - Add computer and storage devices for data transfer and backup.
2. Organising products for efficient workflow - Group products by size, color, or material for an efficient shooting sequence. - Separate products requiring special attention, like delicate items, products requiring advanced lighting, or those needing assembly. - Prioritise products based on their availability and the need for additional setups, such as models or specific lighting conditions.
3. Importance of a shot list - A shot list is essential in streamlining the shoot and ensuring all products are captured. - The shot list can include, e.g., product name, SKU, product type, item cost, required content types to be captured (stills, video 360º spin), photographed angles, specific features to highlight, and any special requirements, like white backgrounds or lifestyle shots.
4. Setting up for the shoot - For studio shoots, arrange your space for the best lighting conditions and product handling. Use soft light sources and reflectors to eliminate harsh shadows and fill light. Position your backdrops and ensure they're wrinkle-free for a clean background. - On location, choose spots with enough natural light. Morning or late afternoon hours offer softer light. - Organise your props in advance. Select items that complement the product and arrange them to lead the viewer's eye towards the main subject.
1. General product preparation - Carefully clean each product to ensure a spotless appearance. - Remove any protective foils or tags from new products. - Check for and repair minor damages or imperfections. - Ensure products are dry and free from cleaning residue.
2. Special considerations for various products - Electronics: Ensure screens are clear and remove any stickers or foils. - Apparel: Steam or iron clothes, check for lint and align seams. - Jewelry: Polish each piece, check for loose stones, and ensure clasps function. - Furniture: Dust and polish surfaces, tighten loose elements, and arrange for best display, which is vital for lifestyle photos. - Food photography: Keep ingredients fresh, pay attention to presentation, and use garnishing for appeal.
3. Preparing products for different photography styles - For lifestyle photography, position products in a natural setting, utilizing natural lighting to create authentic lifestyle shots. - In studio settings, focus on highlighting product features using controlled lighting and camera settings. - Adjust lighting to enhance product textures and colors for great photos. - Position products to look appealing from multiple angles. - For close-up shots, pay extra attention to fine details using a macro lens.
4. Additional product photography tips for mastering photoshoot preparation - Use gloves when handling highly reflective items prone to leaving fingerprint marks. - For transparent or glass items, ensure no streaks or smudges are present. - In apparel photography, consider the fit and drape on models or mannequins. - For group shots, ensure a cohesive look among all products. - Regularly clean and adjust your studio setup.
Product photography requires a well-curated set of tools and equipment. This chapter covers its specifics, providing practical advice for assembling your photography kit to shoot product photos.
1. Camera and lens selection - Choose a DSLR or digital mirrorless camera with high resolution and manual control features. - Invest in a standard zoom lens for versatility and macro lenses for close-ups, essential for capturing detailed product shots. - Consider a tilt-shift lens for controlling perspective, especially for larger products, enhancing your product photography setup.
2. Lighting equipment Utilize continuous lights for easy setup - what you see is what you get. - Flashlights are more difficult to operate but offer more versatility, creativity, and better color rendition. - Softboxes are ideal for diffusing light and reducing harsh shadows, not demanding overly precise light positioning. - Narrow-angle reflectors (especially used with honeycomb grids) provide very hard directional light, great for rendering textures, but require very precise positioning. - Bounce desks/reflectors can reflect light to soften shadows and highlight product details, useful in both studio and natural lighting setups.
3. Tripod, camera head, and light stands - A sturdy tripod is essential for stability, especially for long exposures. - A camera head with micro-adjustments is great for precise control of camera positioning. - A robust light stand is important for protecting lamps from flipping over. - A boom stand easily adds light from the top, which is flattering for most products.
4. Backgrounds and surfaces - Use seamless paper rolls for a clean, distraction-free background, ideal for product-only images. - Incorporate textured surfaces like wood or fabric for lifestyle shots, adding depth to your high-quality product photos. - Employ light tents for small reflective products to achieve an evenly lit, shadowless look without a studio being reflected in your products.
5. Additional accessories - Keep extra batteries and memory cards on hand to avoid disruptions during the photography session. - Use lens cleaning kits to ensure your lenses are spotless for clear images. - Cable releases or remote triggers can help keep the camera stable during shots, avoiding long-exposure blur.
6. Software for editing photos in post-production - Choose complex photo editing software like Adobe Lightroom, Photoshop, or Affinity Photo for advanced editing capabilities. - Utilize tools for color correction and retouching to enhance your product images. - Consider batch processing to streamline workflow for large sets of photos, optimizing your post-production process.
Equipping yourself with these tools will elevate the quality of your professional product photography, allowing you to capture stunning images that truly showcase your products.
The art of product photography is greatly influenced by the choice of lighting. This chapter discusses specifics of studio and natural lighting, offering a comprehensive guide to making the best choice for your products.
Advantages and challenges of natural light - Natural light provides an authentic look that can enhance the product's real-world appeal in lifestyle photographs, which are difficult to render using artificial light. - Challenges include its variability and dependence on weather and time of day, making planning and consistency difficult. - It requires adaptability and may not be suitable for all product types and photography styles.
Advantages and challenges of studio lighting - Flash or continuous lighting offers unparalleled control over light intensity, direction, characteristics, and quality, which is essential in product photography. - It requires a lot of practice to become a professional product photographer who can master the complex setup for desired effects. - The investment in equipment and space can be significant but pays off in consistent, high-quality images.
Choosing between natural and artificial light - Consider the product's nature, the mood you want to render, and the context in which the product will be used in your product presentation. - For lifestyle and outdoor products, natural light is often preferable; artificial lighting excels in highlighting details and textures. - Your target audience and the platform where the images will be featured can also influence this decision; distinguish the visual appeal of all your images based on their utilization - for an e-commerce website, social media, or marketing materials.
Setting up your environment for the best results - In natural light settings, seek locations that offer diffuse, indirect sunlight, such as near large windows or outdoors in the shade, for softer light. - In studio environments, experiment with the positioning of lamps and various light shapers to find the best combination for a given product. - Always adjust your camera settings to suit the lighting conditions, whether shooting in natural light or with studio setups.
2.Understand product features:Familiarize yourself with the product’s unique features and selling points. This knowledge helps in highlighting key aspects during the shoot.
3.Select the right background: Choose a background that complements your product and fits the aesthetic of your brand or the platform where the images will be displayed.
See the clever marketing trick on how the added elements actually show what the product - the smoothie - is made of.
6.Scale and proportion in prop selection:Props should be in scale with the product, ensuring they do not overpower it. The proportion of the props to the product can also affect the viewer's perception of the product's size, which is crucial for accurate product representation.
Each of these aspects of prop use in product photography requires careful consideration and a creative eye. By carefully incorporating props into multiple shots, a professional photographer can create more engaging, dynamic, and appealing product images.
Orbitvu's photography automation saves time on repetitive tasks and creates room to focus on preparing products for a shooting session. The time-consuming tasks of shooting and photo editing are streamlined, allowing you to concentrate on perfecting your product's appearance. This shift in focus means more attention can be given to cleaning, arranging, and styling your products, ensuring they look their best. Orbitvu's technology simplifies the photography process, meaningless time worrying about the technical aspects of photography and more time for creativity. The result is a more efficient workflow where product preparation takes center stage, leading to higher-quality product photos.
In mastering product photography, preparation and strategic planning are key, as outlined in this guide. Each phase, from organizing to choosing the right props, significantly influences the final output images. Integrating Orbitvu’s automated solutions into this process further streamlines and enhances the whole process, allowing you to focus on creativity and detail. Orbitvu’s technology not only simplifies the photography workflow but also ensures consistently high-quality results, demonstrating how innovation can improve product presentation in the digital marketplace.
For those looking to elevate their product photography game, Orbitvu is here to guide, support, and innovate. Let's shape the future of e-commerce photography together. Feel free to reach out to learn more about how we can help achieve your goals.
Use the form to tell us what you are planning and what kind of product content workflow you need.
July 23, 2026
Meet Orbitvu's AI OCR: extract labels, part numbers, and product data straight from your images and turn it into structured metadata inside Orbitvu Station.
July 15, 2026
Meet Orbitvu's AI Masking: automatically remove the background from product photos in high resolution, right inside your Orbitvu Station workflow - no design skills needed.
July 14, 2026
Meet Orbitvu's AI Retoucher: automatically remove reflections, correct colors, and clean up imperfections right inside your Orbitvu Station workflow.