The best solutions for white background product photography
White background has won the hearts of e-commerce businesses. This is clearly visible from the statistics presented by retouching companies, as around 75% of all product images end up with white background. Customers vote with their choices based on visual information, and these choices are all pointing to white.
Is this an incentive to join the general pro-white trend in product presentation? We are asking the crucial question why “white is king” and exhaustively describing the ways you can obtain white background products.
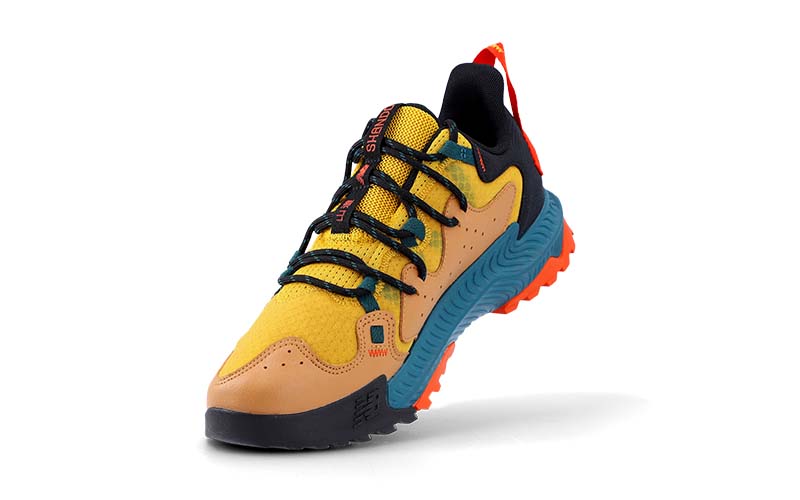
Why should you present products on a pure white background?
Answers to this fundamental question lie firmly with the human body and its systems of perception. Also the finance and marketing rules that govern the e-commerce industry have a word to say here.
First, white remains the eye-friendly color. When it is used as background, there is less color interplay and less field for unwanted contrasts or too soft harmonies. When presented on white, colors seem more true and cause less distraction.
Second, it is easier to maintain store consistency with all product backgrounds set to white. Brands require cohesion with their color palettes and with white you risk stylistic conflict less across roundups of multiple products.
Third, you may experience more versatility across media channels, when using white backgrounds. A photo originating in your e-shop may also be pasted into Facebook or Instagram, and it may as well find its way to Pinterest or various communicators. In all these cases, application backgrounds will have the potential to come in conflict with colorful photo backgrounds. White stays most neutral…
Fourth, and this might be important to photography practitioners, white background is easy to edit. It allows clear visibility of details and just enough contrast to use automatic graphic editing tools. Plus, white backgrounds produce smaller files.
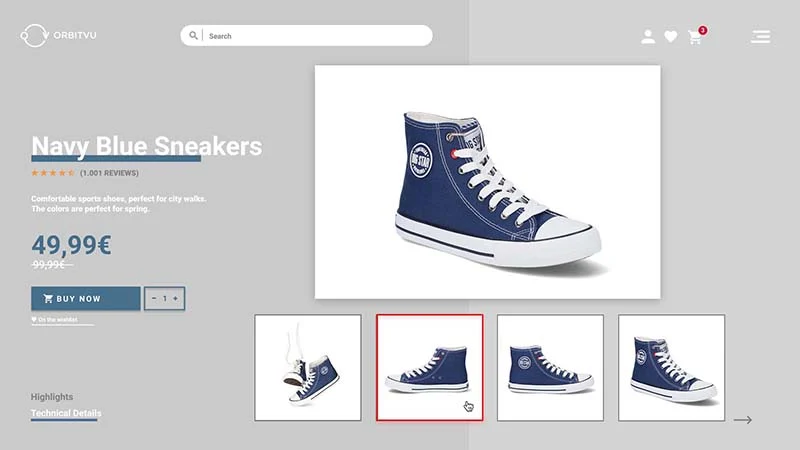
Finally, we have a good message to share with you. Not always is white background the static solution that has to be engineered already at the photo-taking level. Software exists that allows you to cut products from the background conveniently (and sometimes automatically, as in case of automated product photography solutions). Then, you have the full freedom to choose the color of your background and change it on the way.
You will get to know more about creating white background in photos and the cutting of products in our following sections with detailed guides per every method.
Good and bad uses of white background
For full understanding of the white background question it will be good to see some examples. Two of them, drawn from live e-commerce websites, will help you to find your own way to white background products.
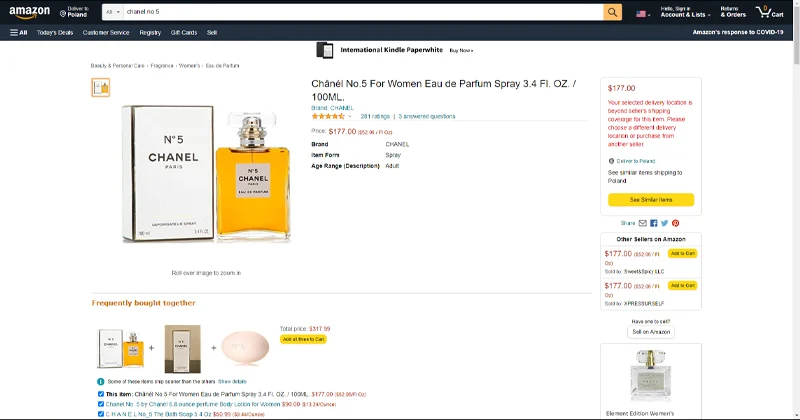
In this listing of Chanel’s No 5 perfume white background is clearly at the service of perfect product presentation. The yellows and the blacks are in the right contrast level to the background and the product edges are rendered sharply. There is an overall impression of crispness and professionalism.
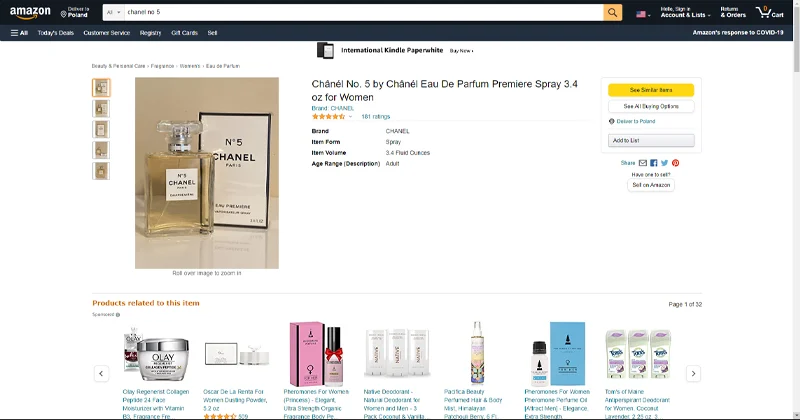
In our anti-example, something seems to have gone wrong with the photo session already at the stage of preparation. The background is not white, the lighting not sufficient and thus the background exposes all the shortcomings of the photo creation process. Can you notice the reflection of the lighting in the foil that covers the product? Or the general greyish hue of the setting that works against the product?
White background would have helped here to highlight the product through contrasts and strengthen the positive impression on the side of the customer. There would be no hesitation which Chanel listing to choose as a gift – they speak for themselves and about the professionalism of the seller.
Read more about the requirements for a good product photo, background included, in our “Complete Guide to Product Photography”.
How to produce photos on pure white background?
Various e-commerce platforms, such as Amazon, have placed pure white background among their product photography requirements. This means the RGB(255,255,255) color and causes several difficulties on the photo production level.
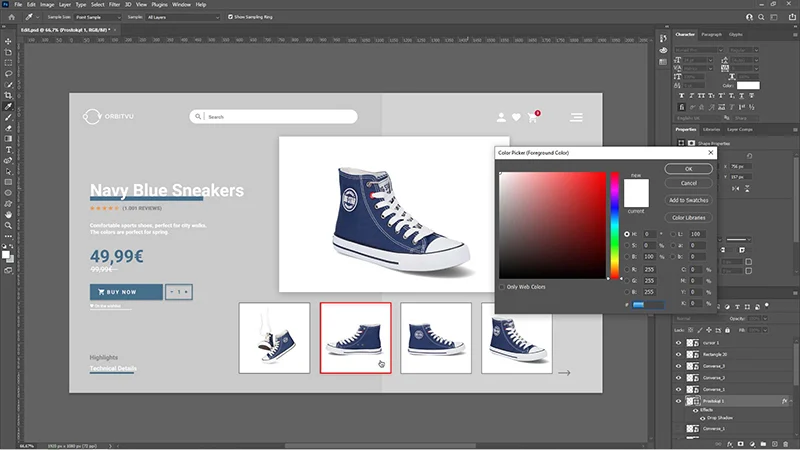
You may choose to try to obtain white background during the photo session itself with plenty of light and backdrop manipulation. It may still turn out that post-production is necessary to help you to arrive at the desired pure white.
Your work towards a pure white background photo will almost certainly take one of the paths we enumerate and describe in the following paragraphs. Let’s have a look at what they are.
- The use of a white background shooting table in a traditional photo studio may be one of the basic ways available to you.
- You may as well try seamless white backdrops and focus on the raw processing of the photos.
- Automated product photography solutions offer quick and effective intelligent mask background removal, which cut your product from the background and put it on any desired color/pattern.
- Automatic intelligence solutions for background removal have been developed that focus on the processing of a ready photograph or integrate into the photo session.
- You might already be familiar with the method of manual clipping of the product that can be undertaken in various graphic software by a human operator.
- Adobe Photoshop will help you with obtaining a pure white background also with its Dodge and Burn tool.
- Finally, the method of chroma keying (the green screen and layering of two visual streams onto each other), so popular in movie production and television, will also serve for the purposes of product photography.
In our detailed descriptions of each method, we will show you how it works and in which cases it is best applied. We will highlight the pros and cons and provide simple guidelines to the operation of each solution.
From white background shooting tables to intelligent mask background removal, the choice of technique is all a matter of measuring the needs and resources of a business. Let’s see what can be achieved with this in mind.
1) Shooting table
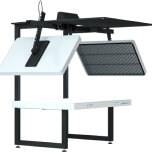
Still life shooting tables are pieces of equipment designed to simplify product photography and the obtaining of white background in traditional photo studios. Their surface (usually Plexiglass) is optimized for light straying and softening so that the product may be properly exposed.
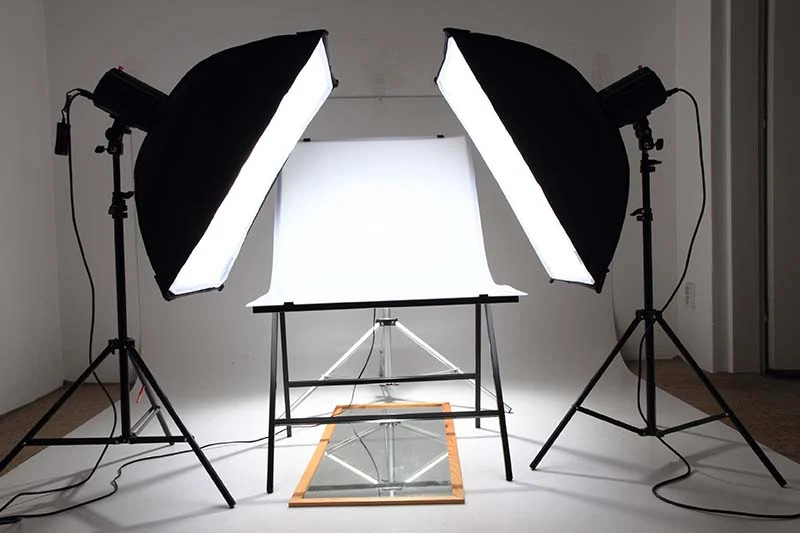
Shooting table – pros and cons
+ pure white background without the need of post-production.
With the right configuration of lighting and camera, shooting tables may eliminate or simplify the post-production. In consequence, the time-to-market of a product is reduced, which means less logistics issues and lower costs for the business.
+ wide selection of ready-made tables
Shooting table, as a basic photo studio accessory, comes in many varieties provided by multiple manufacturers (e.g. Foba, Cambo). In most cases it is a ready-made set with customization options such as the choice of background material – Plexiglass, Masonite, Formica…At a relatively low one-time cost you obtain a versatile piece of equipment.
+ easy to clean
The simplicity of construction of a shooting table allows for easy cleaning and replacement of the background (depending on the model). The plain construction comes in handy also in case of possible damages of the table.
– burns (overexposes) edges of the product
A raw photograph created with the help of a shooting table might involve issues with overexposed edges of the product. The undesired effect can be described as foggy rendering of the edges – the contrast between the background and the product is partly lost. This can be especially visible with lightly colored items and go as far as losing the border between surfaces.
This happens because of the short distance between the item and the source of light (the backlit surface of the shooting table) and is sometimes partly remedied with accessories such as product stands.
The photos attached below present the phenomenon clearly and with the same photo taken correctly you will quickly see the difference.
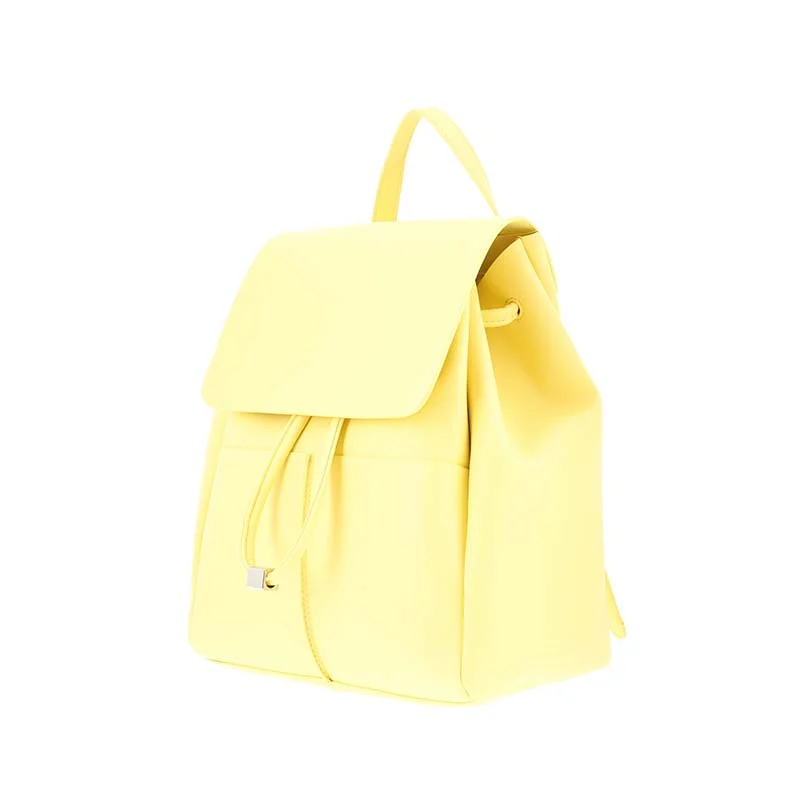
Overexposed
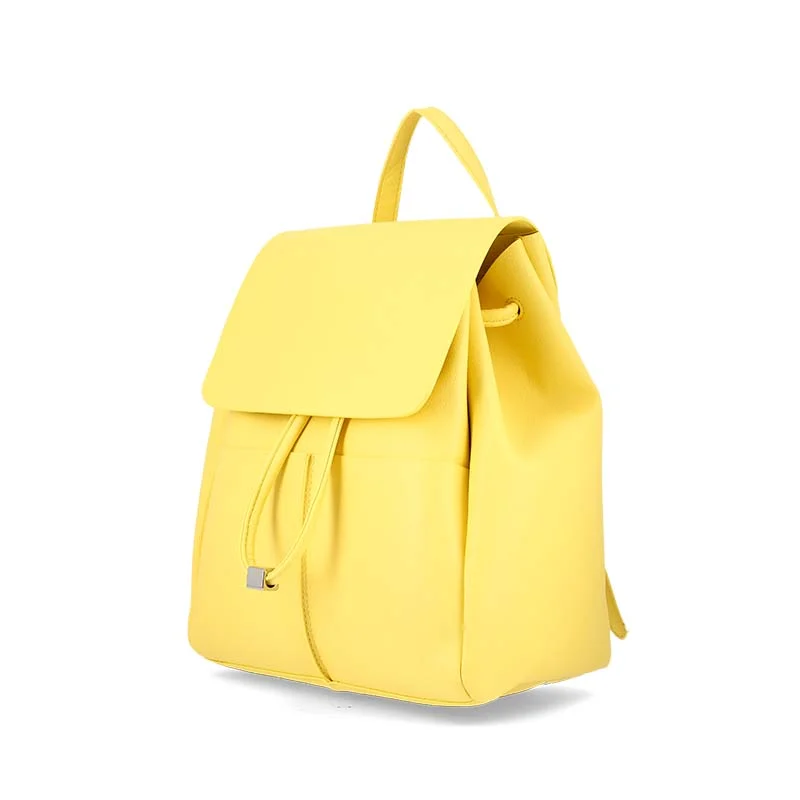
Perfect lighting
– limits access of light sources
The construction of a shooting table by itself limits the access of light sources. The backdrop and the bottom stand will be physically blocking the space which can otherwise be used to place additional lights. The effect of a backlit background will be difficult to achieve and in most cases lights will need to be placed on additional stands.
– decreases contrast (both for lighting and lens)
This effect has the same origin as the burning of the edges of the product – the distance the light travels between its source and the subject of the photo. With a shooting table you might have difficulties photographing glossy products, even when they are dark. The decreased contrast will be visible as a whitish fog on the surface of the product and, again, might influence the sharpness of the edges.
The lower contrast is further enhanced by the fact that some of the light that is used to light the shooting table surface arrives in the lens. With all the optical mechanics at work this naturally decreases the contrast.
You might feel inclined to use our further methods for a white background product, like clipping or IQ mask, to avoid dealing with the decreased contract.

What’s in this method for e-commerce?
Using shooting tables as a solution for e-commerce assumes a level of photographic knowledge. Although it is a technologically simple solution, this choice carries costs in hiring photographers and buying additional equipment (lights, tripods, etc.).
Furthermore, there will be risk associated with contrast issues for light and glossy products, so that the photos might not turn out perfect or require long post-production time. Sometimes you might even realize that you will be clipping the products from the not ideally white background anyway!
WIth a shooting table the photo session and the postproduction will stay separated and require lots of finetuning. Product time-to-market and operator skill requirements will be significant obstacles.
Therefore, it is worth considering the scale of your business and its capacity for dependence on third party or professional photographers before going for shooting tables as a seemingly simple solution. In most cases, you will find out that the time and quality benefits of other methods turn the scales to automation in product photography.
2) White seamless backdrop + raw processing
With limited resources or a low budget, there is still an option to shoot white background product photos. It may require more setup and post-processing time but it will be possible with the help of simple stands (e.g. chairs) and a white seamless backdrop (e.g. paper).
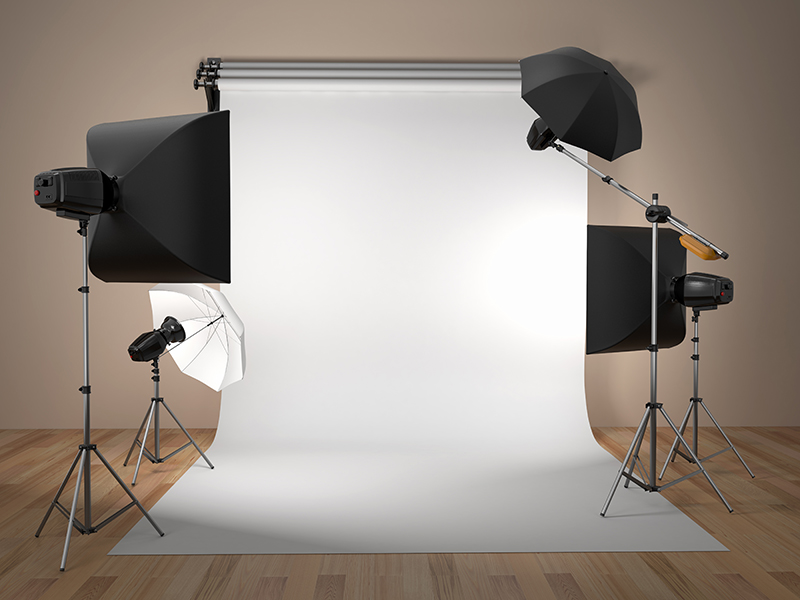
You can choose a white paper sheet or a roll, paying attention that the size fits your product, and use daylight and simple lamps as your light sources. The camera can be either a phone, a DSLR, or a mirrorless.
Sure enough, the key moment will come with the tasks to take in the editing software. Read on to our “How to…” section and take a look at our dedicated DIY article about white seamless backdrop photography to learn more details about this method.
White seamless backdrop – pros and cons
+ minimal investment
When going for this relatively simple method, the costs will be kept minimal. Stands, light diffusers, paper or cloth background, and a camera of your choice. Such a solution will be tempting for small e-commerce businesses, where the turnaround is still minimal and the costs need to be kept low.
+ results without professional studio
With a little skill and experience, the results achieved with this method can reach an acceptable level of quality. Arriving there without the need to invest in professional studio equipment is a benefit for anyone restricted financially.
+ produce photos at your home or office
Another advantage comes from the location of the session. A small workspace can be organized at your home or in an office location, thus reducing the costs of hiring space. It may also turn out easier logistics-wise, requiring less transportation.
– Not time-effective
The main disadvantage of simple white background photography is time. Setting up the workspace may not be easy due to different light sources and limitations of equipment. Getting a perfect shot will suffer from the same limitations and may require multiple approaches to one product.
– requires manual editing
White seamless backdrop photography will need to be supported by manual editing in an effective graphics software. This, again, prolongs the time-to-market and ups the bar for skill requirements. You will need to learn at least the basics of color and contrast control in editing suites like Adobe Photoshop.
– additional technical limitations
You will be very much limited by the equipment you choose. Mobile phones have small sensors, which allow for more noise and worse sharpness. DSLRs may not be used to the full with limited light options. And, in the end, you will need to migrate the photos between the camera and processing software. Prepare for many steps from space setup to e-commerce publication.
How to photograph on a seamless white background?
The process will be moderately demanding to think through and arrange. You will need to consider equipment preparation, workspace setup, camera and light settings, and finally get ready to post-process.
Simple equipment from IKEA and furniture shops will be of great help, while little experience in photography will take you a huge step further to your own successful product photos.
Remember to carefully diffuse the light, so that it does not overexpose fragments of your field of view. You should be satisfied with up to 4 light sources. The best focal length for your camera will start at 50 mm, while the aperture should be kept in mid-range, f/11 – f/16. The lower ISO speed you use, the less noise is to be expected – stick to ISO 200 or ISO 100.
In post-processing, you will use tools such as dodge, saturation, brightness and contrast regulation. Photoshop lets you conveniently see the results of your changes in comparison to the original. This is the way to learn.
We write in detail about the whole process in our DIY article for home-arranged white background photography. Let us know your experience on social media.

What’s in this method for e-commerce?
White seamless backdrop and post-processing is certainly the resource-wise simplest of the available ways to pure white background in your packshots. It will not be free from limitations you encounter with shooting tables.
This means issues with the right contrast level, sharpness and product dimming. Light reflexes and overexposure will cause some trouble, just all the time needed to do it yourself.
Still, no advanced photographic knowledge is prerequisite and everything can be arranged at your own risk and benefit. You will get extended control over the process and serious investment savings. It comes at the cost of fully professional results and plenty of time spent on post-production.
Try this method for a start, it will build your experience and probably serve as a platform for introducing more advanced solutions. For larger e-commerce enterprises, you will need one of the other methods. Especially when automation is involved, serious scalability benefits come into question, regarding time and cost.
3) Mask-based background removal
This method opens the catalogue of more advanced solutions available with manual, semi-automated or automated processes. Its relative innovativeness has led it to become the favorite method for automation solutions.
How does it work with automation?
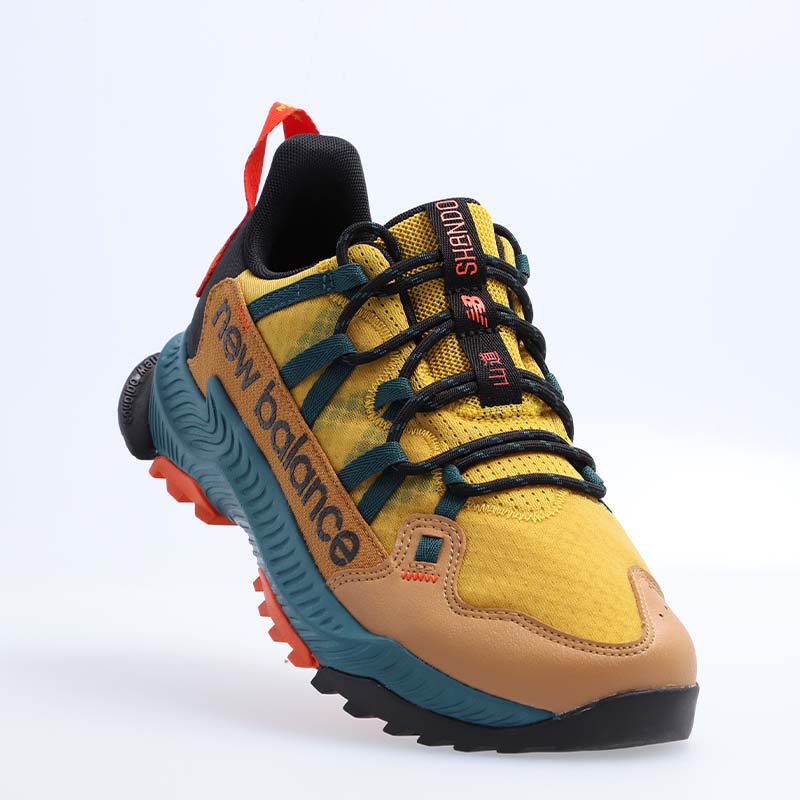
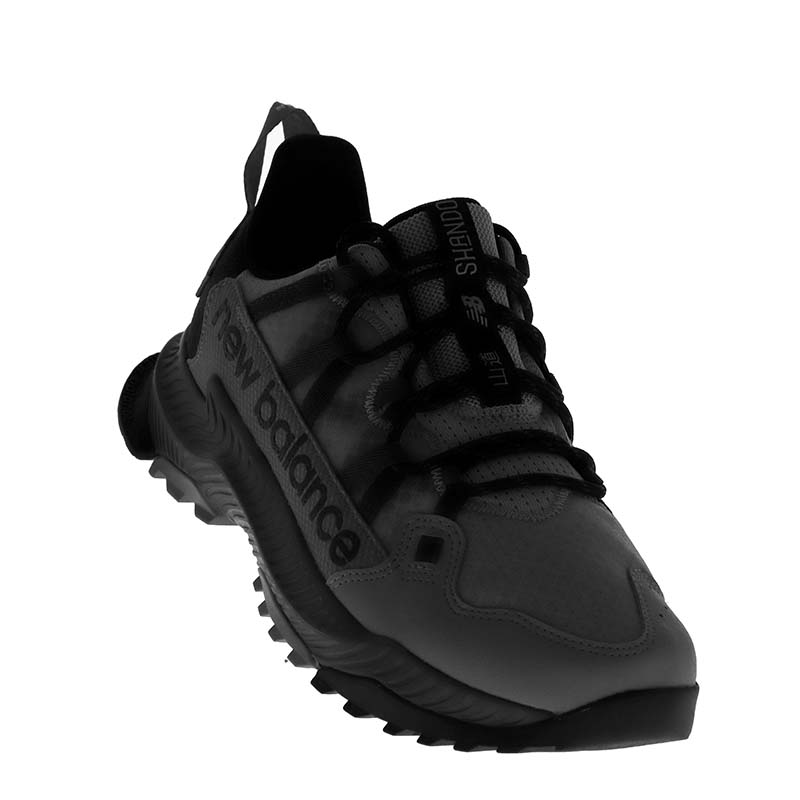
In mask-based background removal, two photographs need to be captured. The first one covers the correctly lighted item, while the second one (the mask) is only about the silhouette of the product. To achieve a high-contrast mask strong backlight is used, so that the product turns out to be intensely dark in the photo and the background light. It is important that the item is not moved in between the capturing of the two photos.
The superposition of the mask and the first photo in automatic post-processing allows you to easily cut out the background. The product is separated from its surroundings by the mask and the background can be replaced with any color or pattern you wish.
In software-hardware integrated solutions, such as those from Orbitvu, the process is executed automatically: from the taking of the photos and masks to the background control in the application. The user is able to finetune the mask shape and manipulate the target background properties. The process takes from seconds up to several minutes and significantly hastens white background product photography.
Mask-based background removal – pros and cons
+ very precise
Precision lies at the heart of this method. The photo and the mask allow you to cut minute details of the photographed item. Tussles, hair, difficult texture or semi-transparency pose less problems with masking than with any other method.
+ preserves transparency
Masking is a good way to photograph transparent and semi-transparent products. You will have tools at your disposal to fine-tune the mask, so that it covers difficult surfaces correctly. It will serve well with items such as bottles and glassware.
+ perfectly renders fine details
Provided that the mask and the photo match perfectly (no movement), the masking technique will allow you to work with fine details such as hair, thin edges and difficult material texture. No other method matches the precision here.
– requires either high technical skills or full automation
The big requirement for masking is technical knowledge. You will need to be able to set the photo and mask parameters in a way that they can be juxtaposed and, as a result, produce white background. Photographic skills are pricey and time-consuming to obtain, which raises the entry threshold for this method.
Full automation can be a quicker solution here, as a dedicated software suite and a fully equipped photo booth will work together to simplify the process of mask and photo production. With automation, only basic training will be needed to work with background removal.
– time consuming when not automated
Time flows quickly in the process of photo and mask taking and especially in the post-processing phase when they need to be placed upon each other precisely. Photoshop skills required and even they do not necessarily reduce the time spent on masking.
Again, automation in photography has delivered a solution. The mask and the photo are processed in a special software suite that uses advanced algorithms to produce effects automatically and quickly. Think of serious time savings in this method that become available with the use of automation devices.
– purchase price of automation
It may be said that masking requires automation to be effective and to bring maximal time savings. Photography automation equipment can be expensive although it is a one-time investment that reduces permanent costs significantly.
This would generally limit the use of masking based background removal to professionals – e-commerce businesses, retailers, and photography studios.
How to photograph and process photos using mask-based background removal?
In automated photography two photos need to be taken. The lighting rules for each one of them do not change. Once you learn the lighting and studio preparation rules, the work flows similarly. However, automation brings the benefit of the possibility to template your settings and recall them at any time.
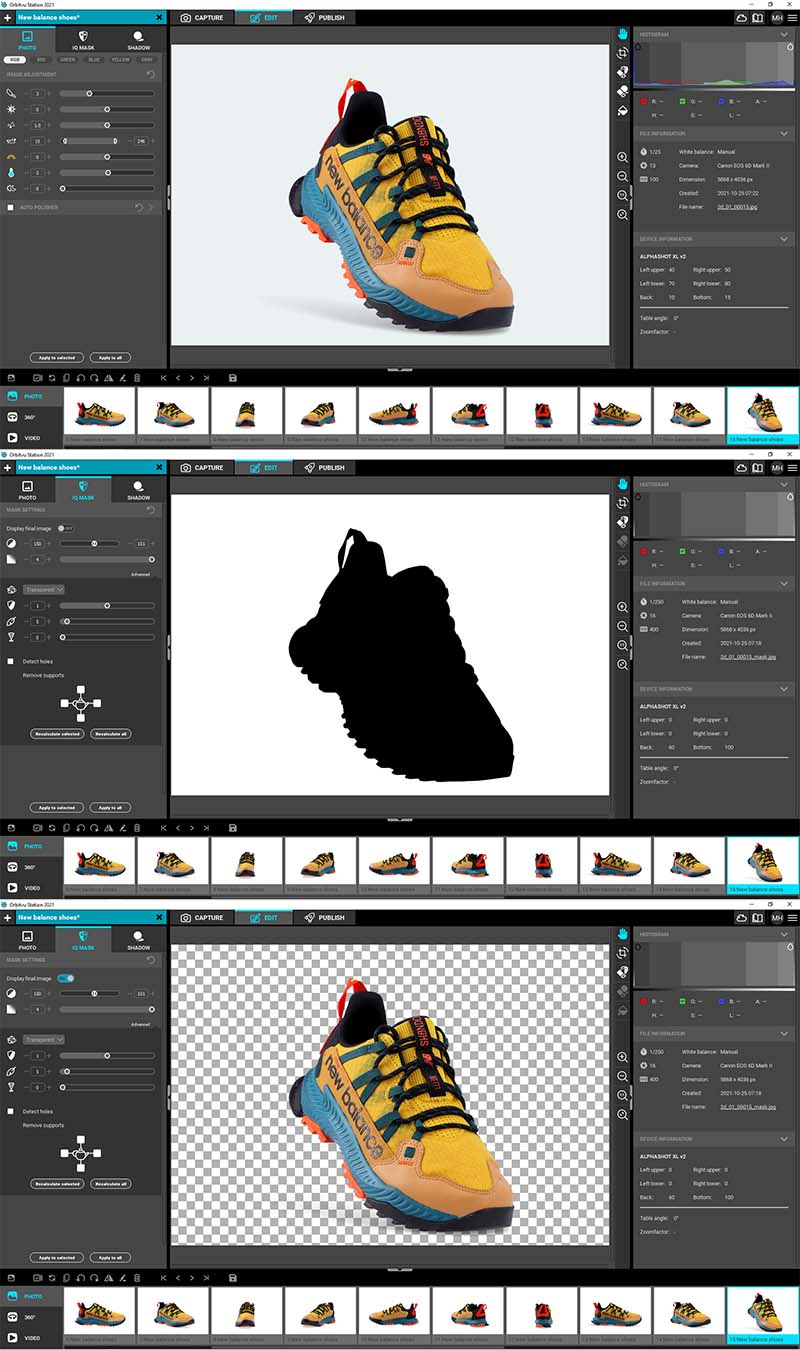
First, you need to prepare the product. This usually means careful grooming – cleaning, dusting, and positioning in the studio. Do it early and time will be saved on post-processing such as removing fingerprints.
Second, you take two photos with different lighting conditions. The first one focuses on the product with an aim to present all its details in the best light. The second one aims at lighting the background and keeping the product more as a dark outline – this will be the mask. This process requires lighting changes such as applying strong backlight for the mask. Automation devices will allow you to choose from a set of lighting templates both for the mask and the photo. On top of that, you will be able to create your own templates that suit the needs of certain products.
The third phase is post-processing, which takes place in the photo editing software. You apply the mask on the photo and use background removal techniques to obtain a cut product. Read more about Photoshop processing for white background in our dedicated article.
What’s in this method for e-commerce?
E-commerce businesses will be especially interested in the mask-based background removal for their product photos. They have the best investment resources available and constantly look to lower the time and money consumption of their photography processes. This is exactly what masking paired with automation provides.
Businesses will obtain high-quality repeatable shots with a perfect white background. The speed of background cutting is unparalleled when applying automation, which will shorten the time to market and work well with hundreds of products in large e-shops.
With automated mask-based background removal, you will also be able to increase the photo throughput at the same resources engagement. No highly skilled staff will be needed.
This way, the choice of masking and traditional photography would not be advised in large scale enterprises for its time-consumption and skill requirements. A range of devices using exactly this method is widely available on the market.
4) AI based background removal
Modern technology has arrived at a stage where machine learning algorithms are able to discern what is the background and what is the foreground of an image. Not delving into the technicality of the ways to programme and teach the machines, it can be said that these methods to remove background will be getting better with time and work done.

The use of AI background removal is amazingly simple for an end-user, as your engagement is limited to photo upload, background choice, and photo download. Of course in some cases, there will be fine-tuning options available.
You can try AI algorithms in desktop applications such as Photoshop or Topaz Mask AI, usually for an additional one-time or subscription fee. Some services offer useful background removal plugins. Others are available online, via browsers or API, on websites like remove.bg or removal.ai.
For e-commerce needs we will consider their advantages and disadvantages when it comes to product photography (high volumes, quality requirements).
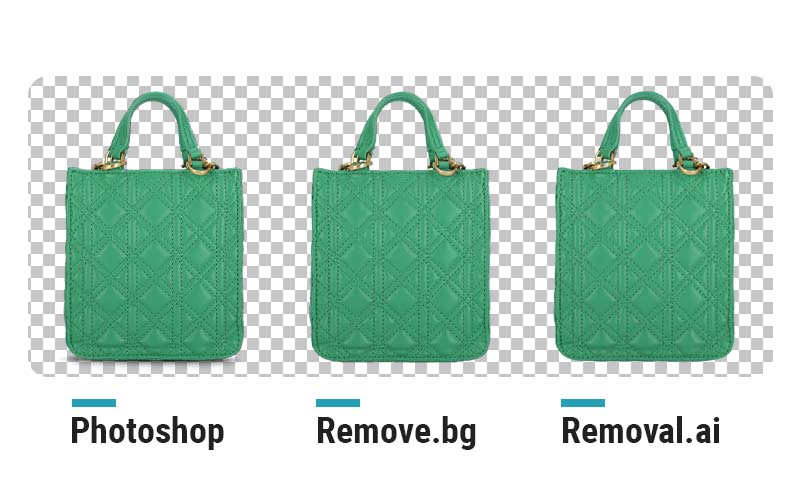
AI-based background removal – pros and cons
+ instant result without manual effort
Anyone in commercial product photography will have realized the importance of time-span post-processing takes. Involvement of third-party retouchers can be limited by the application of well-trained AI. The workflow is smooth and consists of several clicks for providing input and receiving output. The processing usually takes seconds and requires no additional attention. Expect no time-consuming clipping in Photoshop and very little manual effort.
+ low resolution output free of charge without any watermark
Online AI background removal tools operate for free with lower resolutions. It means no adding of watermarks and a wide range of opportunities for those who do not require detailed close-up options.
+ pay as you go or subscription plans
Should you decide to process higher resolutions, you can choose pay as you go or subscription plans with AI processing tools. The true benefit of this method comes with quantity, as price per image drops significantly with volume.
+ batch processing
AI can process files in batches, which remains unavailable for manual editors. Your large quantities of photos will be handled in no time at once compared to traditional post-processing.
– very limited capability to fix unsatisfactory results
The first serious limitation of AI background removal options comes with its editing capabilities. In case any part of the automatic clipping is unsatisfactory, you will not be able to fix it straight away in the automatic process. Almost no additional post-processing tools are provided with the AI algorithms. This does not refer to in-built Photoshop AI, as there you get the benefit of both AI and a manual editor in one program.
– transparency of the product lost
Automatic AI solutions usually do not handle transparency of the item. Photographs of bottles or glassware will end up wrongly clipped or with semi-transparency lost. This one disadvantage might guide you more towards mask-based background removal, which works only little less quicker but works fine with transparency.
Photoshop AI for background removal
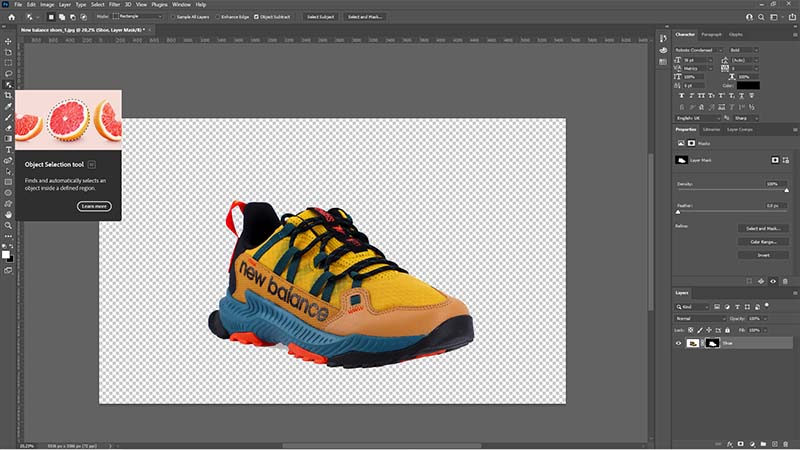
Photoshop is the most robust, complex and renowned photo editor. Frequently used for manual editing, it also uses AI for making automated object selections.
The huge benefit of this system becomes clear when a selection can be further fine-tuned by Select and Mask sliders or by various other Photoshop tools (e.g. layer mask, Pen tool, Lasso tool, Magic Wand tool, Quick Mask etc.)
+ Good starting point
Photoshop’s AI works very well as a starting point for creating a precise professional selection. You run the engine, obtain a basically cut object and then focus on adjustments. Easy?
+ Perfect for combined AI and manual processing
Photoshop will give you all the tools needed for manual processing of the AI’s work result. Lasso or pen – it will be much more complex than in online AI engines.
– Faulty work with complex objects and holes
The AI engine provided with Photoshop generally deals badly with complex objects or items with holes. It will be more difficult to automatically cut wheels with spokes or any metal grills.
– Editing skills required
To deal with imperfections of AI background removal and receive a perfect outcome you will have to master the tools Photoshop offers. It certainly takes some time and training to become familiar with them, which might prolong the time-to-market and increase staffing costs.
– No batch processing
With Photoshop as your AI background removal tool, you will have to process photos one by one. There are no batch processing options available. With hundreds of images to work through, this can be a significant setback.
Topaz Mask AI background removal
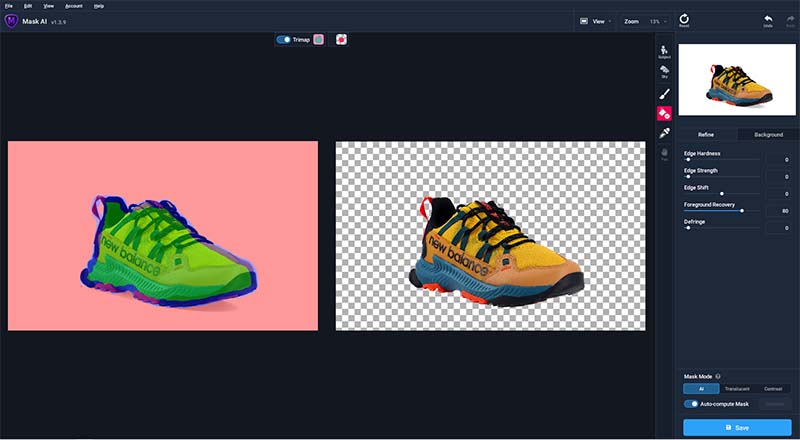
Topaz Mask is a complex piece of software dedicated to background masking. It was developed by Topaz – a company with huge experience in photo editing and AI applications.
The process is simplified relative to Photoshop. You brush the general silhouette of the item to be cut and let the AI do the rest of the job. Quite usefully, you can use a brush tool to refine the edges of the proposed mask or control the precision of the algorithm with sliders. All that is left in the final step is background replacement – you can choose white, transparent, or any image.
+ Great results
It has been confirmed by many users that the results offered by this AI are incredibly precise and efficiently help to produce white or transparent backgrounds for your photos. In a way, Topaz is incomparably good.
+ No high technical skills for manual touch ups
The ease of operation of the Topaz AI tools will encourage non-professionals. It is just a few sliders and different brushes and a three stage background removal. Easy-to-learn and highly operable.
+ One time purchase fee
For those who wish to purchase Topaz AI tools for regular e-commerce use the one-time purchase fee can be a huge benefit. No monthly subscription means savings in the long run.
– Batch processing not available
Just as with Photoshop, Topaz does not offer batch-processing, which slows down the creation of web-ready product photos.
– Relatively high purchase price for non-professional use
The requested one-time purchase fee is still rather beyond the budget of those who wish to employ Topaz only from time to time. The software has been dedicated to professional use and e-commerce business.
– No advanced manual tools
When the AI fails to deliver a satisfactory result, you will need to work on the photo manually to refine the clipping. In Topaz, the options are rather limited (at the benefit of simplicity) compared to Photoshop.
TIP:
How to photograph a product well for AI processing?
Wishing to make the job easier for an AI engine and thus to obtain better results quicker, you will need to follow two rules. First will require the object to be in full focus and sharp. The second will give priority to good contrast between the object and the background to be removed. Have a look at the perfect example for AI processing below.
What’s in this method for e-commerce?
The aim to produce plenty of good product photographs in a short time, so characteristic for e-commerce businesses, will fall in perfect line with the options offered by automatic intelligence.
Count on the simplicity of operation and thus lowering of staffing costs. Add the quickness of work and options to batch-process photos and your e-commerce will obtain a powerful time-saving device.
However, the imperfect work of certain algorithms often needs to be corrected manually, if possible. This again prolongs the processing-time and points to more precise methods for white background such as masking and automation. You will need to face this choice, if your photographed material consists of transparent objects, fur products (soft efges), or has reflective surfaces.
5) Manual clipping of the product
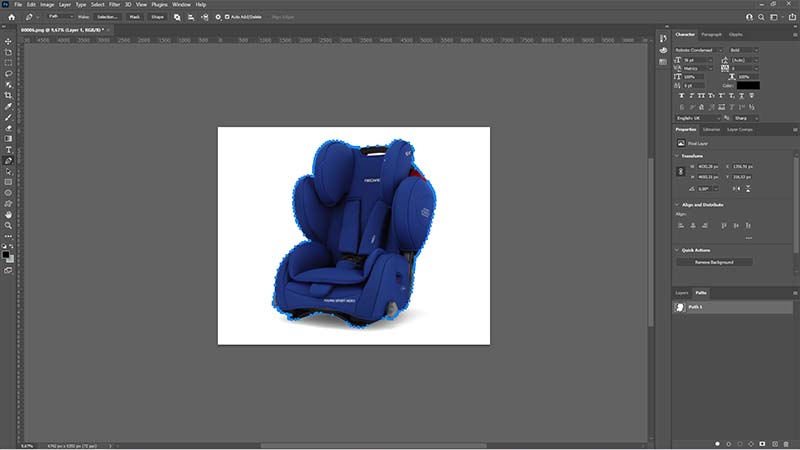
Manual clipping of the product can be called the traditional way to white background. You use photo editing software and its various tools such as the Magnetic Lasso or the Pen to outline the product and indicate the background to be replaced with pure white.
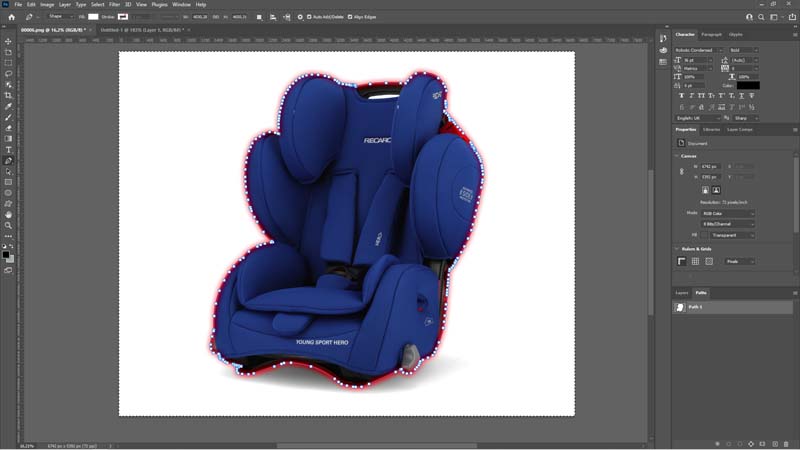
Various programs offer different levels of precision and ranges of tools for clipping. Your choice of method to create a clipping path will depend on the complexity of the product, i.e. its shape and texture. The clipping path can be digitally boosted by sticking to product edges or absolutely dependent on your move of the cursor.
You will find more about Photoshop tools for clipping paths in our article on how to remove background from a product image. This method has its interesting advantages and equally serious disadvantages.
Manual clipping path creation – pros and cons
+ Very accurate
Working manually, just as in any craft, guarantees high precision and freedom of decision making. Manual clipping path is pixel perfect and you can work on it in various magnifications.
+ Easy to correct errors
Precision draws perfectability. Manual clipping paths can be edited at will making adjustments during or after their creation. It does take time, however warrants a precision level that is unmatched by more automatic methods.
– Steep learning curve
A serious obstacle comes with learning Photoshop skills. The correct use of Pen or Lasso tools, the manipulation of layers and masks will take time to learn and thus can turn out to be costly. What’s more the learning curve is not the simplest and can resemble a steep mountain to climb for beginners.
– Not perfect for difficult products
Manual clipping gets a tedious task the moment you are faced with difficult objects. Soft edges, unsharp areas, very complex objects with holes add a considerable amount of time to processing and may even turn out impossible to outline with a 100% accuracy.
– Expensive
If you aim at quick processing of thousands of photos for your e-commerce, manual clipping can turn out too slow. You may need to employ a platoon of retouchers or refer to outsourcing, which in turn generates costs.
What’s in this method for e-commerce?
Manual clipping brings benefits of precision and easy error correction but needs employment of time and resources.
If you wish to reduce costs and keep this method for your white background images, it might be a good idea to refer to Asian clipping studios. They offer various levels of background removal services at attractive prices and may even force well-acceptable turnaround times. The whole process will be summed up in sending the source material and receiving the results via cloud or dedicated servers.
A similar service is offered by pixelz.com, the leading provider of background removal services in the world. They offer good quality work and an interesting blog to read, which might help you with building “white background skills”.
Choosing manual clipping will be less beneficial for your e-commerce business, if you trade in photo-unfriendly products, i.e. those with very soft edges, furry texture, semi-transparent edges or unsharp areas. Think more of masking and automation solutions in such cases.
6) Chroma keying
Chroma keying, or color separation overlay, is a technique you might find useful for product videos. It allows you to superpose two streams of image based on their colors (chroma range). This way a product filmed on a specifically green or blue (or simply – contrasting) background can be presented on white or in any surroundings of your choice.
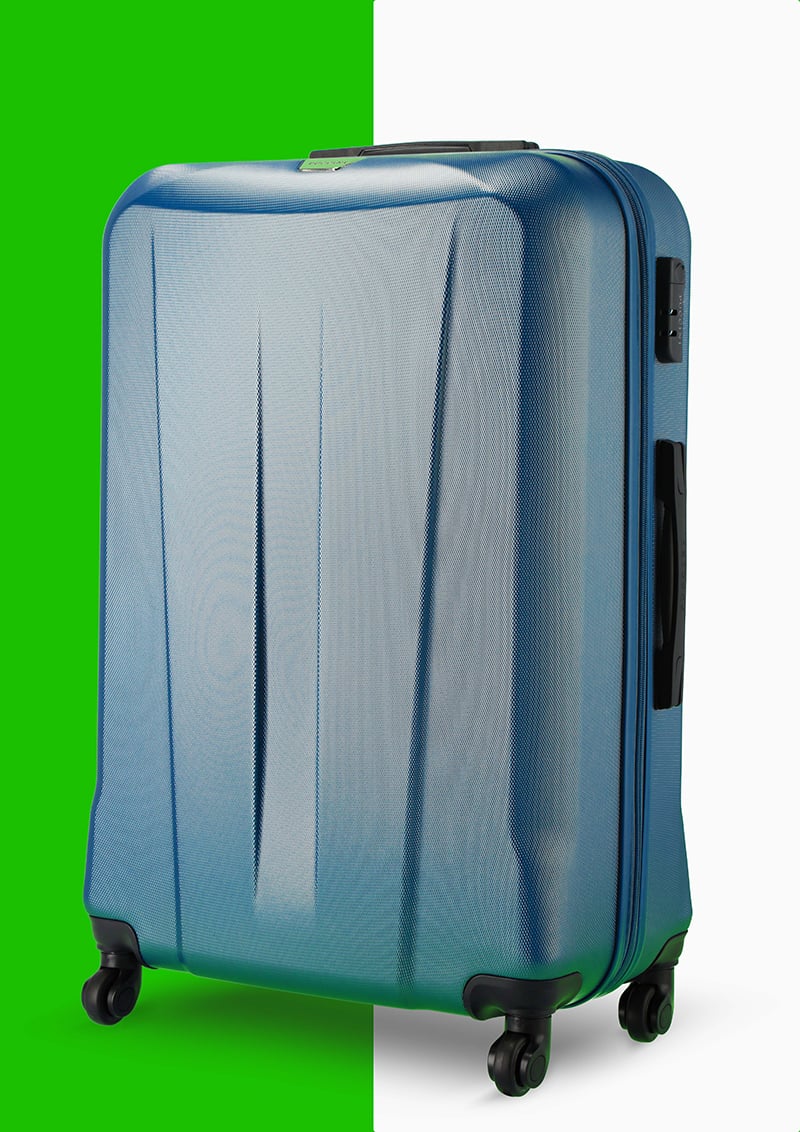
This technique, often employed by newscasters and video-game producers, is also called the green screen technique and can bring white background to your 360 degree video product spins and live model photography.
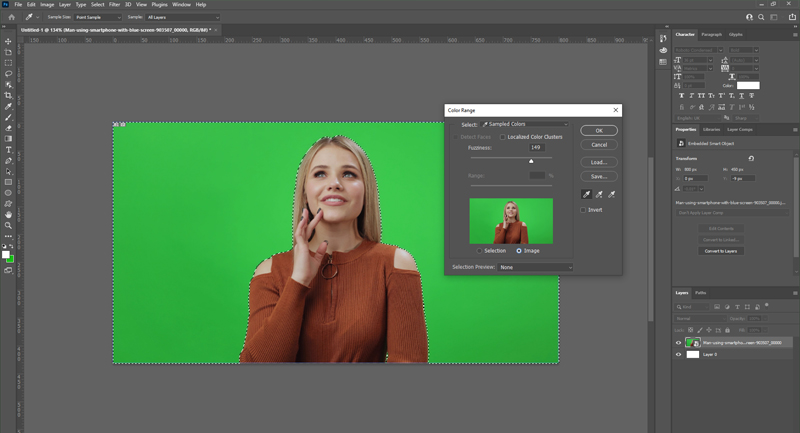
You can employ it in photo and video editing software by selecting a color range and replacing it with pure white or maybe making it transparent to allow textured background. This operation is called “keying out colors”. Adjustments in still image can be made with additional use of magic wand or lasso clipping paths.
Let’s have a look at what benefits chroma keying brings to product photography and videography.
Chroma keying pros & cons
+ cost effective
There is little investment required to introduce chroma keying to your photography processes. Green or differently colored screens plus editing software with staffing will generally be the only requirements.
+ reliable
This method has been present in business for a long time, first introduced on a serious scale in television. You can be sure that contrasting backgrounds will make it relatively easy to manipulate the photo in post-processing. This way to white background remains detail-sensitive and highly adjustable.
+ works also for videos
The biggest advantage of chroma keying is its operability for videos. Should you involve models in your work or aim at lively product videos, this method will do the white background job for video streams. Just choose a video-editing software suite that fits your needs.
– requires editing skills
This difficulty is not actually a huge differentiator between the methods. Most of them require editing skills and at least a basic understanding of Photoshop techniques. Taking care of your staff Photoshop preparation will always pay off.
– time consuming
Work with chroma keying requires plenty of manual adjustments such as edge refining and color spill corrections. A retoucher will have to devote more processing time, if products belong to a difficult category.
– not suitable for all products
Transparent or highly reflective products can turn out to be nearly impossible to handle with chroma keying. This method is a no go for glassware or even jewellery.
How to use chroma keying to obtain white background?
For beginner users we prepared a short guide on what chroma keying consists in. We described two stages – lighting, capture, and editing to make it easier to understand and try it “at home”.
Lighting
… first evenly light the chroma key backdrop
… avoid shadows and wrinkles on the backdrop (the more even and smooth the backdrop, the better masking result you will obtain)
… lighting of a product must match the lighting of the new background to look natural. If it is a solid color background, like pure white, this requirement can be skipped.
Capture
… it is best to use RAW files, as they contain the most image data and allow more extensive editing without losing detail/quality of the image.
… place the subject item as far from the backdrop as possible (to avoid color spill on its edges).
… avoid under or overexposure – decreased saturation of the key colour and more noise would render worse masking results.
Editing
… crop the image to required size before editing.
… increase the key colour saturation.
… select the key color range.
… create a mask from the selection to allow further manual tweaking with the use of e.g. the brush tool.
…refine the edges of the product.
…fix the color spill with color replacement tools.
What’s in this method for e-commerce?
The first and foremost advantage of chroma keying for e-commerce is its availability for videos. Very often, an e-shop will require video 360 spins or live model presentations that fit in elegantly with the website layout.
This is when chroma keying comes as an aid, bringing a relatively easy technique for background processing. It is also cost effective, as its main needs focus on screens during the capture and software for post-processing. Naturally, staff will need to be trained to use chroma keying, which incurs additional costs.
And why not choose the most flexible method?
The final choice of the method you will use to obtain white background will be driven by your business needs. You will consider time availability, budgets, and whether you prefer to keep the know-how inside the organization.
Decisions about one-time investments in automation technologies or a constant budgetary position for outsourcing will need to be taken early on. Skill availability on the local market will also be a factor worth considering.
The most flexible white background solution for your business will most probably involve automation due to its unbeatable speed and precision, although learning the skills required for all the methods can be the best way to choose for yourself. Again the size of the business and time requirements will play a role.
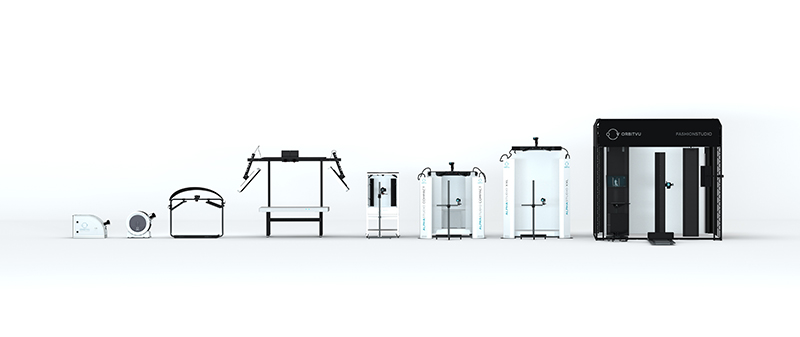
With automation solutions, such as Orbitvu machines that rely on intelligent masking, you will get widely available user support and training. Do not hesitate to contact us for a demo and ask about pricing options. Automation remains the future of white background product photography and an ocean to sail with all-friendly winds.
Good luck!
Contact us
Contact us
Got questions? We'd love to hear from you. Send us a message and we will respond as soon as possible.
Products
Products
Articles you may also like
Artwork photography is art in itself! Artists spend hours if not months to produce beautiful work for the world to enjoy! Wh...
We all waited for the release of Orbitvu Station 21.2.0 “Fancy Biker” last summer. Now the software gets a revision edition i...

When building your clothes business on the Internet, you will face questions about product photography right from the beginni...


