Are you looking for the best lens for product photography? Are you struggling to make an optimal decision within your budget? We know there are literally too many factors to consider when choosing the best lengths for your product photography but we’re here to help. From this article you will learn about the significant features of lenses, understand them and take a look at various examples and brands. Most important aspects of choosing a lens will be taken into account step by step, and not forgetting those related to the budget.
We address the following questions you may have about lenses for product photography:
What is really important in product photography?
Product photography is a subset of still life photography – taking pictures of inanimate objects. It is used in product catalogues, in e-commerce and its main goal is to depict a product as it is, in an attractive way. Good quality product photography is important for e-commerce as it provides information about a product, builds customer’s confidence, and reduces the number of questions.
In contrast, the goal of commercial (advertising, styled) product photography is to create emotions around the product and tell a story about it. It will aim to attract and engage a potential customer in a story.
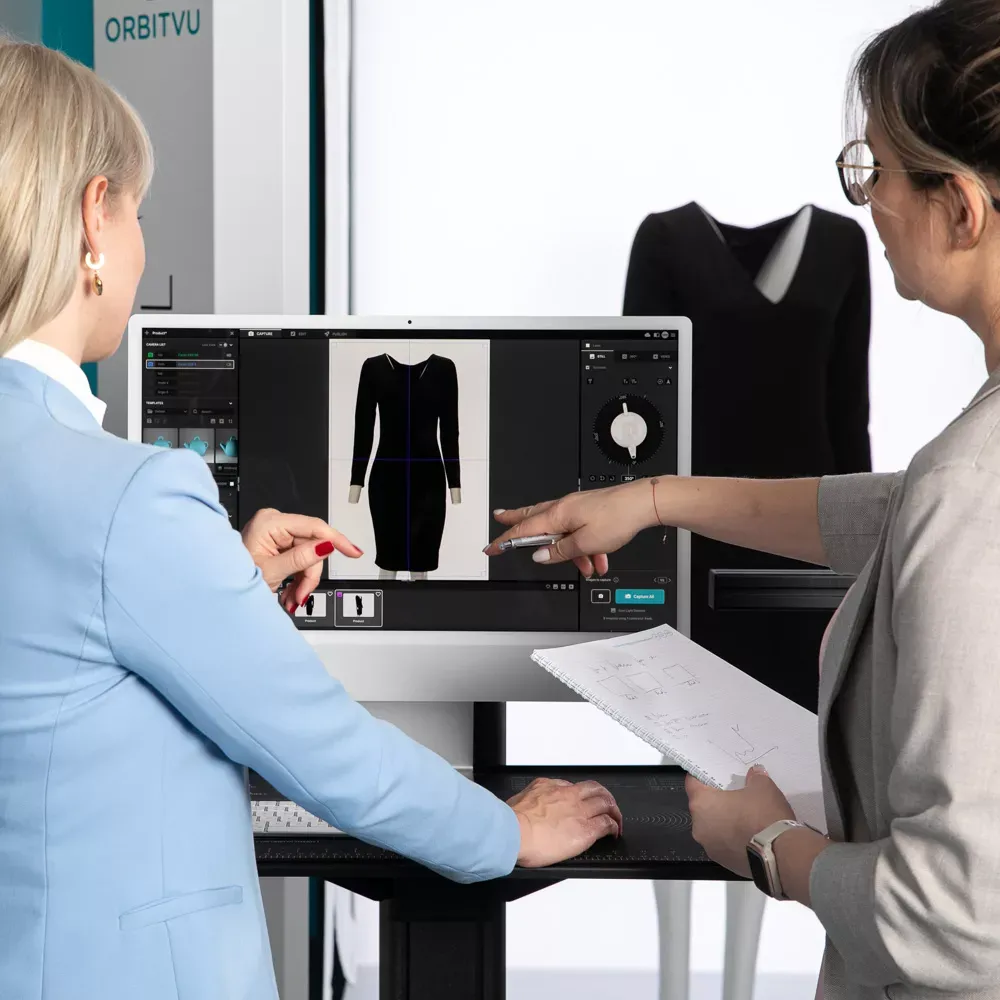
Both types of still life photography can be put into practice with the help of a traditional or automated photo studio. Your studio setup will require different lenses for different purposes. And indeed, the decision whether you wish to engage in commercial or product photography will be defining your choice of lens.
It is exactly the optical setup of your equipment that will be of key importance to produce good product photography. Read on to our “what is important in a lens?” and “how to proceed with settings?” sections to gain useful information for your choice of lens.
What are the features of lenses and which of them I need the most?
Focal length
Notice the focal length specification marked on the lens
The focal length of a lens determines the angle of view – how much of the scene will be captured. It is correlated with the magnification (or zoom) – how large individual elements will be. Mathematically speaking, focal length is the calculation of the optical distance between the focal point of a lens and the sensor in the moment when the subject is in focus.
The longer the focal length, the narrower the angle of view and the higher the magnification. The shorter the focal length, the wider the angle of view and the lower the magnification.
The photos show the difference in magnification depending on focal length (distance from the subject was the same for each picture).
Physics aside, for product photography, you should choose a lens with a focal length of at least 50mm or preferably, a higher one. Lenses with a focal length smaller than 50mm can force you to deal with the wide-angle distortion.An example of this fault is visible in the first picture below. The longer the focal length when photographing an object of the same size, the further you have to move it away from the object. Thus, when choosing a lens, remember about the size of the studio space you use.
Magnification ratio
This is a parameter that often remains hidden from a first-time buyer as you would most often have to look into technical specifications of the lens model to find it. It remains crucial for the quality of macro photography and thus is worth considering.
The better your magnification ratio, the more detailed your pictures of small products will be. Imagine a small earring magnified to double its size without a loss of detail. This is what you are aiming at with the magnification ratio.
Technically, magnification ratio is the size ratio at which the photographed object is thrown on the sensor of the camera. A 2cm wide ring shot with a 1:1 magnification lens will be depicted on the sensor with a size of 2cm, while a 1:2 lens will render a 1cm object on the sensor. Simply speaking, look for a higher magnification ratio to achieve better results.
Magnification ratio remains correlated with minimum focusing distance (described below), as the maximum scale is achieved only at the closest distance a lens is able to focus.
The images represent a growing magnification ratio and the resulting size of image on the sensor: 2:1, 1:1, and 2:1 respectively.
Minimum focusing distance
Each lens has a focusing distance limitation – the minimal distance from which the lens can focus on the product. When the distance between the camera and the item is smaller than provided in the lens specification, it will not be able to catch focus properly. You might have to move the camera away from the product.
In some situations, when you cannot move the camera further from your product (e.g. when using a fixed position in an automated photo booth), you need to manipulate the product. Otherwise, the lens may turn out to be useless.
Image quality in product photography
Today’s customers expect high-quality images. Even though they often use small resolution smartphone screens to view your website, the image has to be sharp for other purposes as well. For example, you might need your pictures for publication in print or on a website, to be seen on large computer screens.
There are a lot of factors which affect the quality of the final image and lenses are the most important. You should make sure that the lens gives you overall sharpness, from corner to corner. Especially, when you plan to crop detail images from a high-resolution picture.
Image shot in low resolution causes the close-up to be of bad quality.
Image shot in high resolution allows for high-quality close-ups.
Which lens settings should I choose?
What aperture value for product photography?
Aperture is one of the exposure parameters, next to shutter speed and ISO. It indicates the hole of variable diameter inside the lens, through which light travels into the camera body and onto the image sensor. Simply speaking, It regulates the amount of light which the camera sensor will receive. Thus, it correlates to image brightness and affects the image quality and its depth of field.
In product photography the aperture stays key to maintaining high quality sharp image and comes into close interplay with shutter speed and ISO. It is one of the questions you cannot omit, if you are interested in the best camera settings for product photography. Read our extensive guide on the aperture to discover how precisely you can manipulate this setting for various effects. For now, a short graphic to acquaint you with the basics.
What is depth of field?
Depth of field determines how deep into the plan the image stays in focus (remains sharp). It is the distance between the nearest and the furthest object that comes in acceptably sharp focus in an image. Depth of field depends on:
- focal length – the bigger focal length, the smaller the depth of field
- distance between camera and item – the smaller the distance, the smaller the depth of field;
- aperture – the bigger the value of the aperture, the bigger the depth of field
As it is an immensely complicated topic that repeats across all styles of photography, for detailed information about focal length and depth of field refer to our extensive guides devoted individually to these parameters.
Image quality vs aperture value
Apart from brightness and focal length, aperture affects the image quality. In general, most lenses are at their sharpest at middle values of aperture, like f/7, f/11.
f/22 details get blurred
f/11 details are sharp
Keeping in mind that your product photography will require an aperture value of around f/11, it is worth adjusting ISO and shutter speed values accordingly. This order of settings will allow you to keep the sharpness, while still retaining control over brightness.
When choosing a lens for product photography, you need to take into account the depth of field you need, the aperture that you are going to use and the quality that is available at this aperture. Different lenses will have different quality at different aperture values. In general, it’s best to keep aperture values of f/16 or below (f/11, f/7).
In some cases, e.g. in high qualityjewellery photography, you may need to use apertures from the range of f/4 – f/5.6 to achieve the best quality (though compromising the depth of field). In this case, to achieve a bigger depth of field, you can use software techniques such as focus stacking.
Comparison of pictures taken with aperture f/2.8, f/29 and with focus stacking
What is focus stacking for macro photography?
Macro photography is demanding. Product pictures shot with macro lenses offer high level of detail at the cost of focus difficulties. The background and more distant features of the product suffer from low depth of field – they can get blurry and disturb the overall impression of the image. Think of a bracelet with a diameter of 5cm where only the front part stays in focus in the resulting picture.
Here, professional photographers come up with a technique called focus stacking to remedy this issue. It is available for all lenses as it depends on focusing solely. Several photos are shot with focus on different areas of the product and then “stacked” onto each other using post-processing software. The result is usually a crisp sharp image of the product with maximum depth of field (read on to “lens settings” section for more on depth of field manipulation).
The focus stacking technique in macro product photography is automatically implemented in Orbitvu photo studios and known as “Super Focus”. It will allow you to shoot good macro photos of your products while sparing your work-time in the post-processing software.
Most frequent issues with lenses for product photography
Anyone involved with product photography has already identified several areas which might pose risks to the quality of final images. For a start, let us tell you about several basic faults of lenses.
Chromatic aberration
Chromatic aberration is an optical problem of a lens. It happens when there is high contrast between the white background and dark edges of an item. A frequent risk for product photographers, as they usually use white backgrounds.
As a result of chromatic aberration, you can see “fringes” of different colours along the boundaries between dark and bright parts. Even though it is possible to eliminate chromatic aberration in post-production, choosing a high-quality lens with minimal chromatic aberration will better serve your needs and save your time.
These pictures show chromatic aberration in macro and outdoor photography.
Vignetting
Vignetting is an optical problem which causes the lens to underexpose image corners when comparing to the centre of the image. Its level is higher when using lower aperture values, which may happen when aiming at a blurred background. In varifocal lenses vignetting will decrease with the growth of focal length.
Vignetting may occur more frequently when using a varifocal lens and its maximum and minimum focal lenghts. The risk hides also here in the potential distortion (see below). These two faults make the use of 50mm and above prime lens the standard choice for product photography.
To help you understand vignetting…
Distortion
There are two types of distortion – perspective and optical. You can get the perspective one when you e.g. use a wide lens. And it is intended in most cases then. Optical distortion is a lens error which makes straight lines appear to be curves. The effect depends on the construction of the lens – a good lens reduces this effect.
What is NOT important in your choice?
There are lens features which add to the price and play its role in shooting action – ports, models, videos. They do not bring benefits for product photography.
Minimum aperture
Minimum aperture is the smallest value or the biggest hole which can be formed in a photographic lens. In the model description of the lens you will usually find a minimal aperture range, right next to the focal length (e.g. 24-105mm f/3.5-5.6). This range reflects the largest possible aperture depending on the focal length used. In this case, the 105mm focal length allows the smallest aperture value of f/5.6 and the 24mm focal length allows f/3.5 minimum aperture value.
More expensive lenses allow you to use the same minimum aperture value throughout the entire zoom range. The most expensive lenses (so-called fast lenses) allow you to achieve very large apertures in the range of f/1.2-f/2. In the case of product photography, this is usually not important as small apertures are rarely used due to very shallow depth of field.
The specification of minimum aperture for a focal length is marked on the lens.
Fast focusing
Fast-focusing is not the most important feature of a product photography lens as your item does not move. This is what you should think about when considering the purchase of lenses to shoot action: e.g. in a reportage or in sports photography.
Silent autofocus
This feature would be helpful when recording a video with sound. When you use the lens for product photography, it is not as important. No sound, no problem.
Image stabilization
It is practical when shooting handheld video or when you take pictures free-hand. When taking pictures in a photo studio, you will be using a tripod or a similar camera support so there will be no need for image stabilization.
In the case of some photo-automation solutions (e.g. Orbitvu Alphashot) stabilization has to be permanently disabled when taking images with background removal.
Mirrorless cameras have the image stabilization feature in the camera body. Problem solved – there is no longer a need to buy lenses with this option built-in.
How to choose a lens? – a step by step guide
With many lenses to choose from on the market, the decision can be difficult and will require some consideration. That’s why we’ve decided to guide you through the process with a step-by-step tutorial.
1. Think about the budget you want to spend on purchasing the lens.
Firstly, the camera model is important. It will be the body that makes good use of the lens potential. If you need to choose and do not have an unlimited budget, it is better to acquire a crop-sensor camera and its dedicated lenses.
Secondly, remember that good quality photos can bring you more profit, so take into account how much you can get out of your lens itself.
Last but not least, lenses tend to lose value over time much less than cameras and usually will be used longer than a camera.
2. Take into account all of the functionalities.
Image quality and sharpness, minimum focusing distance and focal length remain key. You already know that, so your lens decision might be a step further now.
3. Full-frame or crop-frame sensor?
Every digital camera has an image sensor inside which collects information about the image which is taken. The sensor size in your camera poses a question for the choice of lens due to variations that it causes in available focal length.
A full frame sensoris a digital version of a 35mm film frame. Full frame cameras, in most cases, offer more flexibility. You can use a higher ISO value without getting significant grain effect. It also guarantees, which is important to product photographers, higher image quality. The full-frame is more often used by professionals and the price is higher than the price of crop frame cameras. Additionally, full-frame cameras have smaller depth of field.
A crop frame camera has a smaller sensor. Modern crop cameras can give very satisfying results at lower costs. If you need images for your online shop, you should be able to find some models which will suit your requirements. Smaller sensor means a bigger depth of field than in full-frame cameras.
Canon EOS 77D – crop frame sensor
Canon EOS 5DSR – full-frame sensor
It remains possible to use some DX lenses (for crop sensors) on a full-frame camera body. The cameras should automatically switch to DX mode and use only a part of their sensor, one of the same size as in case of a crop frame camera. This, however, happens only if the camera has the “auto-cropping” option and at a loss of resolution. Still, beware of mount compatibility issues between DX lenses and full-frame cameras – always check the specifications.
In case you want to use a full-frame lens with a crop sensor camera you need to recalculate the effective focal length multiplying it by the crop factor (e.g. 1.5). To show it on an example, crop lenses with focal length 35-135mm used in a full-frame camera will have an effective focal length of ~50-200mm.
4. Choose the brand.
Each brand that produces a body kit has a different lens mount. You cannot use a Nikkor lens for a Canon body and vice versa – a Canon lens for a Nikon body.
You may also wonder whether to buy lenses from brands other than camera manufacturers. Consider Tamron or Sigma here, who are producers with a significant popularity. In this case, you must remember that the specification should include the type of mount for which the lens was manufactured (e.g. Canon, Nikon, Olympus, Sony). A lens from non-producer brands can be a pretty good compromise – the price is usually lower, while the quality corresponds to that of the original camera producer-branded one.
Sony Alpha 7R and Canon EOS 77D with dedicated lenses
Remember that these so-called “replacements” may have a different mode of operation, i.e. you will need tocalibrate your body with the lens from time to time. Otherwise, you might obtain an unwanted effect of back or front focus. This means that the focal point in the taken picture is shifted in relation to the point you chose while taking the picture.
5. Choose a lens with an appropriate focal length.
Types of lenses – focal length
The focal length changes across a wide range of different types of lenses on the market. Main types can be summed up as follows:
- varifocal lens (zoom lens) – allows the focal length to be adjusted within a range (e.g. 27-70mm, 25-105mm, etc.);
- prime lens – offers only one fixed focal length (the most popular and universal is 50mm).
If you photograph items of different sizes, a varifocal lens will allow you to adjust the zoom level to the subject size at any moment. When using a prime lense the only option to zoom-out the image is to move the camera and the lens further from the object. With a zoom lens you can simply make the zoom wider (smaller focal length) without changing the camera position.
When you use a fixed lens, you will always have the same focal length, the same angle of view. Although the work can be less comfortable and present some limitations, you will always get the same focal length results. The standard lens, which is 50mm, has a focal length near the optimal 44mm, similar to human vision.
6. Check the lens specification and use a lens comparison website before the final decision.
You may have realized so far that the parameters of lenses are a complicated multi-dimensional question. To your help in confusing situations come websites such as Digital Photography Review, which offer lens comparison engines and articles. There will be many details listed in a clear table form and an option to compare several lenses. Try this link for their useful comparison tool.
Digital Photography Review – choose your lenses to compare!
When it comes to lenses, they all have faults to a bigger or smaller extent, so be as precise as you can. Keep in mind the quality contributors we mentioned above – focal length, aperture, magnification ratio, and so on. The comparison engine will provide plenty of information you will find useful – compatibility, prices, physical descriptions.
Recommended lens for product photography
Do you remember the feeling of having to look into the thick technical specification and manual booklets of any equipment you buy? Don’t worry, it’s a normal reaction to their specifically difficult language and big volume. However, this time we would like to invite you to have a look into the detailed description of the lens you intend to buy.
Search there at least for the magnification ratio parameter, one of the less advertised ways to good quality macro photos. Most of your potential buys will already have a “macro” label but with a dive into the tables you will be able to better compare and analyze the pros and cons.
From us, here comes a recommendation shortlist of lenses from various brands. We paid attention to the focusing parameters and all the factors we mentioned earlier. It would be important for you to remember that all producers use different mutually incompatible mounts for their lenses. The mount can differ from DSLR to mirrorless even within one brand. Build your set carefully also minding whether you use a crop-frame or full-frame camera.
A screenshot from a DPR comparison of chosen recommended lenses.
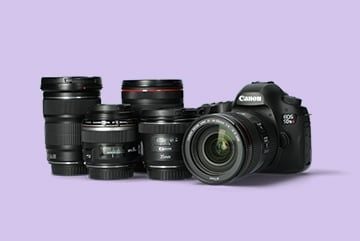
Canon:
Canon EF-S 18-135mm f/3.5-5.6 IS STM – (for crop-frame cameras) You get a very versatile focal length for various needs of product photography. The lens is well-priced and, for Canon, offers a good price-quality ratio. optimal price-quality / versatile focal length
Canon EF 24-105 mm f/4 L EF IS II USM– (for full-frame cameras) Again a very wide range of focal length. The L (L- very sharp) series has the best focus parameters and low distortion. high quality / average price
Canon EF 100mm f/2.8L Macro IS USM– (for full-frame cameras) This prime lens has a very good magnification ratio, focusing parameters and low distortion. extremely sharp / high quality / 1:1 magnification ratio
Nikon:
Nikon allows the use of their DX lenses (models dedicated to crop-frame cameras) for both crop-frame and full-frame cameras with a hint that you must recalculate focal length and you may run into a strong vignetting effect.
Nikon AF-S VR Micro-NIKKOR 105mm f/2.8G IF – Expect good focusing and magnification ratio. It is a lens dedicated to macro photography. 1:1 magnification ratio / good quality
Nikon AF-S FX NIKKOR 24-70 mm f/2.8E – Universal focal length and good focusing parameters. expensive / sharp
Nikon AF-S FX Nikkor 50mm f/1.8G (for full-frame cameras) Treat this lens as an entry-level option for product photography. It has a standard focal length and a good price. Very good price / a lens for the start of adventure in product photography
Sony:
Sony E18-135 – (for crop-frame cameras) Should you decide to use Sony, this lens offers versatility in focal length and image stabilization. well-priced / system lens for Sony
Sony E55-210 OSS – (for crop-frame cameras) Expect a basic-level, well-priced, and versatile (even for high focal lengths) solution with this lens. good price / system lens for Sony
Sony FE24-105 G – (for full-frame cameras) – Here, you will be very satisfied with the focusing parameters and focal lengths perfect for product photography. average price / high quality / sharp
Sony FE 50 mm F2.8 – (for full-frame cameras) This one, dedicated to macro photography, wins a lot for its outstanding magnification ratio in this price range. very good price / starter lens
Sony FE 90 mm F2.8 Macro G OSS – (for full-frame cameras) This macro lens has very good focusing parameters and a noteworthy magnification ratio. very sharp / good overall quality
Third-party lenses:
If your budget is limited, you may consider one of the third-party lenses.
Sigma C 18-200/3.5-6.3 C DC MACRO OS HSM –(for crop-frame cameras) This Sigma, while in macro mode, offers a better magnification ratio than most standard lenses. good price / macro capabilities
Sigma AF 105/2.8 MACRO EX DG OS HSM– This prime lens can do its job for macro photography. A good magnification ratio would be its key advantage. very sharp / 1:1 magnification ratio
Tamron 35-150mm F/2.8-4 Di VC OSD –If you are looking for a varifocal lens in moderate price and one effective in product photography, this Tamron might be of interest to you. universal / less distortion
Tamron SP 90mm F/2.8 Di MACRO 1:1 VC USD –The advantage of this macro lens would be the 1:1 magnification ratio achieved within a good price range. 1:1 magnification ratio / very sharp
Lens recommendations for automated product photography
If you are looking for lenses to be used in photography automation solutions (e.g. Orbitvu Alphashot) your choice will be limited to camera brands supported by the photography automation system. Nowadays it will usually be Canon, since Canon provides the most versatile support for third party solutions. In case of Orbitvu automation you can find more detailed information on our compatibility webpage.
Summary
The core of this article was designed to help you to decide which equipment is the best fit for you. We tried to base it on all your product photography needs and modern market requirements. And to speak from experience.
We hope you will get a tonne of satisfying results. Setup your studio, equip it with a good camera supported by an optimal lens and the journey begins. The experience and practical knowledge of lens specifications will come with time.
Should you want to read more tips about creating content, have a look at our other guides to product photography.
Talk to Orbitvu about your workflow
Use the form to tell us what you are planning and what kind of product content workflow you need.