Table of contents
Challenges in the spare parts photography
One of the challenges with photographing spare parts is the number of products. There are a lot of categories, accessories, types, and producers, so it may be hard to keep track of all of them. And, certain spare parts may be located in hard-to-reach areas within machinery or equipment, making it difficult to access and photograph them properly. Additionally, parts may need to be positioned in specific ways to capture all the necessary angles, which can be time-consuming and require experience.
There’s also the challenge of the size and scale. The size of products varies from little screws to big ones such as car seats, so it can be a bit annoying to change the lighting setup for every single part you shoot. Not to mention the scale of products, so how to show small and big objects with respect to their actual size. Because if you do it wrong, you can accidentally create an illusion that the screw is the same size as the car seat.
In industries where spare parts are manufactured and supplied, there is often a need for standardized documentation. And that’s another challenge that has to be taken care of somehow. Photographing spare parts consistently and in a standardized manner can be demanding, as it requires careful attention to detail and adherence to specific guidelines.
The last challenge may be that most parts are made from metal, transparent, and mirrored materials, which means that they are highly reflective. Also, some spare parts may have unique textures or specific colors that need to be accurately represented in photographs. Capturing these textures and colors with precision can be tough, especially if the part has a complex surface or subtle variations.
Traditional vs. automated photography studio - where to start?
Now let’s think about how you are going to do it. Choosing the method will determine your workflow and help you establish how much time you need for the whole process.
Traditional photography studio
A traditional photography studio relies on manual labor and meticulous attention to detail. In this setting, photographers take on the task of setting up lighting, adjusting camera settings, and positioning spare parts to capture the desired shots. This method offers a high level of control and creativity, allowing photographers to bring their artistic touch to the process.
However, traditional studios can be time-consuming and labor-intensive, particularly when dealing with a large number of parts. Also, maintaining consistency in lighting and composition across multiple images can be a significant challenge, requiring constant adjustments and fine-tuning.
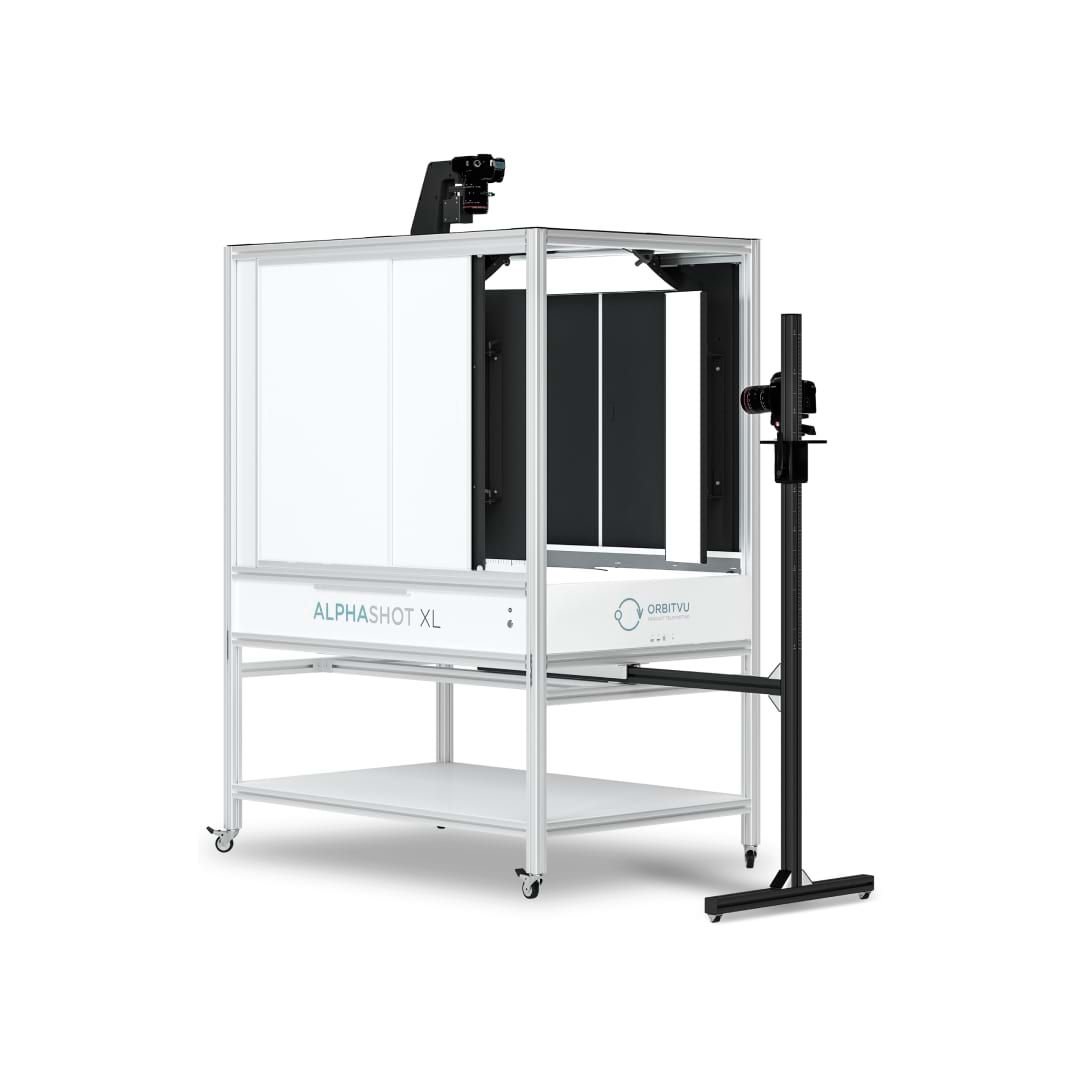
Automated solutions
In contrast, an automated photography studios, like Orbitvu devices, provide a streamlined and efficient approach to spare parts photography. With the help of advanced robotics and software, the process can be largely automated, minimizing the need for human intervention. Technology allows for precise positioning of parts, consistent lighting conditions, and rapid image acquisition. By eliminating manual adjustments and repetitive tasks, an automated studio significantly increases productivity and reduces costs in the long run.
However, you should keep in mind that while automation brings speed and consistency, it may lack the artistic touch and creative decision-making capabilities that a skilled photographer can provide. In instances where spare parts possess intricate details or unique features, a human eye may be necessary to capture their essence effectively.
Solution? Striking a balance between automation and human expertise. This can lead to optimal results in spare parts photography, combining efficiency with the artistic finesse of a photographer.
10 expert tips on how to photograph spare parts
Let’s go through our 10 photography tips. In some of the insights, we’ll also show you how automated solutions, like Orbitvu, may make the process even easier and more enjoyable.
Sort products by category
The first step before taking photos will be to organize your workspace. So take the list with categories from the e-shop, and sort your products with the list, which will simplify your work on the next steps.
Sorting products before taking pictures enhances the visual appeal, improves the user experience, aids decision-making, and enables search and filter functionality on the website. Think about it. When items are properly sorted, you can integrate search options and filtering features based on various attributes (e.g., make, model, year, price). This empowers customers to narrow down their search results and find the exact automotive products they need or compare those similar to each other, improving their overall shopping experience.
Sorting products not only benefits the customers but also helps in backend management and inventory control. When items are systematically organized, tracking inventory, managing stock levels, and updating product information becomes easier than ever. This simplifies the inventory management process, minimizes errors, and improves overall operational efficiency.

Disorganized vs. organized workspace

Prepare your products
As a professional photographer, you probably know that it's the most time-consuming part of product photography, but not as consuming as manually retouching the product photos in post-processing programs.
If you have, for example, shiny, plastic, or mirrored products that can easily get dirty, you should use white gloves - this way, you will avoid fingerprints. Then, clean your product from dust with compressed air, fingerprints/dirt with cleaning detergent, and a dust-free cloth.
Also, try to cover all scratches with paint, markers, or polishing paste. It will make your product more attractive.
Thanks to properly preparing the product before a photo shoot, you ensure that you present it in the best possible condition.

Scan the product & include the part number
Naming - probably the most important part of a photo shoot. If you do it right, your workflow will go much smoother. So name the product using the producer name and part number and scan the SKU code from the tag. You can also use the SKU code of the product in the photo name. In this way, you will easily find the parts in your files and get back to them in the future.
As we said before, using the correct part number will also help the customer to find the parts they're looking for on your website. But the key to your success is SKU code - you can link your product created in e-commerce with photos added on the FTP panel and combine them quickly and easily. When using Orbitvu devices, you can also export them from Orbitvu Station whenever you want.
Create a template for product categories
Preparing templates for individual categories will save you a lot of trouble and challenges. Just think about it. Setting the lights, camera position, and camera setting in a traditional photo studio can be something really daunting since you need to mark with tape the positions of lamps and tripod as well as write in a notebook the camera aperture, ISO, and exposure. But, if you want to change the positions to shoot another product, you need to unmark everything - that's when you're losing repeatability, and your feed in the e-shop looks like a big mess!
Using automated photography software, like Orbitvu Station, you can save all information about camera settings and light intensity on your computer in product sessions.
Capture the item from all angles
Now, we pass to the easiest and most pleasant stage - the photo shoot. Once you've finished with each previous point, you can start photographing the products. In the Orbitvu devices, you just need to set up the angles you want to capture - remember to use them on all products from the same category so your content will be consistent and more attractive to the user experience. Also, use different angles to best showcase your products so the customers know exactly what they're buying and don't forget details like connections, materials, mounting elements, and futures.

Create 360° spins
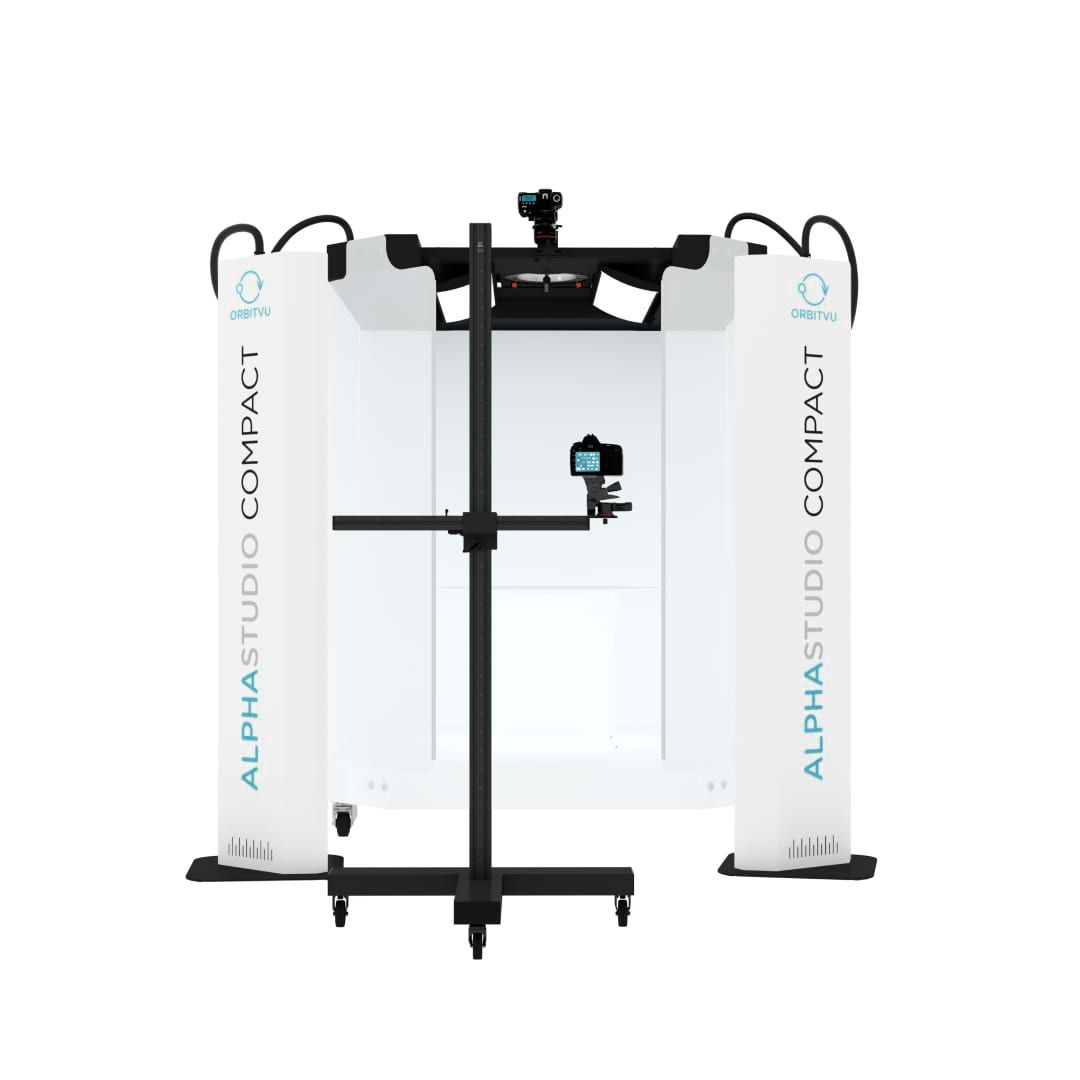
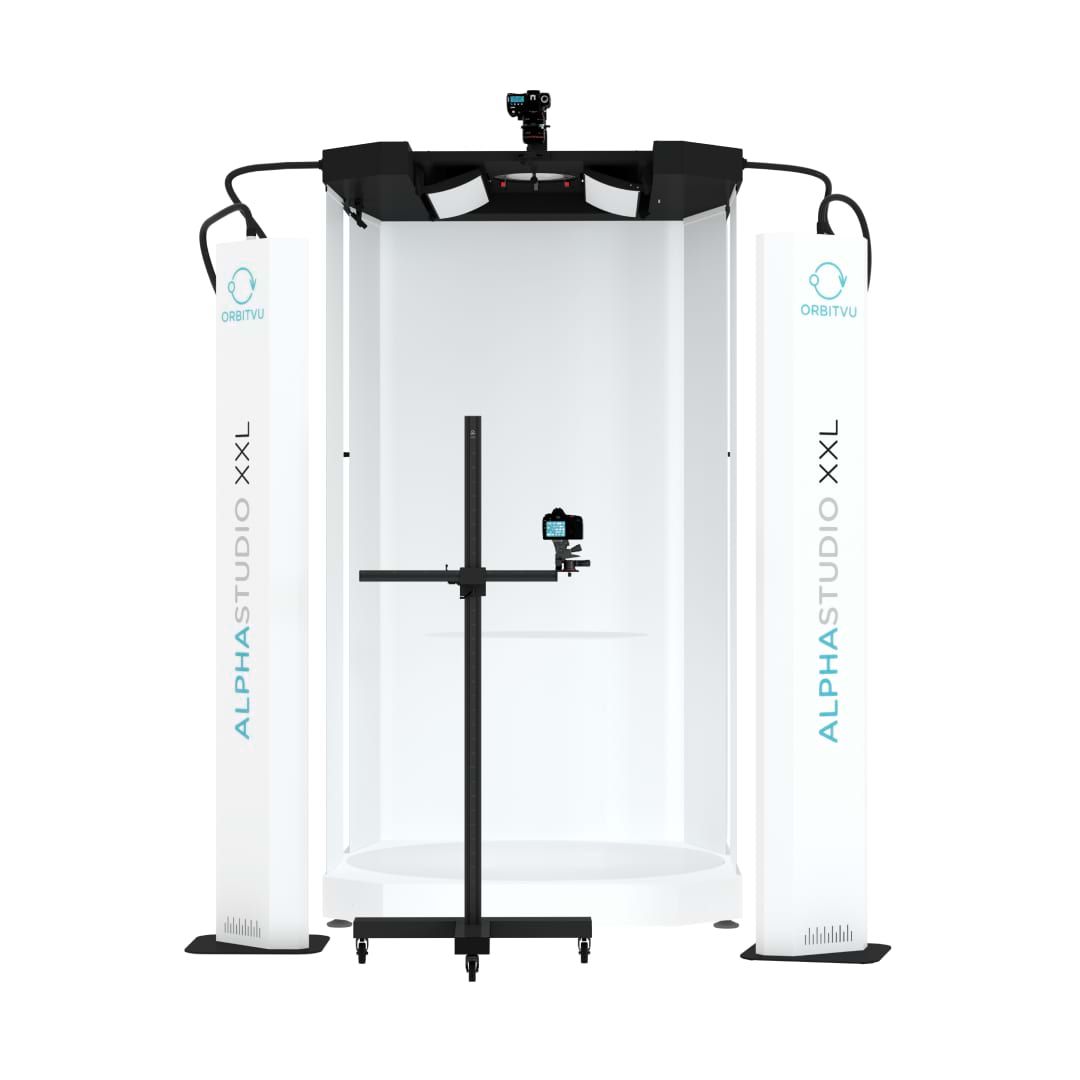
However, the best way to show the product will be to create a 360-degree presentation. Can you imagine making the 360° spin in a traditional studio? Where would you start? And, even if you manage to do a 360-degree spin manually, how are you going to put it together?
With automated photo studios like Orbitvu Alphastudio Compact, you can create 360° spins of your product. Additionally, elevate your content's informativeness with Orbittours (product tours), making your presentations even more engaging!
Creating 360° spins is important in the e-commerce automotive industry because it offers customers a comprehensive and immersive view of the products. By allowing users to rotate and examine the item from every angle, you provide a realistic and interactive experience, replicating the feel of physically inspecting a car part. This boosts customer engagement, builds trust, and enables potential buyers to make more informed decisions, ultimately leading to higher conversion rates and customer satisfaction.
Want to learn more about conversion rates and how product photography can help you improve them? Read our article on how to increase the ecommerce conversion rate.
Use the right accessories to illuminate the product
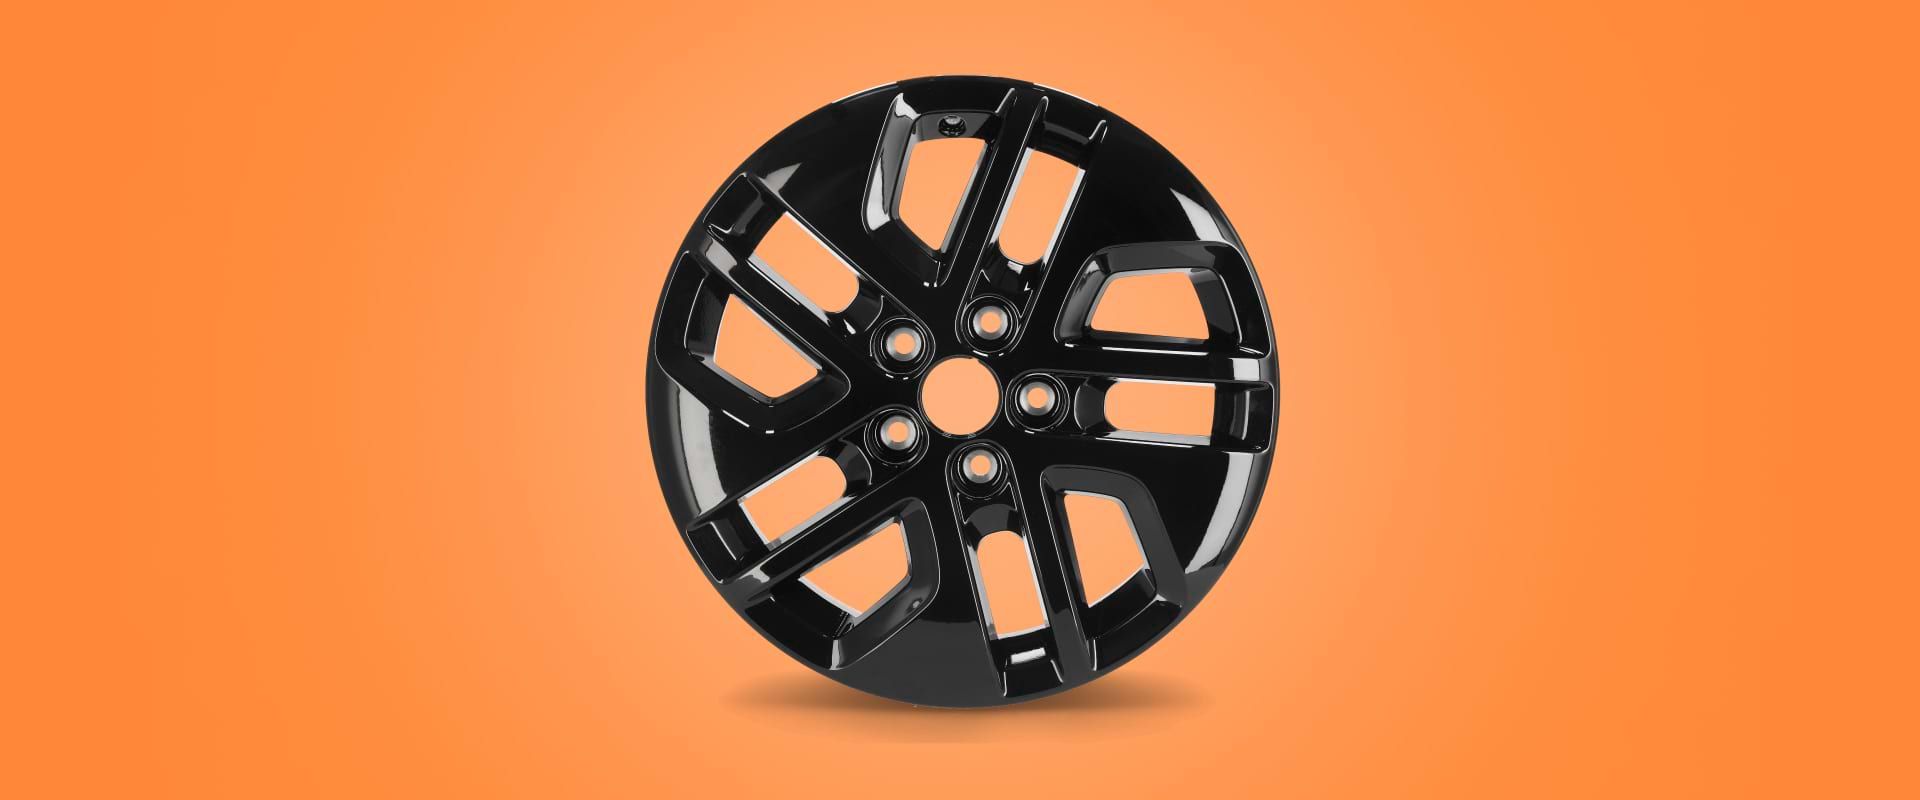
Coming back to the challenges you might have with car parts, we talked about the difficulties in taking pictures of products of this type because of their reflective surfaces.
Let's try to solve this problem - in photography, we need to be very creative, so we should experiment with different types of accessories such as photo umbrellas, polyester reflectors, diffusers, or softboxes with honeycomb. Thanks to such accessories, we can manipulate and control the light to our advantage. These accessories act as tools to reflect and shape the lighting, mitigating glare and unwanted reflections while enhancing the contours and details of the car parts. Through experimentation and ingenuity, we can achieve captivating product images that effectively showcase the unique features of each car part.

Don't overdo it during post-production
Most online stores use gs1 standards, which means they look similar to everyone. What are the standards? For example, the clipping path is recommended within a one-pixel device, while the background should be removed to white (RGB 255/255/255).
Unfortunately, the reflective nature of spare parts makes the products even harder to photograph - you can't put too much light on the background because it will make your products overexposed, but if you don't use enough light, you will need to cut the background manually.

Overexposed product photo vs. well-lit product photo

AI, as of today, is able to remove the background from most products, but this can be imperfect with highly reflective products, since the image analysis is done after the photo is taken. This can be solved by using a technology other than AI, like our IQ Mask, which does not cut the background from a single finished photo but takes a separate photo to cut the product from the background, preserving the perfect shape of the product.
Learn more on how to achieve the perfect white background from our guide - The best solutions for white background – a guide.
Publish the photo with the SKU number
When you're done with the photo session, with good naming, and with the SKU number, you can start the publication process. Now it will be easy. Just add the list of your products and combine them with the photos. Of course, when you do it manually, you need to go product by product to upload the content.
Let's compare it to automated solutions such as Orbitvu Station, which make it much easier and faster - just choose the export section, the destination, where you want to post the photos, as well as the resolution, watermark, and other settings like product shadow or reflection that will make your product even prettier.
Ensure that the content is coherent
Everything is ready; your products are already online, so let me give you the last tip for a finish line. Once you have all those product photos, remember about content consistency across your e-commerce website - showcase your product from the same angle and use the same pure white background (it's especially important if you sell on e-commerce platforms like Amazon or eBay) to create a sense of harmony and order. This will boost your user experience since visitors will have no trouble browsing through the products.

All in all
Summing up, you can see that working with an automated photo studio will be more effective, more optimized, and will help you avoid human errors when compared to the traditional photo studio.
The key benefits for a photographer include the following:
- Templates - thanks to them, you will maintain the consistency and repeatability of photo shots.
- Pure white background - by using IQ mask solutions, you will save time during post-production and adapt photo backgrounds to current standards in e-commerce.
- Easy publication - correct naming and adding SKU codes to the session will help you avoid human errors and speed up the process of publishing photos on the site.
Want to see the process in action? Check out our video on how to photograph spare parts and see how easy it is to take industrial products images with automation!
As you can see, shooting spare parts doesn't have to be hard work. With a few of our tips and the help of automated product photography, the workflow is easy and enjoyable, while the product images can be uploaded in bulk in a record time.
Want to learn more about Orbitvu solutions for product photography? Reach out to us! We’d love to talk to you about what automated product photography can do for your business.