July 10, 2026
How to create a fashion lookbook: a step-by-step guide
Learn how to create a fashion lookbook from planning to publishing, and see how to speed up production with in-house automation.
Learn the essentials of packshot photography for high-quality product images. Choose the right camera settings and master lighting techniques. Read Now!
Table of contents
There is an increased demand for packshots, which appear in catalogues, billboards and e-commerce sites, in all sectors of marketing and sales. Product photography broke into the market for good and continues to conquer new areas.
In this guide, we will cover the basics of packshot photography with its benefits, process, and various areas of usage. Let's dive in!
Packshot photography, also called packaging photography, is a type of product photography that focuses on capturing the item along with the packaging and labels. Packshot images can "take" various shapes, like 3D photos, so you can adjust how you show off your products.
The main characteristics of packshot photos:
As you can see, it's about simplicity and, at the same time, providing as much product information as possible. In contrast, lifestyle photography tells a story about a product. The product is usually depicted in its natural environment, while the photographer's main goal is to attract your attention and create positive emotions around the product.
However, not all products are equally easy to capture realistically. Jewelry packshot photography can be especially tricky, as reflective rings, watches, necklaces, and earrings are tiny and detailed. They are also difficult to style, as they sometimes need support to hold them in place. Take care to capture the intricate details of tiny products to allow potential customers to appreciate these dainty components. But more about that later.
As a branch of product photography, packshot photography is closely related to sales and marketing in the e-commerce sector. Salesmen and marketers will refer to packshots when the product needs to be shown precisely and fully, without a distracting background.
Many e-commerce platforms require product photos to have a white background and a defined product-to-frame size ratio. Our dedicated article explains Amazon's product photography requirements.
Very often, catalog and manual creators state additional requirements for photography. For example, spare parts and small details of devices will need a sharp, precise photo on a white background to provide good contrast.
Leaflets, posters, and brochures are examples of good uses of packshot product photography. A product on white or cut from the background can be used in a montage and play well in a composition with text.
Big brands that present their products on billboards can also appreciate the magic of the white background and equalized lighting that packshots can offer. A high-quality packshot will play an informative role in marketing materials.
Absolutely not. It isn't the background that defines product photography. It's the way you choose to photograph the product.
So whether you:
These questions, when answered, will help you categorize the shot as a product one or qualify it as still life.
Transparent background – useful in brochures
White background – product only
Colored background – different reception
In the case of packshot photography, we can easily list characteristics and put forward requirements regarding equipment, light, and camera settings.
The choice between a classical DSLR or a mirrorless camera (which is consistently gaining in popularity) depends only on the size and quality of the sensor. This will further influence the resolution and level of detail you can present in the photo.
The most common camera sensor sizes are full-frame and APS-C. Full-frame sensors traditionally measure 35 mm in width, while APS-C sensors are smaller, measuring 24 mm. What matters for packshot photography is that the APS-C will allow a higher depth of field, i.e., the sharpness of the whole product in the frame (assuming the same settings, such as aperture).
APS-C
Full frame
The choice of lens for product photography comes as the next equipment question. We described the stages of lens choice in our guide. In this case, a macro lens will come in handy. It often offers the best magnification ratio (look for 1:1 at least). This directly corresponds to detail rendering in the final photo.
Macro lens used
Traditional lens used
The work with light in packshot photography revolves around the need to present the product as faithfully as possible. Shape, texture, and color need to be rendered just as in reality so that the customer receives precise information before a purchase decision.
The requirements for lighting in packshot photography sum up to four major points, described in full in our complete guide to product photography. Let's examine them quickly:
Items such as fluffy fabric clothes or electronic equipment will require the photographer to expose much detail and make the photo-realistic while keeping the artistic techniques to a minimum. Unevenly distributed light of different intensities will be perfect for rendering the texture.
Interesting texture
To render the colors without distorting their natural hue, coordinate the white balance in your camera with the light color temperature of the lamps you use. For best results, keep the color temperature around natural sunlight, ca. 5500 K.
There is no actual difference between continuous and flash light in the quality of the produced packshots. However, when choosing continuous light, you won't be limited to slower shutter speeds and will be able to benefit from live view in the camera.
Read more about live view in our article about camera settings for product photography.
Very often, studios for product photography have to be set up in various locations or moved frequently. Unfortunately, because of this, it's harder to achieve content consistency.
Moving a traditional packshot photography studio with lamps will be easier if you draw a setup plan. Don't forget to measure and write down the distances and angles, as well as the strength of the lights.
The entire post-production of a packshot consists of four stages. Firstly, you cut the product from the background. Secondly, you choose a desired uniform background, usually white. Thirdly, you retouch the surface of the photographed item. Finally, you correct the color palette of the photo, manipulating saturation, vibrance, and contrast.
It's important not to overdraw post-production effects in your photo because this may mislead the customer as to color or texture and trigger an unwanted product return.
Read more on reducing your returns rate via product photography in our dedicated blog post.
Just enough post-production
Overdrawn post-production
With automated solutions available on the market, some post-production steps can be eliminated(executed by the machine) or partially automated. Think of automated cutting of the product from the background or a simple adjustment of contrast and sharpness. This is all done within seconds thanks to advanced algorithms and masking technology for cutting out the product and a friendly, accessible user interface for other aspects of post-production.
Even with high Photoshop skills, a human is not able to match the speed of automated background removal. Thousands of products multiplied by minutes in post-production time-savings give significant alternative cost reduction.
Finally, it's necessary to remember that post-production is a means of marketing persuasion. Try to apply it too blatantly, and the result is undone. That's why automation can be a good solution here since it will standardize the photography output of a business with templates.
When it comes to packshot product photography, jewelry is the most challenging. The pieces are tiny, making it difficult to achieve a good depth of field, as well as causing unwanted reflections. However, with care and determination, you can shoot the perfect jewelry packshot. Here's how you do it:
Carefully position your jewelry on the studio set. To perfectly place your jewelry, you might need some support. You can hang earrings on T-bars or use foam boards that you can edit out in the post-production phase. Take a photo of a ring by placing it flat and taking a shot from above. You can also glue the ring to the surface of the set for a beautiful vertical shot.
Remember to clean and polish jewelry before the shoot and wear cotton gloves when positioning these items. A good packshot will capture a high level of detail and might expose marks and blemishes that are not visible to the naked eye.
You can use a full-frame camera to capture the intricate details of jewelry, but you won't achieve a high depth of field. Photographers who rely on a full frame might need to use the photo stacking technique. This method requires photographers to take numerous photos by changing the camera's focus. These photos are then layered and combined in photo-editing software to create an image with a better depth of field.
Some photographers also use APS-C sensors to shoot jewelry packshots. These sensors offer more depth of field, with the photographer positioned further away from the jewelry. Ideally, you'll want to set your aperture to f/11 or higher and lower your ISO to 100.
Lighting for jewelry packshot photography needs to be subtle and diffused. Diffused lighting will minimize reflections. Most items will look best with some front and side lighting. Keep in mind that rings can be challenging to photograph, as their curved shapes cause excessive reflection.
During the post-production phase, you can edit out any supports you used and apply post-processing touches. Because packshots are a faithful representation of the product, you need to ensure that the editing looks natural. Consider the images' sharpness, contrast, and color saturation when you edit, and ensure they are faithful to reality to avoid creating a false representation of the product.
Among technological solutions for packshot photography, you will find plenty of studio equipment ranging from special lights to dedicated white background shooting tables. The market also provides automated solutions in the form of software-manipulated studio booths for different product sizes.
Aiming to shoot packshots of furniture? Or maybe jewelry? You will be able to find solutions tailor-made for both, some requiring more experience than others. What advantages do they bring?
These devices offer dedicated, comfortably shaped white plexiglass or plastic surfaces to position your product. Supported by a backlight and a proper set of lamps, shooting tables allow for the production of packshots with a uniform white background. However, this happens at the cost of plenty of manual work – from ensuring the right equipment to complex post-production.
Knowledge of flashlights will be necessary, as you will need to arrange the lamps yourself, which means choosing the strength and angles. Light diffusers will be a useful addition, and depending on the shooting table model, you will be able to choose different colored backgrounds.
We wrote extensively about shooting tables in our article on the best solution for a white background.
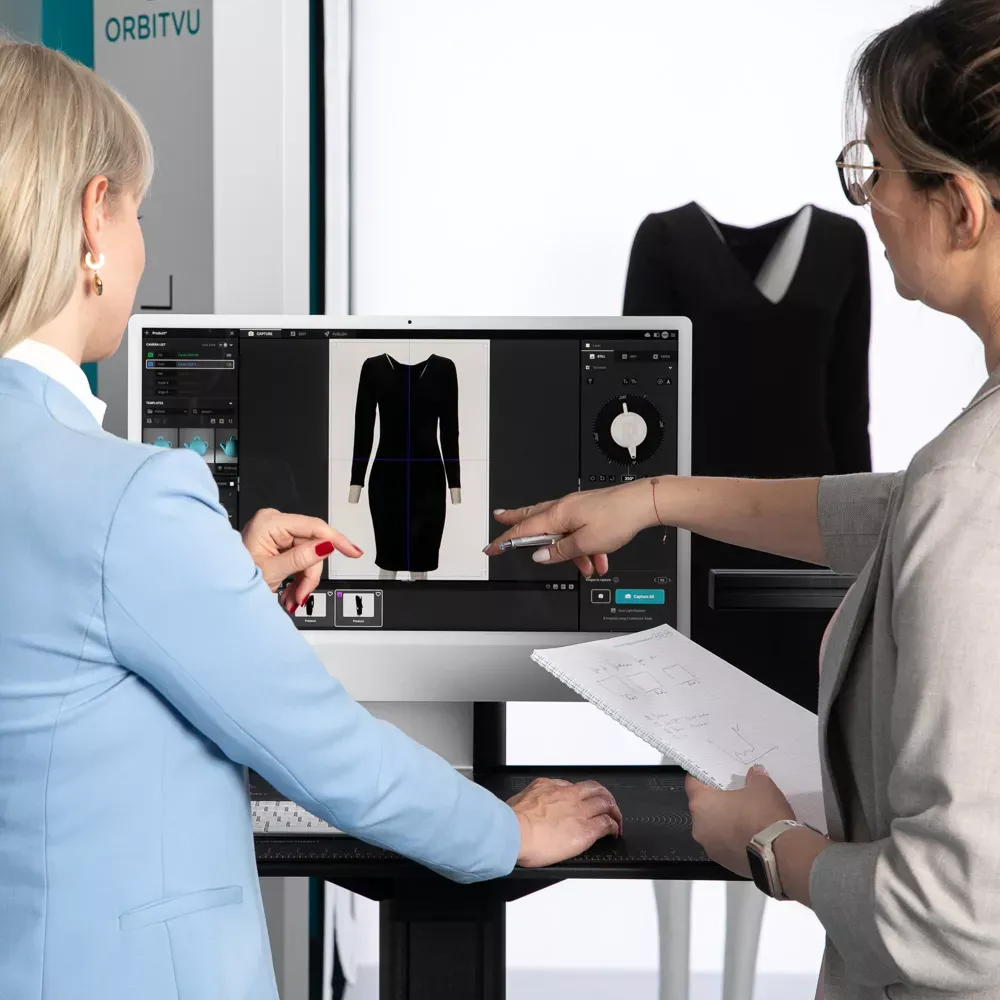
The automation of packshot production has become a game-changer with the rise of software-driven studios. These advanced systems streamline the entire photo shoot process, using templates and guided workflows to simplify image creation—right down to instant publishing on e-commerce platforms.
While automated studios require an initial investment, they quickly pay off by drastically reducing production time and costs. Everything—from capturing the shot to post-production—happens within a single, seamless software suite, eliminating the need for multiple tools or extensive manual work.
One of the standout benefits of automation is the ability to remove backgrounds in seconds. With intelligent masking technology—like Orbitvu’s solutions—you can achieve crisp, white-background images without needing expert photography or editing skills. This translates to even greater savings by reducing the need for outsourcing or additional staff.
While traditional studios still offer the highest level of creative control, automated solutions provide an efficient way to produce high-quality packshots at scale. As your business grows and the demand for product imagery increases, automation will become an invaluable asset.
Curious to see it in action? Watch our video for an inside look at how packshot automation works and how it can transform your workflow.
Product photography | Automated vs Manual - background removal
For anyone armed with the knowledge of what a correct packshot consists of, the approach to packshot photo sessions and post-production becomes a task within reach and a way to constant skill improvement.
Showing the product with as much faithfulness to reality as possible, reducing effects that border on art, and choosing a uniform background are what make packshot photography successful.
Depending on the budget and business purpose, you will make choices as to camera equipment and technological solutions dedicated to packshot photography. These decisions will focus on a balance of high quality and cost-effectiveness and will inevitably turn to automation in your packshot process.
The basic tips and definitions in this article may serve as a stepping stone or a starting point for these decisions. Want to learn more about Orbitvu's automated solutions? Book a demo with our experts and start saving money now!
Use the form to tell us what you are planning and what kind of product content workflow you need.
July 10, 2026
Learn how to create a fashion lookbook from planning to publishing, and see how to speed up production with in-house automation.
June 12, 2026
Learn how to shoot flat lay fashion photos in 2026: setup, lighting, camera settings, post-production, and marketplace-ready exports.
February 18, 2026
Learn how to photograph antiques professionally - from manual techniques and the right gear to automated product photography solutions that save time and deliver consistent results.