In the ever-evolving world of photography, lighting stands as both a challenge and a key to creative excellence. Whether it's capturing the intricate details in product photography or portraying the depth of human expressions in portrait photography, the right lighting can transform a good shot into a great one.
Before you start
This comprehensive guide delves into the complexities of photography lighting, offering solutions and insights for photographers at all levels. From photography lighting basics to mastering light characteristics and choosing the appropriate light sources to understanding sophisticated lighting setups and avoiding common errors, this article illuminates the path to mastering the art of photography lighting.
With practical advice and expert tips, it addresses the challenges photographers face, empowering them with the knowledge to create visually stunning and impactful imagery.
Light characteristics explained
Exploring the nuances of light is pivotal in photography. This chapter sheds light on how varying characteristics like softness, hardness, and directionality can transform your photos.
Lighting in photography isn't just about brightness; it's about character. The nature of the light significantly impacts the look and feel of your shots. Each type has its unique effect, setting the stage for your photographic story.
Soft light: its nature and best uses
Soft light is like a gentle brush, smoothly painting your subject without harsh shadows. It’s forgiving, making it great for portrait photography where you want the light setup to flatter the subject.
Soft light evenly distributes across the scene, reducing contrast and softening details.
An example of soft light
Hard light: dramatic effects and applications
Hard light is your go-to for drama. It’s bold, creating strong shadows and high contrast. Ideal for accentuating textures in product shots or adding a dramatic flair to portraits, hard light can turn an ordinary scene into a striking visual.
An example of hard light
Directional light: shaping your subject
Directional light is all about angles. It creates mood and depth, highlighting specific aspects of your subject. Whether it's sidelight for drama or backlight for silhouettes, the way you direct light can tell different stories.
An illustration of directional light
Lighting arsenal: various options to light your scene
Exploring the diverse lighting options in photography, this chapter focuses on the different tools photographers can use to illuminate their scenes. From the quick bursts of flash to strobe lights to the steady glow of continuous lighting, each source has its unique strengths.
Flash photography: intensity and control
Flash photography is all about delivering a powerful burst of light. Whether it's an in-built camera flash or an external unit, flash provides intense illumination for a brief moment, perfect for freezing motion or adding a dramatic touch. Off-camera flashes offer more flexibility and control, enabling photographers to position the light for the best effect.
Continuous lighting: what you see is what you get
Continuous lighting, such as LED panels, provides a constant light source, allowing photographers to see the lighting effect in real-time. This 'what you see is what you get' approach is particularly beneficial for beginners or when shooting video. While not as intense as a flash, continuous lighting is invaluable for its predictability and ease of use.
Choosing the right light source for your shoot
Selecting the right lighting equipment is crucial for achieving the desired outcome in photography. Factors like the shooting environment, subject matter, and desired effect play a significant role in this choice. Whether it's the portability of flashes or the consistency of continuous lighting, understanding the strengths of each light source is key to successful photography lighting.
Shaping your light: softboxes, reflectors, and beyond
Crafting the perfect light in photography often involves more than just the light source itself. This chapter delves into the world of light shapers like softboxes, reflectors, grids, snoots, and specialty accessories, each playing a pivotal role in manipulating light to achieve the desired photographic effect.
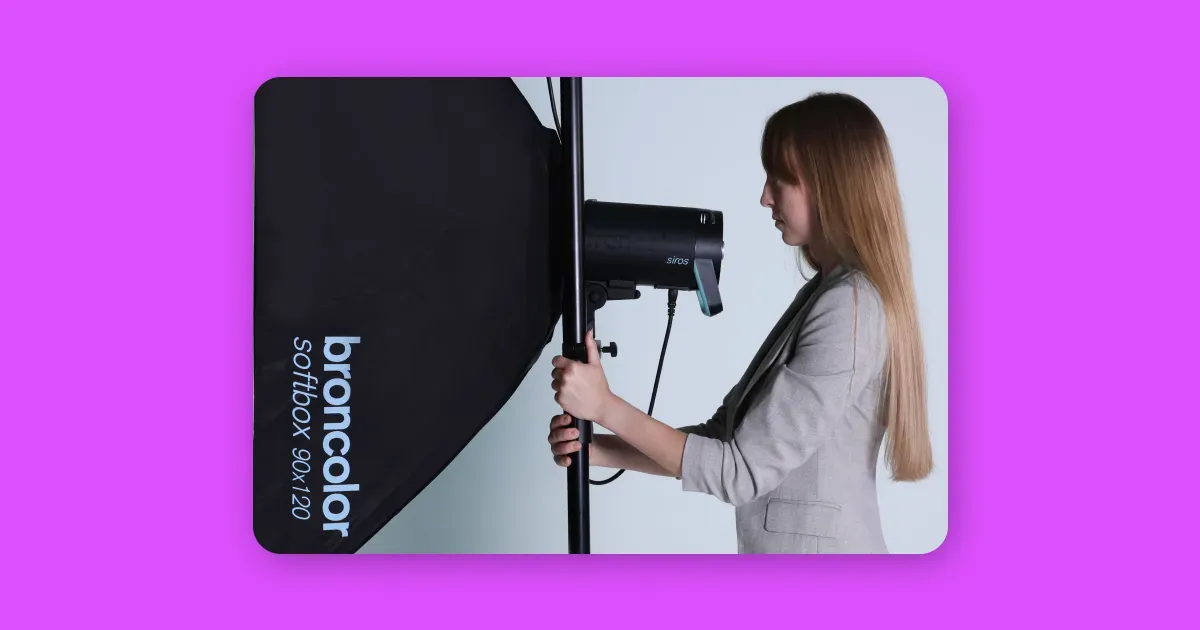
Softboxes: softening and diffusing light
Softboxes are essential for photographers seeking to soften and diffuse light. By transforming harsh light into a more even, gentle glow, softboxes are invaluable for creating flattering light in portraits and reducing deep shadows in product photography. They come in various sizes and shapes, each offering a different quality of light.
Using reflectors for subtle adjustments
Reflectors are discreet workhorses in photography, used to subtly manipulate light. They bounce light back onto the subject and reflect light, filling shadows and enhancing highlights. Reflectors are versatile, and portable, and come in different surfaces — silver, gold, white, and more — each adding a unique touch to the lighting.
Advanced light shaping with grids and snoots
For more precise control over light, grids (honeycombs) and snoots are go-to tools. Grids narrow the light spread, allowing for focused illumination on specific areas, ideal for dramatic effects rim lighting, or highlighting details. Snoots take this a step further, concentrating light into a tight beam for pinpoint accuracy in lighting.
Exploring unique effects with specialty accessories
Beyond the basics, specialty studio lighting and accessories open up a world of creative possibilities. From gels that add color to the light to gobos for patterned shadows, these tools enable photographers to experiment and craft unique, visually striking images. They encourage playfulness and innovation in lighting setups, pushing the boundaries of conventional photography lighting.
A photo with color gels
Essential lighting principles for photographers
Photography is as much about understanding light as it is about capturing moments. This chapter breaks down the fundamental principles of lighting in photography, highlighting the roles of key light, fill light, backlight, and the significance of light ratios portrait lighting technique.
Key light: the cornerstone of lighting setup
The key light is the primary light source in any photography setup. Its placement and intensity set the tone for the entire image. Whether it's casting dramatic shadows for a moody effect or illuminating the subject evenly with one light, the key light is pivotal in defining the subject and directing the viewer's attention.
Fill light: softening shadows and adding depth
Fill light plays a supportive role, softening the shadows created by the key light and adding depth to the image. It helps in revealing details hidden in shadows and reducing contrast for a more natural look. It is essential in achieving a balanced exposure, especially in portrait photography, where subtle nuances in facial expressions need to be captured.
Understanding light ratios
Light ratios, the relationship between the intensity of the key light and fill light, are crucial for creating the desired mood and depth in an image. A higher ratio results in a more dramatic and contrasty image, while a lower ratio yields a flatter, more evenly lit photograph. Understanding and manipulating these ratios allows photographers to craft images with varying degrees of drama and realism.
The role of the backlight in three-point lighting
The backlight, often overlooked, is an integral part of three-point lighting setups. It separates the subject from the background, adding depth and dimension to the image. Positioned opposite the key light, it outlines the subject with a subtle glow or rim light, enhancing the overall composition and bringing a professional polish to portrait lighting in the photograph.
Crafting the perfect balance
Lighting ratios are fundamental in photography, as they dictate the balance between light and shadow, influencing the mood and depth of an image. This chapter explains how to use lighting ratios effectively, ensuring dynamic, consistent, and visually impactful photography.
Fine-tuning ratios for dynamic imagery
Dynamic imagery often hinges on the interplay between light and dark. By fine-tuning lighting ratios, you can control this contrast. For instance, a 1:2 ratio offers subtle shadows, suitable for a natural look, while a 1:4 ratio creates more dramatic, moodier images. Experiment with different ratios to discover the dynamic range that best suits your subject and style.
Achieving consistency across various shoots
Consistency in lighting is crucial, especially when shooting a series or for brand imagery. Consistent lighting ratios ensure that your photos have a uniform look and feel, regardless of the shooting day or conditions. This can be achieved by noting down the ratios and settings used in each shoot and replicating them as needed.
Balancing contrast for visual impact
Contrast is a powerful element in photography, capable of adding depth and dimension to images. Balancing contrast through lighting ratios can enhance the visual impact of your photos. A higher contrast ratio accentuates features and creates a sense of depth, while a lower contrast ratio results in softer, more evenly lit images.
The interplay of natural light in photography
In photography, ambient light — the light that naturally exists in a scene — plays a crucial role. This chapter delves into how ambient light can be blended with artificial light sources for a harmonious effect, and how to make the most of natural light in photography.
Natural or artificial light for portrait photography
Balancing ambient light with studio lights is a skill that can significantly enhance the quality of your photos. The key is to harmonize the color temperature and intensity of both light sources. By adjusting the settings of your studio lights to complement the ambient light, you can achieve a more natural-looking result. This technique is especially useful in portrait photography, where the interplay of natural and artificial light can add depth and realism to the images.
Maximizing natural light in your shots
Natural light, with its ever-changing qualities, offers numerous opportunities for photographers. To maximize its potential, understanding the golden hour — the time just after sunrise or before sunset — is essential. During this period, the light is softer and warmer, ideal for creating images with a magical, ethereal quality.
Utilizing reflectors to bounce natural light or diffusers to soften harsh midday sun can also help in achieving the desired lighting effect in your photographs.
Spotlight on product photography: effective lighting techniques
Product photography is an art that requires full attention to lighting. This chapter focuses on techniques that enhance product images, from broad lighting to creating dimension and highlighting textures to overcoming common lighting challenges and employing innovative methods for e-commerce imagery.
Creating dimension in product photography
Dimension in product photography is key to making items pop off the screen. The right lighting setup can add depth and volume, making products look more appealing and realistic. Techniques like side lighting or using a combination of soft and hard light can accentuate the shape and contours of products, giving them a three-dimensional feel.
Highlighting textures and details in products
Capturing the texture and intricate details of products is essential in showcasing their quality. Close-up shots with controlled lighting can bring out material textures, patterns, and fine details. Using a combination of directional and diffused light helps in highlighting these features without casting unwanted shadows.
See the difference between the rendered textures!
Overcoming challenges in product lighting
Product photography comes with its set of challenges, such as reflective surfaces or inconsistent colors. Overcoming these requires a mix of specific lighting setups and post-processing techniques. For reflective products, using polarizing filters and carefully positioned lights can reduce glare and reflections.
Innovative techniques for e-commerce imagery
In the fast-paced world of e-commerce, standing out with innovative imagery is crucial. Techniques like 360-degree product spins, dynamic lighting changes, or creating shadow effects can make online listings more engaging. Experimenting with different lighting styles and setups can lead to unique and compelling product imagery that captures the viewer's attention.
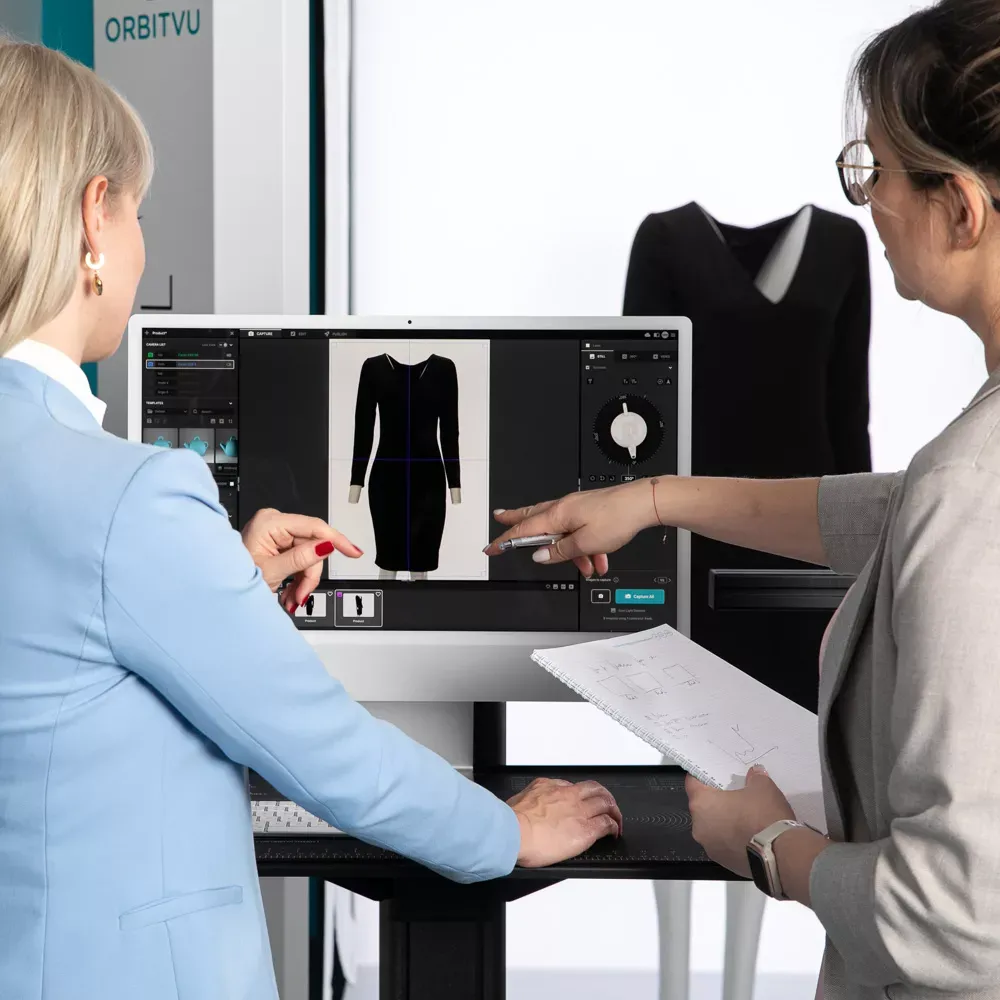
Orbitvu's edge in photography lighting
Orbitvu's commitment to revolutionizing product photography extends beyond just superior lighting. Our range of automated photography solutions, designed to serve various industries, showcases an innovative approach to capturing images. Each device is engineered to optimize the photography process, from simplifying setup and reducing shooting time to ensuring consistent, high-quality results through templates and automation. This dedication to innovation and quality offers photographers and businesses alike a powerful tool to elevate their visual content and streamline their photographic workflow.
Common lighting errors and how to avoid them
Lighting can be tricky, and even seasoned photographers can face common pitfalls. This chapter focuses on identifying these lighting errors and providing practical solutions to avoid them, ensuring your images always look their best.
Fixing overexposed and underexposed images
Overexposure washes out details, while underexposure hides them in shadows. To fix this, adjust your camera settings like ISO, aperture, and shutter speed. In a studio, modify the intensity of your lights. You can check your camera's histogram for a balanced exposure.
Avoiding unwanted shadows and glare
Unwanted shadows and glare can ruin an otherwise perfect shot. Position your lights strategically to soften shadows. Use diffusers to tame harsh lights and avoid direct lighting on shiny surfaces to reduce glare.
Troubleshooting color balance issues
Color balance issues can make your photos look unrealistic. To correct this, adjust the white balance settings on your camera to match the lighting conditions.
Managing harsh highlights and dark shadows
Harsh highlights and deep shadows can create an unwanted contrast with short lighting. To manage this, use fill lights to soften shadows and reflectors to tone down highlights. This ensures a more even lighting distribution across the subject.
Preventing flat lighting
Flat lighting lacks depth and can make your images appear lifeless. To prevent this, use directional lighting to create depth and texture. Experiment with different angles and intensities to add dynamism to your shots.
Correcting mismatched lighting temperatures
Mismatched lighting temperatures can lead to inconsistent color tones. Use color-correcting gels to match the temperatures of different light sources. Consistent lighting temperatures maintain the color integrity of your images.
Dealing with reflections on reflective surfaces
Reflections on reflective surfaces like glass or metal can be distracting. Use polarizing filters to reduce unwanted reflections. Positioning your lights at different angles can also help minimize reflections and enhance the texture of reflective subjects.
Conclusion
In conclusion, mastering the art of photography lighting is a journey filled with exploration and creativity. The techniques and principles outlined in this article, ranging from understanding light characteristics to sidestepping common lighting errors, provide a solid foundation for photography lighting techniques for both novice and seasoned photographers.
In photography lighting, the latest advancements in LED lighting systems are noteworthy for their exceptional quality. These systems are designed to provide balanced and precise illumination, ensuring ideal outcomes in every capture. The synergy of superior lighting with cutting-edge control technology enables photographers to remotely adjust settings via user-friendly software. This fusion of modern photography lighting equipment and innovative technology empowers users to effortlessly produce professional-grade photographs, accommodating photographers of all skill levels.
Talk to Orbitvu about your workflow
Use the form to tell us what you are planning and what kind of product content workflow you need.