The role of photography in e-commerce is to
showcase and sell the product.
You only have one chance to make a good first impression and ignite the potential buyer’s interest. Think of an e-commerce landing page as a
front store of a traditional retail store
. It should look professional, convey the brand’s identity, and inspire trust. Featured images must grasp attention and encourage the customer to click through to the product page where more information is provided. Using captivating,
mesmerizing visuals on the front of your e-commerce is crucial to creating the desire
that could later motivate the purchase.
Before you start
On the other hand, it is important to note that additional images showing various angles, zoomable detail photos, and 360 spin shots must convey all the product particulars to compensate for the lack of real-life sensory experience and answer all the potential questions that might arise. Those images play a crucial role in the conversion process as the buyer bases their decision on the data deducted from the product page. Therefore product photos should beinformative and eye-catching while showing the product in a flattering yet realistic way.
Product photography does not only influence your conversion rates but also the customer’s satisfaction.Unrealistic images increase the number of returns and complaints.Furthermore, clear, detailed, professional photos help build customer trust. Image quality, context shots, and the style of visual communication convey the brand’s core values and contribute to its visual identity.
Brand owners often tend to prioritize organizing a professional photo shoot, hiring a commercial photographer, or renting top-notch photographic gear to create their product photos. Yet, post-processing should not be overlooked.Product photography post-production is crucial for ensuring high-quality images. Color distortion, overpowering shadows, poor white balance - all these factors translate onto customers’ perception of the product and can impair their judgment!
You don’t know where to begin your adventure with post-production to create high-quality photos? This guide is for you!
What is post-production?
The production process starts when the picture is taken and ends when the final file is exported and ready for publication. Post-processing aims to correct certain camera settings, such as exposure orwhite balance, to represent the product as realistically as possible. But also unifying the background, removing the ghost mannequin or retouching imperfections, and preparing the file for export.
Communication and Strategy
What is the key to successful post-production? The plan! First, planning and preparing the shot properly can help you avoid much work in photo editing. It is much quicker to remove an object overcrowding the background, polish a reflective surface, or adjust lighting while shooting than to correct it afterward! Second of all, it is only possible to achieve great results by knowing the goal. What is the purpose of the photoshoot? Where will the photos be published? Do you only plan to use the images in the digital version, or are you planning on prints, too? All of the above factors will determine the size and ratio of your image, the file type, and the resolution. If you plan social media content, consider different ratios imposed by various social media platforms. What about e-commerce platforms such as Shopify, Amazon or Etsy? Double-check their requirements before shooting to save yourself the hustle and get the most out of your content.
Also, planning your content is crucial for consistent visual communication. Why is it so important? Well, chaotic and disorganized images do not look professional and can significantly lower the credibility of your e-commerce. Furthermore, it is only possible to establish a strong visual brand identity through consistent product photos. Write a short list of repeatable takes showing the product from multiple angles. Remember that images' lighting, style, and tone should be common for all images.It is easier to ensure photo repeatability by setting aside a space dedicated to product photography and creating your photo studio.
Are you only shooting pack shots? Flatlays? A lookbook? Consider complementing your simple product-only photos with lifestyle shots. While shopping online, customers can not try on the item, so it is always a good idea to add more pictures to help them visualize the product in their daily lives.
Use your shot list to create a storyboard. It will help you better visualize the photoshoot’s outcome and ensure no shot is missing; different angles are shown or need adjustment. Also, describing your project precisely with words might be challenging. Visual tools are great for communicating with your in-house team or the external commercial photographer hired.Make sure everyone knows exactly the purpose of their work and what effect they should strive to achieve.
An example of a product storyboard
Post-production process step-by-step.
As you can see, post-processing plays a crucial role in transforming raw footage into captivating product content. Let us walk you through this process's key stages and techniques.
File organization
Begin by downloading, organizing, and renaming all the images.
Culling images
Culling means the selection stage. Go through all your images to see which are suitable for further photo editions or retouching. In the editing process, similar images can also be composited into one.
Processing RAW Files
RAW files contain uncompressed and unprocessed image data from the digital camera image sensor. They are basically digital equivalents of negatives and need processing before you can start editing. At this stage, lens correction, exposure, contrast, sharpening, and color correction occur in Adobe Photoshop.
Pathing, Masking, and Selections
This stage can be compared to scrapbooking.It is often called „knockouts” or „clipping paths”. Here, you will change the background if needed or maybe cut out and prep some elements for further editing or compositing.
Compositing images
Here, multiple images shall become one. Yet, it is a little bit more complicated than that. At this stage,images are creatively pathed out or masked into one image.
Retouching images
Retouching is often associated with removing blemishes, wrinkles, fine lines, and airbrushed models on magazine covers.Yet, it also concerns removing distracting elements, such as electric cords, dust, or smears. How much is too much? It is difficult to draw the line. The right amount of retouching will depend on the type of content.Keep in mind that overly retouched photos can mislead the customer and generate a higher number of returns.
See the difference in photos after the retouching process
File Delivery
Export the image in the right size and format.Which one to choose? Follow the guidelines of social media and e-commerce platforms where the image will be published. Remember that your file's type and size will impact SEO results. Aim for the smallest size necessary to preserve the image quality.
What should be edited?
Essential parameters in product photography
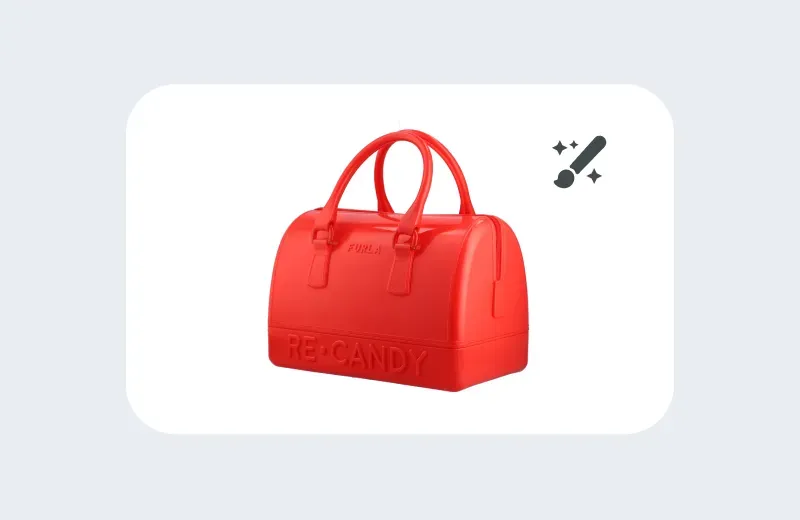
Removing background in product photos
A white background will always remain your safest option. If you choose a bold, solid color, ensure it goes along with other images from your Instagram grid or website’s layout.
If the damage is already done, do not panic! Thebackground (and the unwanted objects) can be removed and replaced automatically, thanks to photo editing apps or software.
Color correction
No matter how expensive your photo gear is,there will always be a distortion between the image perceived by the human eye and the lens, especially regarding colors. The customer needs to know the exact color of the product to make an informed purchase!
See the difference in photos after the color correction process
Lens corrections
Lens corrections is a tool in Adobe Lightroom that fixes lens distortions, chromatic aberrations, and vignetting. Its main advantage is that it can be copied between the images and applied to hundreds of pictures simultaneously, significantly optimizing the post-production process!
See the difference in photos
Adjusting exposure in post-production
White balance
All photographers know that whiteness is a subjective matter. Proper white balance ensures accurate colors, boosting the photo’s informativeness. Correcting white balance in post-production is a crucial step in enhancing the overall quality of an image. This process comes down to adjusting the color temperature and tint of the photo to ensure the whites are neutral.White balance correction allows photographers and editors to restore the scene’s authentic color temperature and ensure color accuracy.
Correcting the white balance in photos is crucial. See the difference yourself.
Contrast in product photography
Correcting contrast in post-production is another step essential to enhancing the visual impact of your product images. Adjust the range of shades between the deepest shadows and the brightest highlights to achieve the desired level of drama and clarity. An image lacking contrast appears flat. On the other hand, excessive contrast results in loss of detail. Hence, the importance of finding the sweet spot during the post-processing. By carefully enhancing contrast, you can bring out intricate details, create a more compelling composition, and emphasize the subject. This adjustment improves the overall quality of the image and plays a pivotal role in conveying the intended mood through a captivating visual narrative.
Setting the right contrast in photos in post-production boosts image attractiveness.
Brightness
If your image requires refining the exposure and luminance, brightness is the parameter you should consider while editing. The overall lightness or darkness of a photograph translates into its visual appeal. An underexposed image lacks detail in shadowy areas, while an overexposed one in highlights. Brightness adjustments can rectify these issues.
erexposed photos seem too unnatural and lack important details.
Sharpness Correction and Noise Reduction
Low-light conditions or high ISO settings can cause unwanted grainy or speckled artifacts to appear in your images. Reducing noise will help you achieve a smoother look with cleaner backgrounds and finer details.
Sharpness correction, on the other hand, involvesenhancing the clarity and crispness of details within a photograph.Through this adjustment, professional photographers and editors can bring out intricate details of different textures, improve overall focus, and create a visually striking result.
Remember that an overly aggressive sharpening or noise reduction can lead to unnatural results. Balancing both is a delicate art. Yet, a skillful application ensures that the final image is sharp, clear, and free from distracting visual disturbances, resulting in a more professional and visually appealing outcome.
Adding gradients and shadows in post-production
Consider incorporating gradients and shadows to enhance your image's depth, dimension, and visual appeal. Gradients blend colors and tones across specific photograph areas, creating smooth transitions and subtle variations. This technique often improves the sky’s appearance, adds drama to sunsets, or polishes the backgrounds.
On the other hand, shadows help impart asense of realism and depth to your product photos. They can make your products appear three-dimensional and integrated into the scene. A skillful application of both techniques can transform flat and uninspiring visuals into captivating, immersive compositions.
Adding reflections
Reflections can trulybreathe life into your product photography.Adding water reflections or play of light on glass surfaces enhances the depth and realism of your images. Reflections should complement the original composition without overpowering it.
Product photography retouching
How much photo editing is enough? How much is too much? It’s a fine balance. The product should be shown in a flattering yet realistic way. Remember that the amount of retouching should be coherent with your brand’s identity. For example, if your brand adheres to the body-positivity movement, you should use normal retouching, such as color and lens correction. For a luxury brand, you might consider going for more polished visuals.
Think smart! Save time and reduce costs
Prepare for the photoshoot
The better you prepare for the photo shoot, the less time and money it will cost you in the post-production.First of all, prepare the product. Iron the material, pay extra attention to dust, and polish reflective surfaces. Double-check for loose threads, stains, or labels. Make sure the product is assembled correctly. Then, get your photo studio ready! If possible, try usingnatural light. If you choose artificial light, remember to light the background and install several light sources! If you shoot in a traditional studio, set the RGB to 255-255-255.
Learn more about camera settings suitable for product photos. If you lack experience in this matter, hiring a professional photographer to shoot products might be a good idea.
Ghost mannequins for product photography
How do you get three-dimensional product photos on a budget? Use ghost mannequins! This technique is much cheaper than hiring life models and simplifies batch shooting repeatable shots of the whole product range. You can remove the dummy in Adobe Lightroom or using an automated app. Then, de-wrinkle the clothing and make sure it lies flawlessly. Although it takes an extra step in post-production, the ghost mannequin technique is great for product-focused 3D images for your online store.
One product, various colors
Changing the color in post-production can be a great solution for merchants sellingthe same product in various colors.Lengthy photo session requires an investment of extra time and money. Just multiply an already edited picture and change the product color as desired!
What photo editing software should you choose?
Choosing the right tools for post-production is a critical decision in the product photography creative process. What factors should be taken into consideration when selecting software?Define your specific needs, skill level, and budget.High-end industry standard software like Adobe Photoshop offers a wide range of features and flexibility but can be quite pricey and has a steep learning curve. Do not get discouraged! There are millions of free tutorials available to get started!
On the other hand, free or low-budget apps such as Canva or Snapseed might be sufficient for editing images on your photo before posting them on social media. Ultimately, the ideal software should align with your artistic vision and workflow, ensuring that your post-processing enhances and elevates your creative work while remaining accessible and manageable for your skill level.
Photo editing in-house or hiring a post-production specialist?
For a beginner, navigating professional software can seem daunting and require investing time and work before seeing the first results. Furthermore, it takes experience and practice to perfectly balance all the parameters without distorting the product’s representation.Hiring a commercial photographer and investing in professional post-production services might be a better idea. Also, remember that in-house post-production takes an initial investment in software licenses.
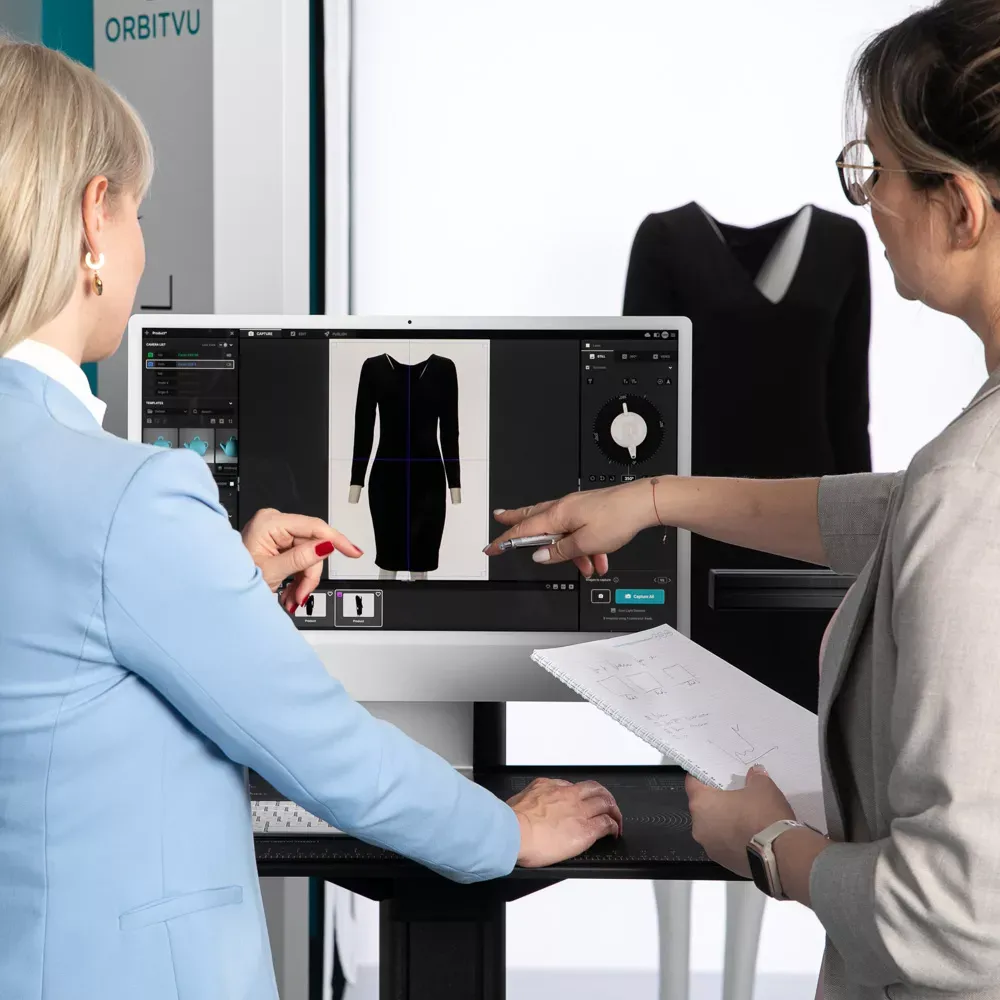
Automated solutions for product photography
Automation offers great solutions for keeping your post-production in-house, even without experience! With Orbitvu products,it only takes one person to create outstanding product photography from A to Z.It is a perfect solution for e-commerce planning recurring product photo shoots!
Automation simplifies andoptimizes the workflow, from the moment the photo is first taken through post-production to publication on the desired platform. Thanks to automation, non-professionals with minimal training can smoothly operate Orbitvu products, keeping the content production 100% in-house and considerably limiting extra expenses and hustle. Improved time-to-market, increased savings at scale, and stunning professional quality shots, what more is there to ask for?
Orbitvu offers solutions adapted for all types of product photography catering to your needs. Take photos on dedicated flat-lay devices with an integrated lighting setup and a mount to fix your camera. Shot your products from different angles and create 360-degree spin photos. Opt for our automated photo studio for shooting live models or bigger objects.
Thanks to Orbitvu software, batch processing is easy and quick. Remove the background, manage and distribute your content, and upload all your images directly to the e-commerce website of your choice!
Final Thoughts on Post production for Product Photography
There is no doubt that post-processing hugely contributes to successful product photography.Balancing between enhancing the product's appearance and keeping the representation realistic is a fine art that requires skill and experience. Hiring a professional photographer or photo editor for post-production services can be worth the splurge.
However, automated solutions might better fit repetitive and frequent photo shoots. Despite the initial investment, automated photo studios and software are a great way to save money and time while showcasing your products at their best. If you want to learn more about Orbitvu’s automated solutions, do not hesitate to contact our team!
Talk to Orbitvu about your workflow
Use the form to tell us what you are planning and what kind of product content workflow you need.