July 23, 2026
What is Orbitvu's AI OCR, and how does it work?
Meet Orbitvu's AI OCR: extract labels, part numbers, and product data straight from your images and turn it into structured metadata inside Orbitvu Station.
Elevate your furniture photography with our 25 expert tips. Capture exceptional images, attract more customers, and boost online sales. Read It Now!

Table of contents
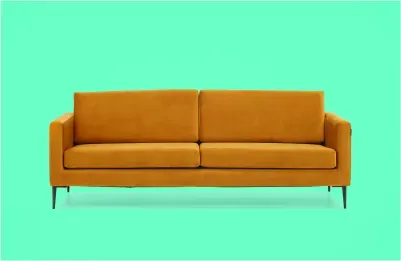
Product visualization is vital in almost every business, especially e-commerce, where 93% of consumers consider visual appearance to be the key factor in a purchasing decision. For a furniture company, it's all the same. It's how you build recognition in the market, attract potential customers, and get them to buy. Not to mention that nowadays, customers are more demanding than ever before. They want high-quality interactive content that will be as close to reality as possible.
So how to approach furniture photography? What are some tricks that every photography expert should know? Get to know 25 tips from our product photography experts divided into 3 stages: preparation, photoshoot & post-production. Learn how to photograph furniture like a pro!
Here, I'm talking about these furniture pieces that come with assembly instructions, like in the case of IKEA. So double-check if the furniture is correctly assembled before you start shooting.
But if you have a furniture piece that's vintage or comes as a whole already, then you're good to go.
The center of your photography should be the productyou capture. So remove all the unnecessary packaging and labels that get into the shot and focus on taking furniture images.
Simple chore, and yet, it makes all the difference. Use material-specific detergents to polish the surface of furniture pieces. It will make furniture look good under the bright furniture photography studio light.
As I said before, the focus is on your furniture - everything around it should only amplify that, including the background. The best one here is color-neutral, which will bring out the quality of furniture pieces even more and ensure no unwanted reflections, easy post-production, and no color shifts of photographed products.
Want to learn more about product photography? Check out our product photography guide!
The top light usually works great as a key light for furniture photos. When light is directed from above, it creates highlights and shadows that emphasize the texture and shape of the furniture. This can make the piece look more three-dimensional and help it stand out in the photograph.
Also, top light can help to reduce glare and reflections on shiny surfaces, which is often a challenge in product images. By positioning the light source above the furniture, you can avoid having it reflect directly back into the camera lens and create unwanted glare.
But it all depends on the specific piece of furniture and the desired look and feel of the photograph.
A photo without a large light source
A photo with a large light source
Good lighting is everything when it comes to product images. Thanks to large light sources, you get to create soft, even lighting that can help to eliminate harsh shadows and highlights on the furniture. This can result in a more natural and appealing look to the photograph as if you photographed in a bright room with large windows.
Additionally, large light sources can help to reduce the contrast in the photograph, making it easier to capture detail in both the shadows and the highlights.
With a tripod, you stabilize the camera and keep it fixed during the shoot. This can eliminate the risk of camera shake or movement, resulting in blurry or distorted images.
A tripod provides a stable base for the camera and allows for precise adjustments to be made to the camera's height, angle, and orientation.This can be especially important when photographing furniture, as capturing the piece from different angles and perspectives is often necessary to showcase its features and design.
Using a tripod can also help toensure consistencyin the photographs, as the camera's position and alignment will remain the same for each shot (this can be done if you have a tripod where you can read its setting/position from a scale). It’s especially helpful when photographing multiple pieces of furniture or when shooting a series of images for a catalog or website. Here consistency is important, as it looks more professional and can increase customer trust.
It can help to capture the entire piece of furniture in the frame and providea better sense of scale and a correct perspective and shape. When the camera is too close to the furniture, it can distort the image, making it look larger or smaller than it actually is. This is one of the major mistakes in product photography.
Learn about 9 mistakes in product photography and how to avoid them.
The entire piece can be captured in the frame without distortion by backing up the camera and using a standard to tele lens. This is especially important for larger pieces of furniture.
PROTIP:We suggest using 70-200 mm focal length for best results. Ideally, the same distance/focal length for given category/product sizes.
A bad example of perspective in furniture photography
A good example of perspective in furniture photography
Using sufficient camera distance can also provide context for the piece of furniture. For example, if the photograph is intended to showcase a particular room or space, capturing the furniture in the context of the room can help to give viewers a better sense of how it will look in their own space.
But this is rather the case for the wide lens. Here, we would recommend using a 24mm or 35mm prime lens, which offers less distortion than zoom lenses. For the best results, you should use tilt/shift lens.
Shooting from different angles is vital in furniture photography because it allows for a more comprehensive view of the piece, highlighting its features, design, and details. It can also provide great material for interactive 360° spins, which can boost the user experience on your product page and increase the conversion rate by up to 250%.
Additionally, shooting from multiple angles can help to showcase different aspects of the furniture that may not be visible from a single shot. This can be especially important for pieces with intricate designs, unique features, or particular details that need to be highlighted to potential buyers or customers.
PROTIP 1: Use the same angles for all products of the same category to create consistency.
PROTIP 2:Don't forget top shots.
It's again all about the details that make the furniture piece stand out. Those are characteristics like materials, textures, connectors, or handles. Thanks to close-ups, you get to highlight these unique features even more. Not to mention customers prefer to see the features visually rather than read about them in a textual description.
Without a high-resolution camera
With a high-resolution camera
A high-resolution camera lets you crop out details from a photo of the entire product. As a result, you can capture the piece with greater detail and clarity, showcasing its quality and craftsmanship.
Also, high-resolution cameras have more pixels, allowing them to capture finer details. This is crucial in furniture photography, where it's necessary to capture the piece's texture, grain, and details.
Using a turntable when shooting furniture can help to showcase the piece from multiple angles, providing a more comprehensive view of the piece and highlighting its features and details. A turntable allows the piece to be rotated smoothly, providing the opportunity to capture the furniture from different angles without the need to move it physically. This can be especially beneficial when photographing large or heavy pieces of furniture.
Moreover, using a turntable can help tocreate consistency in the images. By rotating the piece in a controlled manner, the resulting photographs will have a consistent look and feel, making it easier to present the piece in a coherent and appealing way.
Using a grey card when shooting in RAW provides a reference point for the camera to accurately render the colors in the scene. The white balance can be later adjusted to achieve accurate color reproduction.
Moreover, using a grey card can save time and effort in post-production by providing a consistent reference point for all images captured in the same lighting conditions. This can reduce the need to adjust the white balance manually for each image, making the post-production workflow more efficient and consistent.
Manually calibrating the white balance for a given light is important when shooting in JPEG because it allows for more accurate color reproduction in the final image. JPEG files are compressed and processed in-camera, meaning that the white balance setting applied during capture is baked into the image and cannot be adjusted as extensively as with RAW files.
If you photograph a new item that was accidentally damaged, for example, scratched - you should retouch it to give the furniture a more polished look. But don't exaggerate. The last thing you want is for them to see the color in a photo and have it look completely different in real life.
Furniture Photo Editing Tip: Don't retouch imperfections if you photograph a piece of second-hand furniture - you can even highlight them with some graphics (e.g., arrow or circle) and text.
By setting the correct white balance using a grey card image, you can ensure that the colors in the final image are accurate and natural-looking. This can help to showcase the furniture's quality and craftsmanship and ensure that it is presented in the best possible way.
This one may seem obvious, but on the other hand, it may be tempting to change the edit settings with every photo. However, you should bare in mind that this consistency of edit settings will translate to the consistency of your content.
PROTIP: Use batch processing; it works for either JPEG or RAW formats.
The same goes for the aspect ratio as well as the amount of space around the object, so ensure it's the same size on all images. Here, it's also a matter of consistency. When all photos are square, 3:2, or 3:4, and there’s this needed space around the item, it all ensures a much more pleasant viewer experience. The only exceptions in the space context would be the shot of details.
In other words, retouch folds on the paper backdrop, stains on the floor, cables, etc. Or clip the product out of the original photo and replace the background with white or any other neutral solid color, or use a virtual background. This, again, ensures a sense of common ground for all your content.
PROTIP: When using a pure white background, adding a shadow under the product makes it look more natural - the product doesn't float in an empty space. Just like in the example below - the right picture looks much better, right? That’s the shadow work.
Furniture without added shadow
Furniture with added shadow
Use the shadow and highlight adjustment sliders to bring out the details in the darker and lighter areas of the image. This will make the photos much more interesting. Plus, you can turn the focus on various angles and details.
Make sure that your image is not too bright or too dark. You can adjust the exposure using tools like the exposure slider or the curve adjustment. And remember - too much post-production is never a good idea.
Use the sharpening tool to enhance the details in the image. It'll give it a more polished and professional look.
Make sure the lines in the image are straight using the straighten tool. When photographing products, it can be difficult to get the angle and alignment just right in the camera. However, with the straightening tool in post-processing, you can easily adjust the image to correct any tilt or distortion that may have occurred during the shoot.
This can help ensure that the product looks straight, level, and balanced, enhancing its perceived quality and appeal to potential customers.
Converting colors to sRGB in furniture photography can help to ensure that the images are displayed accurately on a wide range of devices. sRGB is the standard color space used by most displays, and converting to sRGB can prevent colors from appearing washed out or oversaturated on some screens. By using sRGB, you can create a more consistent viewing experience for your audience, which can enhance the perceived quality of your images.
By resizing the images to an appropriate size and compressing them to a smaller file size,
you can reduce the amount of data that needs to be loaded when the page is accessed, resulting in faster loading times. This can help toimprove user engagement, reduce bounce rates, and increase overall site performance.
Product photography gives you an opportunity to show your products as accurately and yet, as expediently as possible. The combination of consistent visual content and a detailed copy is a winning strategy to drive conversion rates in no time.
By following our expert tips, you can easily create stunning images of furniture that showcase its beauty and functionality. This can lead to increased efficiency and consistency in image quality.
And if you’re looking for a way to make furniture photography even more efficient, check out our Furniture Studio,a variation of E-COMM STUDIO+, designed specifically for capturing all kinds of furniture, from a single armchair to entire sets.
With templated lighting and user-friendly control software, you can take & publish high-quality photos, interactive 360° views, and videos in a single workflow. Additionally, all the items can be shot effortlessly, from all angles, including top shots, while the remotely-controlled lights help to bring out the product all the details and unique features.
Check out F urniture Studio page to learn more about this custom solution for large-sized products.
Use the form to tell us what you are planning and what kind of product content workflow you need.
July 23, 2026
Meet Orbitvu's AI OCR: extract labels, part numbers, and product data straight from your images and turn it into structured metadata inside Orbitvu Station.
July 15, 2026
Meet Orbitvu's AI Masking: automatically remove the background from product photos in high resolution, right inside your Orbitvu Station workflow - no design skills needed.
July 14, 2026
Meet Orbitvu's AI Retoucher: automatically remove reflections, correct colors, and clean up imperfections right inside your Orbitvu Station workflow.